Start by locating your local frost date through the USDA Plant Hardiness Zone map, which tells you when freezing temperatures typically stop in spring. Most gardeners sow poppies four to six weeks before that last frost arrives, waiting until soil reaches 50–60°F. If you live somewhere mild, autumn sowing works just as well and sometimes even better.
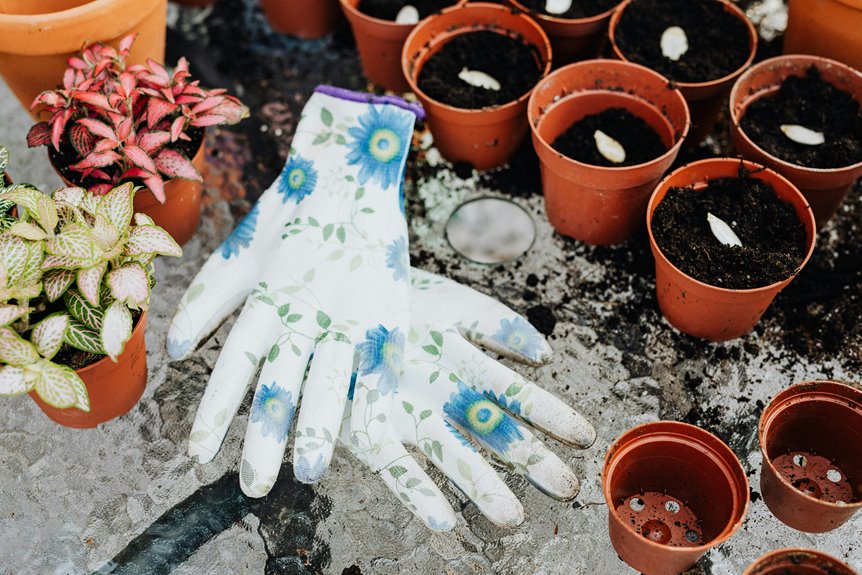
When you’re ready to plant, direct sow seeds straight onto fine soil mixed with sand—poppies really dislike being moved after they sprout. Once seedlings reach 12–15 centimeters tall and develop their true leaves, thin them out to 15–20 centimeters apart so they have room to grow without crowding. The exact timing depends on your region and which poppy variety you’ve chosen, so there’s a perfect window waiting for you once you know your local conditions.
Choose Poppy Varieties That Grow in Your Climate

How do you pick the right poppy when so many options exist? Your climate is genuinely your starting point, and it matters more than you’d think.
If you want cut flowers that last two weeks or longer in a vase, Icelandic poppies are your best bet—they’ll outperform other varieties by several days. Shirley and Breadseed poppies are easier to grow but typically fade within 5-7 days indoors. For cool climate zones, both Icelandic and California poppies do well, and California poppies often reseed themselves, meaning you get free flowers the following year depending on where you live.
Here’s what makes poppies genuinely low-maintenance: you’ll direct sow most varieties straight into soil rather than starting them indoors because their delicate roots hate being transplanted. This actually means less work for you and better success rates. Match your variety to your region’s temperature patterns—whether that’s cool summers or hot, dry ones—and you’re already halfway there without any fussing or complicated steps.
Find Your Frost Date and Soil Temperature

You’ll want to track down your local frost dates—those specific dates when your area typically gets its last spring frost—because they shape your entire poppy planting schedule. Grab a soil thermometer and check your garden’s temperature regularly throughout the season. Most poppies germinate best when soil reaches 50–60°F, though they handle temperature swings pretty well once they’ve sprouted.
Knowing both your frost date and soil temperature lets you pick the right sowing time. If you’re planting in fall for spring blooms, you’ll work backward from your spring frost date. Planning a spring planting for summer flowers means waiting until soil warms up enough to trigger germination, which usually happens a few weeks after your last frost.
Locating Your Frost Date
Before you scatter a single poppy seed, you’ll want to nail down your region’s frost dates—those average spring and fall dates when frost stops and starts. Think of these dates as your planting guardrails.
You have several solid resources available right now. The USDA Plant Hardiness Zone map lets you search by zip code online and gives you a starting point for your area. Local cooperative extension services dig deeper because they understand the specific microclimates in your region—those tricky spots where cold air pools or warmth lingers. Native plant societies and local gardening groups offer real-world knowledge. And longtime gardeners in your neighborhood have literally tested the timing through their own successes and failures.
Here’s why this matters: Your spring frost date tells you when it’s actually safe to direct-sow poppy seeds outdoors without exposing seedlings to a killing frost. Your fall frost date determines whether you can sow seeds in autumn for overwintering or if you need to wait until spring instead. Getting this timing right prevents watching your seedlings blacken overnight and means your poppies will emerge with strong root systems ready to flower.
Measuring Soil Temperature
Knowing your frost date gets you in the ballpark, but soil temperature is what actually determines if your poppy seeds will germinate. Grab a soil thermometer and measure at a 2–4 inch depth, where seeds make contact with moisture and nutrients. Poppies germinate best when soil temperature sits between 55°F and 65°F (13°C to 18°C)—that’s your target range for sowing.
If you garden in a cooler climate, lay down black plastic over your bed a few weeks before planting. The plastic absorbs sunlight and conducts heat downward, warming the soil naturally without any extra effort on your part. This head start can mean the difference between seeds sprouting on schedule and seeds sitting dormant in cold ground. Check your soil temperature with an actual thermometer rather than guessing based on air temperature alone, since soil warms and cools on its own timeline.
Plan Your Regional Planting Timeline

Look up your USDA hardiness zone to nail down your local frost dates—this is genuinely where everything starts because your region’s weather patterns dictate your whole planting schedule. Most gardeners aim to sow poppies about 4–6 weeks before that average last frost date hits. But here’s the thing: if you live somewhere milder, fall sowing can work wonderfully for spring blooms instead.
Your local extension service is worth its weight in gold here. Call them up or check their website and they’ll give you the exact planting windows that match your specific neighborhood’s conditions. They know the quirks of your local climate in ways general guidelines simply can’t capture.
Regional Frost Date Mapping
When frost still threatens your garden in spring, those tender poppy seedlings won’t stand a chance. That’s why pinpointing your region’s frost dates matters so much—it’s the difference between planting at the right time and watching your seedlings blacken overnight.
Here’s the practical way to nail this down. Start by visiting your local extension service website and jotting down two specific dates: your last spring frost and your first fall frost. These dates represent the average day when frost danger passes in spring and returns in autumn. Next, cross-reference the USDA Plant Hardiness Zone map with your address to double-check what you’ve found. Write both dates somewhere you’ll actually look at them—a garden notebook works well, or set phone reminders for two weeks before each date so you have time to prepare.
With these benchmarks in hand, you can plan your sowing windows with real confidence. Spring planting usually happens in the weeks right after your last frost date, when soil temperatures sit around 50 to 60 degrees Fahrenheit. Fall planting works backward from your first frost date, giving you about 8 to 10 weeks before cold arrives. This regional approach prevents the expensive mistake of planting too early, watching seeds rot in cold soil, or planting too late and having seedlings get zapped by unexpected frost. You’re working with nature’s actual calendar instead of guessing what might happen.
Climate-Specific Planting Windows
Where exactly should your poppy seeds go in the ground? Your location determines everything. In California and Colorado, you’ve got flexibility with both fall and spring sowing windows. New York gardeners do best planting in spring, while Florida and Texas residents can work with either season.
The real strategy comes down to timing. Sow your seeds 4–6 weeks before your last frost date if you want flowers next spring, or plant in early fall if you live somewhere mild. Direct sowing beats transplanting because poppy roots really dislike being disturbed once they’re established.
Here’s where autumn planting gets interesting: the chilling period over winter actually helps seeds germinate better and reduces pest and disease problems naturally. You’ll end up with stronger plants come spring without extra effort.
Check your USDA Hardiness Zone and look up your local frost dates to pinpoint your sowing windows. This timing approach gives you healthier plants that’ll produce plenty of flowers when warm weather arrives.
Prepare Poor, Well-Drained Soil for Poppies

Most poppies aren’t fussy about soil quality—they’ll actually do better in poor to average conditions that would leave other plants struggling. What matters most is drainage, since poppies really dislike sitting in wet soil.
Here’s what you need to do:
- Loosen the soil 6–8 inches deep to improve water movement through the bed
- Remove all weeds that’ll compete for available nutrients
- Skip heavy amendments unless you’re planting Oriental poppies, which can handle richer soil
- Test your drainage by watering the area; water should soak in and drain within a few hours
Before you sow seeds, make sure your bed slopes slightly so water runs off rather than pooling. When you’re ready to plant, mix fine breadseed with sand for even spacing across the surface. This approach prevents root rot and keeps your plants healthy by mimicking the dry conditions poppies naturally prefer in their native habitats.
Direct Sow Seeds in Fall or Early Spring

Ready to get your poppies started? Direct sow your seeds in fall or early spring when conditions naturally favor germination. Autumn through mid-winter sowing takes advantage of cold dormancy, which dramatically boosts germination rates across most varieties. California poppies do best when you sow them 4–6 weeks before your average last frost date, while Icelandic poppies need cooler temperatures and a bit more time to establish themselves.
The real advantage of direct sowing is how straightforward it is. You’re working alongside poppies’ natural rhythms, letting seasonal temperature shifts trigger germination without needing indoor trays or grow lights. No heat mats, no humidity domes, no daily fussing—just seeds meeting the right conditions at the right time. This approach means you’ll get results the same way gardeners have for generations: by letting the seasons do what they’re designed to do.
Thin Seedlings to Proper Spacing

Once your seeds have sprouted and started growing, you’ll notice they’re packed in pretty tight. That’s where seed thinning comes in—it helps each poppy get the space it needs to develop properly.
Wait until seedlings reach 12–15 cm tall with 2 true leaves before you start thinning. At that point, they’re sturdy enough to handle the process without falling apart. Shirley and Breadseed varieties need one plant per 15–20 cm of space. If you’re transplanting Icelandic poppies instead of direct thinning, space them 15–20 cm apart in their new spots. California varieties want a bit more room, so give them 30 cm between rows.
Wait until seedlings reach 12–15 cm tall with 2 true leaves before thinning to avoid damaging delicate plants.
Poppies really dislike having their roots disturbed, so handle transplanting with a gentle touch. If you’re moving seedlings, soil blocks work well since they minimize root damage compared to traditional pots. You can also thin seedlings directly in the soil where they’re growing, which avoids any transplanting stress altogether.
Proper spacing does several practical things for your plants. Better air circulation between seedlings reduces the moisture buildup that leads to fungal problems. Each plant gets better access to nutrients in the soil without competing with crowded neighbors. More light reaches lower leaves, which helps the whole plant grow more evenly. Those skinny seedlings will develop into strong plants with plenty of energy for blooming.
Deadhead Blooms to Extend Your Flowering Season

See those drooping petals falling to the ground? That’s your plant’s way of saying it’s ready to make seeds and call it quits for the season. Here’s where deadheading comes in—simply pinch or snip off faded flowers before seed pods develop, and you’ll convince your poppies to keep producing blooms well into the cooler months. The plant thinks it still hasn’t accomplished its reproductive goal, so it stays in flower-making mode longer.
After you remove the spent blooms, pinch back the stem tips to trigger side branches. This creates bushier plants with more flowers overall. The extra stems mean more spots for new buds to develop, giving you fuller displays that last longer.
Once you’ve deadheaded, water your plants on a regular schedule—about 1 to 1.5 inches per week depending on rainfall and heat. A light feeding with a balanced fertilizer (something like a 10-10-10 blend) every three weeks will give your plants the nutrients they need to fuel those next flower cycles. The combination of consistent moisture and gentle nutrition keeps the bloom engine running smoothly through the season.
Harvest at the Cracked Bud Stage
Catching poppies at the cracked bud stage gives you the best window for cut flowers—look for that papery outer layer to split and show color underneath. This tells you they’re ready to cut.
Timing really does matter with poppies, so here’s the process: use sharp scissors to snip deeply into the base of the stem, cutting at least 2-3 inches from the bottom. Right after cutting, hold the stem end near a lighter or candle flame for about 2-3 seconds to sear it closed. That milky sap you’ll see seals up, and this step actually helps the flowers drink water better and last longer in your vase.
Once you’ve seared the stems, get them into cool water immediately. The cooler temperature slows down the flower’s metabolism, which keeps them fresher. Find a dark, chilly spot—a basement corner or cool closet works well—and let them sit there for a few hours before you arrange them. Keeping them away from light and warmth during this resting period helps them recover from the stress of cutting and absorb plenty of water before they open fully.
Identifying The Cracked Stage
To get the longest vase life from your poppies, you’ll want to harvest them at what’s called the cracked bud stage—that sweet spot right before they fully open.
Look for these four signs that your poppies are ready. The papery outer layer will show color breaking through, and you’ll spot a visible crack or split forming at the bud’s tip. The petals will start peeling away from the sepals, and when you gently squeeze the bud, it’ll feel slightly softer than a completely closed one but still hold its shape firmly. At this moment, your blooms haven’t spent their energy opening fully yet—the petals are just beginning to break free.
Harvest immediately when you spot these signs, then head straight to post-harvest searing of your stem ends. Using a lighter or match, carefully pass the freshly cut stems through the flame for about 2 to 3 seconds per stem. This technique seals the cuts and prevents sap loss, which means your stems will absorb water much more efficiently. You’ve caught them at their prime, and they’ll last roughly 10 to 14 days in a clean vase with fresh water changed every other day.
Timing Your Cut Correctly
Right before poppies fully open is when you want to cut them—florists call this the cracked bud stage. Look for those papery sepals starting to split and showing color underneath. That’s your window.
Cutting at this exact moment keeps them fresher in the vase. Fully opened flowers drop petals much faster than buds harvested at this stage. Once you spot that telltale cracking, use sharp shears to snip stems at a 45-degree angle.
Here’s where most people slip up: seal those stem ends immediately. Dip them in boiling water for about ten seconds, or briefly pass them through a flame. This stops the sap from leaking out and causing wilting. Follow up right away by putting stems into cool water.
Keep everything in a cool, dark spot before you arrange them. The combination of correct timing, proper cutting technique, and immediate sealing gives you stems that actually last.
Sealing Stems For Longevity
Once you’ve made that perfect 45-degree cut, move quickly—those stem ends need sealing right away. The exposed tissue will start losing moisture and taking in air, which shortens how long your poppies last in the vase.
You have two solid options for sealing. Dip the cut ends into boiling water for about 10 seconds, or hold the stem end briefly in a flame for the same amount of time. Either method works by cauterizing the tissue, which stops sap from leaking out and keeps that valuable moisture locked inside the stem.
You’ll notice the stem ends darken and the tissue hardens as this happens. Right after sealing, place the stems into cool water immediately—this stops any heat damage and lets them drink up water while they’re still open to absorbing it. The cooler temperature also slows down the natural decay process that happens after cutting.
Once sealed and cooled, store your stems in a cool, dark spot until you’re ready to arrange them. This extra step adds several days to your poppies’ vase life, which makes the few seconds of effort well worth it.
Sear Stem Ends Immediately After Cutting

Right after you cut those poppies, sear the stem ends immediately—before they touch cool water. This post-harvest step really does extend how long your flowers last in the vase.
Here’s what’s happening: poppy stems release a sticky sap that clogs the xylem, which are the tiny water-conducting tubes inside the stem. When those tubes get blocked, the flower can’t drink properly. Sealing the cut end stops that sap from doing its damage and opens those water channels back up.
You have two straightforward options. Dip each stem into boiling water for exactly 10 seconds, or quickly pass the cut end through a flame for the same duration. Either method works equally well—pick whichever feels easier for you. The key is doing this the moment you finish cutting, not five minutes later. That timing actually matters quite a bit because the sap starts flowing immediately.
This one simple step, done right when you cut, makes a real difference in how fresh your poppies look and last. The flowers reward your attention with noticeably longer vase life.
Let Some Flowers Self-Sow for Next Year

While you’re enjoying those beautiful blooms in your vase, you can also set yourself up for poppies year after year by letting some flowers do their thing in the garden.
Allow certain poppy flowers to mature naturally on the plant rather than cutting them all. The process is straightforward and works with how poppies naturally reproduce. Leave select flowers unharvested on the stem through summer, then wait until late summer when seed pods turn dry and papery—they’ll feel brittle and lightweight when they’re ready. Clip the dry pods and store them in a cool, dry location like a closet shelf or garage, away from humidity. Come fall, sow those seeds directly in your garden beds for reliable blooms the following spring.
This approach creates effortless bloom succession without replanting annually. Your poppies will handle their own seed sowing, returning faithfully each year. You’re working with nature’s rhythm rather than against it, which means less work overall and more flowers to enjoy season after season.


