You’ll want to move your marigold seedlings outdoors after the last frost date—that’s late April in southern Iowa, mid-May if you’re further north. But here’s where most people skip a step: harden them off first over 1–2 weeks by gradually exposing them to sun and wind. This prevents the shock of going from your indoor setup straight to outdoor conditions.
When you’re ready to plant, space them 8–12 inches apart in a spot that gets full sun with well-drained soil. Water thoroughly at planting time, then keep the soil consistently moist while the roots are establishing themselves in their new home. Add 2–3 inches of mulch around each plant—this does double duty by holding moisture in the soil and blocking weeds from moving in. The reasoning here is straightforward: moisture helps roots settle faster, and mulch means you’ll spend less time weeding and watering later on.
Getting the timing and spacing right sets up your marigolds to bloom reliably all summer long without constantly fussing over them.
When to Plant Marigold Seedlings: Temperature and Frost Dates
 1")
Since marigolds absolutely hate cold temperatures, you’ll want to wait until after your area’s last frost date to move those seedlings outside. In southern Iowa, that’s typically late April, while northern regions should aim for mid-May. Checking your local frost dates takes the guesswork out of transplanting and helps you avoid losing seedlings to a surprise freeze.
Marigolds won’t tolerate freezing temperatures, so timing really does matter here. Your USDA zone provides the framework for knowing when conditions will actually be safe for moving seedlings outdoors. Once you’ve identified your local frost dates, you can plan your transplanting window accordingly, giving seedlings enough time to establish their roots before the heat of summer arrives. Follow those guidelines, and you’ll set yourself up for a solid season of blooms that’ll last through fall.
Start Seeds 6–8 Weeks Before Last Frost
 2")
To get your marigolds ready for planting outside, start seeds indoors about 6–8 weeks before your area’s last frost date. This timing lets your seedlings develop strong roots and sturdy leaves before they move to the garden.
This window works well for a few practical reasons. Your seedlings will reach the right size for transplanting without becoming tall and spindly from competing for light. You’ll also avoid the risk of planting too early when a late frost could kill tender plants. Plus, you sidestep the common problem of seedlings outgrowing their containers and getting cramped.
Fill seed trays with pre-moistened seed starting mix and plant 1–2 seeds per cell. Keep the soil warm—around 70–75°F is typical—and you’ll see sprouts in 5–14 days. Once seedlings emerge, give them 12–16 hours of grow light daily to keep them compact and green. This setup takes a little attention, but it’s straightforward work that pays off when you move healthy, stocky plants into your garden beds.
Hardening Off Seedlings: A Critical 1–2 Week Transition
 3")
Your seedlings have spent weeks indoors under grow lights, and now they’re ready for the outdoor world—but jumping straight outside would shock their systems. Hardening off gradually acclimate plants to wind, direct sun, and temperature swings over 1–2 weeks.
Start on day one by placing seedlings in a shady, sheltered spot for just 2–3 hours. Each day after, add another 1–2 hours of outdoor time and bump up their sun exposure. By the end of week one, they’ll handle partial shade (about 3–4 hours of dappled sunlight) comfortably. During week two, move them into full sun as they show readiness, increasing to 6–8 hours daily.
Watch for stress signals like wilting, pale or bleached leaves, or brown crispy patches. If you spot trouble, pull them back to shadier conditions and try again the next day. These signs mean the seedlings need more time to adjust before facing that much light intensity.
Once seedlings make it through two full weeks of outdoor exposure without showing damage, and your nighttime temperatures stay consistently above 50°F, they’re ready for final transplanting into garden soil or larger containers. The gradual shift gives their tissues time to toughen up and their root systems time to adapt.
Direct Sowing vs. Transplanting: Which Is Best?
 4")
You’ve got two solid paths forward, and which one you choose really depends on your timeline and patience level. Starting indoors and transplanting gets you blooms earlier in the season, while direct sowing works just fine too. With direct sowing, you drop seeds about 1/4 inch deep straight into the ground once frost danger passes, and you’ll still get flowers by summer.
Your location matters quite a bit here. If you’re in northern Iowa planting transplants in mid-May, you’re already running late in the season. Direct sowing might actually catch up faster and spare you the hardening-off process, where you gradually expose indoor seedlings to outdoor conditions over 7-10 days. That’s extra work most people don’t miss.
Think about what fits your schedule. Do you have space indoors under lights or near a bright window for 6-8 weeks before your last frost date? Then transplanting makes sense. If you’d rather skip the indoor setup and just wait a few weeks longer for direct seeding, that’s a perfectly reasonable choice that gives you real flowers without the fuss.
Timing and Frost Windows
When should you get those marigolds in the ground? Timing matters more than you’d think, and it all comes down to your frost window.
You’ll want to wait until danger of frost has passed in your region. Southern Iowa typically plants transplants in late April, while northern Iowa waits until mid-May. For direct sowing, soil temperatures need to consistently stay above 65°F (18°C).
Transplants establish faster since seedlings have already started growing indoors. They give you a head start compared to seeds you plant directly in the soil.
Hardening off gradually prepares your seedlings for outdoor conditions before final planting. Over 7-10 days, expose them to increasing amounts of wind and direct sunlight. This process toughens up their tissues so they won’t wilt when you plant them outside.
Direct sowing works once soil’s warm enough, with seeds planted ¼ inch deep. You skip the indoor step entirely, but you’ll need to wait for the soil to reach that 65°F threshold and stay there consistently.
Your choice between these methods depends on whether you’re willing to start seeds early indoors or prefer waiting for warmer soil outdoors. Transplants let you enjoy blooms sooner, while direct sowing saves you space and equipment. Either way, you’re setting yourself up for a good outcome.
Establishment Speed Comparison
Both methods land you at first blooms in roughly 8–10 weeks from sowing, so speed-wise they’re surprisingly close. Direct sowing outdoors after frost danger passes gets your seeds germinating in just 5–14 days with proper warmth and moisture, which means faster initial establishment. You skip the indoor setup and go straight to garden soil.
Transplants require hardening-off and acclimation before moving outside—that’s typically 7–10 days of gradually exposing seedlings to outdoor conditions. This delays your planting timeline somewhat. The trade-off is flexibility: you can start seeds indoors during cooler spring months, then move them out once temperatures cooperate, rather than waiting for outdoor soil to warm up enough for direct sowing.
The real difference comes down to timing and your local climate. Direct sow when conditions are warm, and you often get earlier flowers overall. Transplants let you work around cooler springs by starting seeds under lights indoors 6–8 weeks before your last frost date. Pick whichever fits your schedule and what your region typically throws at you during planting season.
Regional Growing Considerations
Your climate zone determines which method makes the most sense for your marigolds. If you’re in southern Iowa, you’re looking at a late April transplant window. Northern Iowa gardeners should wait until mid-May after the danger of frost has completely passed.
Direct sowing works beautifully when conditions cooperate. You’ll want soil temperature reaching 65°F or higher consistently, your last frost date already behind you by several weeks, and a growing season long enough for blooms before summer ends. This approach saves you the indoor seed-starting effort and mess.
Transplanting gives you a head start if you’re willing to harden off seedlings gradually. Start them in shady, protected spots where they’ll adjust to outdoor conditions, then slowly expose them to more sun over a week or two. Both approaches work well. It really comes down to whether you prefer starting indoors or waiting for warm soil to direct sow outside.
How to Space and Plant Seedlings Outdoors
 5")
Ready to move your seedlings outside? Give your marigolds about 8–12 inches of space between each plant so they have room to spread out as they mature and air can flow freely around the leaves. Crowded plants tend to develop fungal diseases and stay smaller than they should.
Look for a spot with well-drained soil that’s moderately rich in nutrients and gets full sun throughout the day. Dig holes a bit wider and deeper than your seedling root balls so they’ll have some breathing room. When you’re ready to plant, gently slide each seedling from its container and handle the tender roots like they’re delicate—because they are. Set it into the hole at the same depth it was already growing, not any deeper, since burying the stem can cause rot.
Press the soil around the base firmly enough that there are no air pockets, then water until the soil is thoroughly moist. During the first few weeks, keep an eye on soil moisture and water whenever the top inch feels dry to the touch. This consistent moisture helps your seedlings settle in and establish strong roots without the stress of drying out.
Soil Temperature for Successful Germination
 6")
What’s the single biggest factor that’ll make or break your marigold seeds? Soil temperature. Your seeds won’t germinate reliably until soil consistently stays above 65°F (18°C)—it’s non-negotiable.
Before you plant anything, grab a soil thermometer and check the actual temperature at seed depth, not just what the air feels like. Surface warmth can be deceiving. Wait until late spring when soil has genuinely warmed through, then direct-seed outdoors. This patience pays off in faster, more uniform germination.
Beyond hitting that temperature mark, you’re setting yourself up for success by preparing the soil itself. Compacted soil stays cool and blocks oxygen, which germinating seeds desperately need. Loosen up your planting area so water and air can move freely. Add a light top-dressing of fine soil or vermiculite after planting to maintain moisture without cooling the surface layer where your seeds sit.
Aim for soil pH around 6.2–6.5 while you’re at it. This range lets marigold roots access nutrients easily, which matters once those first leaves push through. Get these conditions right, and you’ll watch your marigolds develop into healthy seedlings without the frustration of failed attempts.
Water, Mulch, and Support Your New Plants
 7")
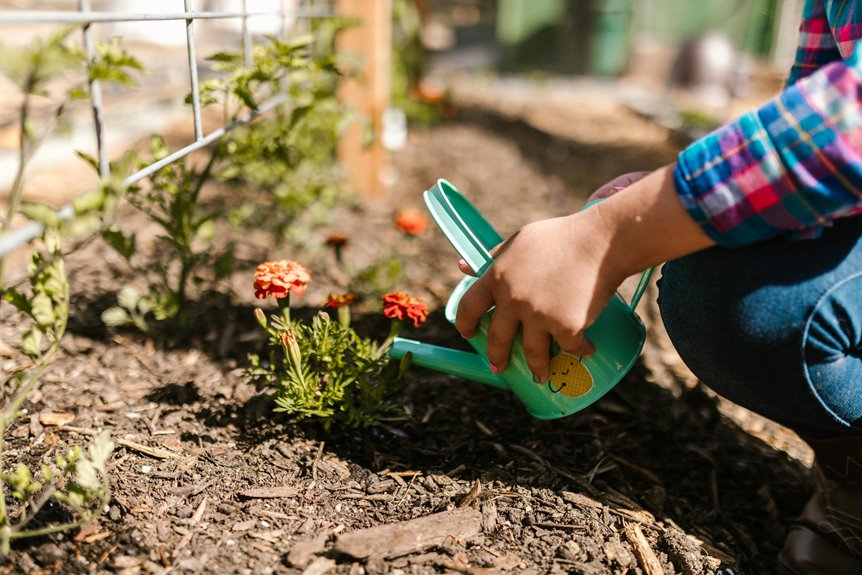
Once you’ve got those seedlings in the ground, the real work begins—but here’s the good news: it’s mostly about staying consistent. Water deeply at planting time, then keep the soil evenly moist without letting it become waterlogged, since soggy roots will struggle to absorb oxygen. A light organic mulch layer—about 2 to 3 inches of wood chips or shredded bark—around each plant does several jobs at once. It holds moisture in the soil so you won’t need to water as often, keeps soil temperature more stable during temperature swings, and blocks sunlight from reaching weed seeds below. As your plants grow taller, especially varieties that reach 2 feet or higher, they’ll need lightweight staking or small cages to stay upright when wind picks up. Think of mulch and water as connected parts of your plant’s support system. Both work together to build strong roots and keep your seedlings standing strong as they mature into plants that’ll produce plenty of blooms.
Why Growth Is Slow: And Regional Fixes
 8")
If your marigold seedlings are moving slower than you’d hoped, take a breath—slow growth is almost always something you can fix. Three common problems usually sit at the root of the issue.
Low light makes seedlings stretch out looking for sunshine and pushes back when they’ll flower. High temperatures stress young plants and stunt how much they actually grow. Weak, struggling seedlings often point to nutrients that aren’t making it to the roots.
Low light stretches seedlings, high heat stunts growth, and poor nutrition weakens roots—three fixes that transform struggling marigolds.
Here’s where regional timing becomes your real advantage. Southern gardeners should wait until late April to move seedlings outside, which gives you faster establishment and earlier blooms. If you’re in the North, aim for mid-May when soil temperatures stay more stable. Before transplanting, spend a week or so gradually introducing seedlings to sunlight and outdoor air through hardening-off. This slow adjustment cuts way down on transplant shock.
Pair that timing with three practical basics: full sun exposure for at least six hours daily, well-drained soil that doesn’t hold water around the roots, and moderate nutrients applied every two weeks. Marigolds don’t need heavy feeding—too much actually encourages leaves over flowers. Start with a balanced 5-10-10 fertilizer mixed at half strength, then watch how your plants respond before increasing it. The combination of good timing, steady light, and thoughtful soil conditions will get you seedlings that actually perform.


