Space your watermelons and cantaloupes in a checkerboard pattern with two squares per plant in a 4-by-4-foot layout. This arrangement prevents crowding and stops the plants from competing for water and nutrients.
You’ll want raised beds at least 12–18 inches deep filled with loamy soil mixed with 25–30% organic matter, which gives roots the right balance of drainage and nutrition.
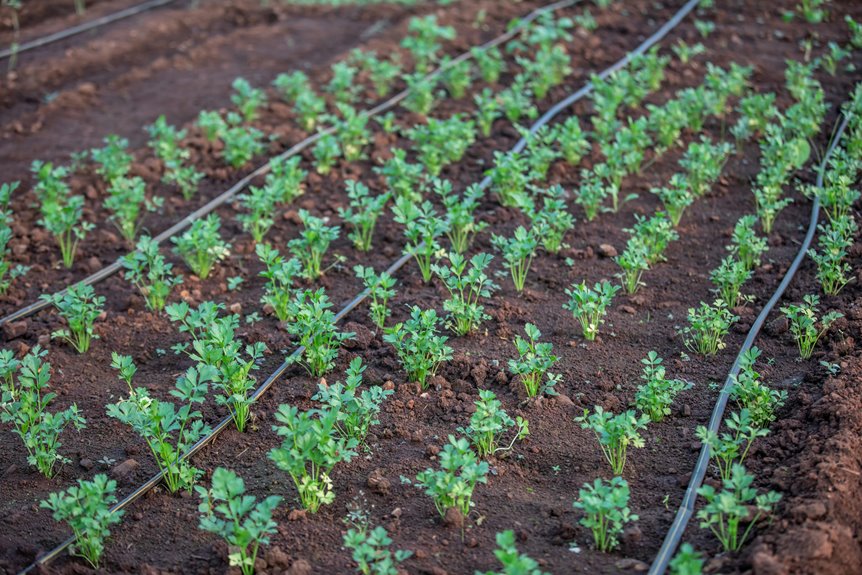
Plant quick-growing companions like radishes and lettuce between rows to crowd out weeds before your vines start sprawling across the bed. Remove these companion plants once the melon vines need more space to spread. This timing matters because you’re using them as a temporary solution, not a permanent fixture.
Position your beds in full sun and water consistently at 1–2 inches per week using drip irrigation rather than overhead watering. Drip systems deliver water directly to soil at ground level, which keeps foliage dry and reduces fungal problems that thrive on wet leaves. Your melons will need steady moisture, especially once they start flowering and developing fruit.
Getting the spacing, soil depth, and watering method right sets you up for healthy plants that actually produce melons. The details about timing for planting, trellising options, and knowing when fruit is ready to harvest will round out what you need to know for success.
Assess Your Garden Space and Bed Dimensions

Before you plant a single seed, measure your available garden space honestly. Watermelon and cantaloupe are hungry vines that need real room to spread out and perform well. You’re looking at roughly two squares per plant in Garden Grid-style layouts, which means a 4-by-4-foot bed accommodates just two plants comfortably.
Standard raised beds work beautifully for melons, especially checkerboard-spaced designs that guide both irrigation and vine placement. These layouts aren’t just pretty—they actually direct water where it needs to go and keep plants organized.
Think about what happens beyond your bed edges too. Those vigorous vines will sprawl outward substantially, so account for extra ground space now or plan vertical trellises. Good spacing prevents crowding, reduces fungal issues, and keeps your plants healthier overall. Give these melons breathing room from the start, and they’ll reward you with better yields and fewer headaches down the line.
Space Watermelon and Cantaloupe Using the Two-Square Checkerboard Pattern

Arrange your watermelon and cantaloupe plants in a checkerboard pattern, where each plant claims a two-square footprint. This spacing prevents overcrowding and keeps roots from competing for water and nutrients. The staggered layout works beautifully with the Garden Grid™ system—when you align plants with grid squares, water reaches them evenly while long vines have room to spread within their designated areas.
This two-square setup does several practical things at once. It stops neighboring plants from shading each other, which both crops need to develop sweet fruit. The spacing also gives you room to install vertical trellis support, keeping vines organized and fruit off damp soil where rot happens. Plus, better air circulation between plants means fewer fungal problems down the line.
Think of it this way: you’re creating invisible boxes on the ground, with each plant sitting in one corner where it gets exactly what it needs—sunlight, water from the grid system, and elbow room to grow without competition.
Checkerboard Pattern Layout
The two-square checkerboard pattern gives you a straightforward way to grow watermelons and cantaloupes side by side without constant vine tangles. You’re essentially drawing up a map that lets both crops share space peacefully.
Assign two adjacent squares to each plant, giving the vines room to sprawl naturally across your garden. Alternate your plantings in checkerboard fashion, leaving empty squares between them specifically for vine expansion and fruit development. When you align this pattern with your raised beds, you maximize root space while minimizing competition for water and nutrients.
The layout works because it improves airflow around the foliage, which reduces disease risk significantly. Your irrigation system can follow those same grid lines without any confusion, delivering water exactly where the roots need it. If you’re working with standard 4-by-8-foot raised beds, you might fit four plants with two squares each, using the remaining squares for growth and air circulation.
Vine Space Requirements
How much room do your watermelon and cantaloupe vines actually need? Give each plant a two-square footprint in your Garden Grid™ system. This spacing accounts for vine growth that sprawls well beyond a single square, not arbitrary guesswork.
Your best bet is a checkerboard planting pattern, alternating plants with empty squares. This arrangement prevents crowding and root competition while giving vines space to spread naturally along clear pathways rather than fighting for room in dense clusters.
The pattern does double duty by simplifying your irrigation setup. You’ll deliver water directly to each two-square site, which means consistent moisture without second-guessing where water actually reaches. Your vines get the space they need, and your garden stays organized.
Grid System Integration
Ready to rework your garden layout into a vine-friendly setup? The Grid™ system’s checkerboard pattern gives you organized space for growing watermelons and cantaloupes side by side without the typical tangled mess.
Assign each plant a two-square footprint—about 4 feet by 4 feet per melon—and arrange them in alternating grid squares. This spacing keeps root systems from competing directly with each other, letting each plant establish its own underground territory. Strategic gaps between vine zones also improve air circulation around developing fruit, which reduces disease problems and helps melons ripen more evenly.
Run your irrigation lines along the checkerboard pattern so water reaches every planting site consistently. This targeted watering approach means less water waste and less guesswork about whether plants are getting enough moisture. You’ll notice how grid-aligned rows make it simple to see which plants need attention and which areas might be staying too wet or dry.
The real benefit here is that your raised bed stays organized while each watermelon and cantaloupe gets dedicated horizontal space without overlapping into neighboring zones. You know exactly where each plant lives, where water flows, and where air moves through. That kind of clear structure takes the confusion out of managing multiple vine crops in tight quarters.
Prepare Raised Beds for Optimal Drainage and Root Development

Want your watermelons and cantaloupes to produce well? Start by building raised beds that are at least 12–18 inches deep—those taproots need the room to stretch out comfortably. Fill them with a loamy or sandy-loam soil mix that contains 25–30% organic matter, which works hard to improve both drainage and how easily roots establish themselves.
Top your bed with a 3–4 inch layer of coarse organic mulch or compost. This layer does multiple jobs at once: it keeps moisture levels steady, stops the soil from getting packed down, and prevents waterlogging that can rot roots quickly. When you pair the right soil composition with smart mulching, you’re giving your melons the conditions they actually need to grow well.
Choose Companion Plants That Won’t Compete or Shade Your Vines
Plant herbs like basil and dill around your melons—they typically stay under 12 inches tall and won’t shade your vines from the sun. Quick-growing companions such as lettuce, radishes, and bush beans mature in 30-60 days, finishing before your watermelons and cantaloupes need spreading room, so they won’t crowd your space or drain nutrients.
Avoid planting cucumbers, zucchini, or other melon varieties nearby. These crops attract the same pests and diseases while competing directly with your main plants for water, nutrients, and ground space. The competition isn’t worth the headache of managing overlapping problems.
Space-Saving Herb Companions
How do you maximize garden space without shading your sprawling watermelons and cantaloupes? Herb companions offer a smart solution for intercropping. You’ll want to plant aromatic herbs like dill, basil, and oregano along your bed’s edge, keeping them 15–30 cm away from your vines. These watermelon companions won’t compete for resources while deterring pests naturally.
Aromatic herbs repel unwanted insects without chemicals, and their shallow growth habits keep sunlight reaching your vines where it counts most. The flowers that develop on these herbs attract beneficial insects like bees and parasitic wasps, which help pollinate your melons and control garden pests. By placing herbs around the perimeter of your bed instead of throughout it, you’re using space that would otherwise sit idle while protecting your crop.
This intercropping strategy lets you harvest fresh herbs while protecting your melons. You get fresh dill for your kitchen, basil for summer dishes, and oregano for cooking—all while your watermelons and cantaloupes grow undisturbed. The practical payoff means you’re squeezing more productivity from the same garden footprint, which matters when space is limited.
Avoid Competing Melon Varieties
While herbs like basil and dill do well at your bed’s edges, picking what grows near your melons takes more thought. Not all garden companions work well with sprawling melon vines.
Skip planting cucumbers, tomatoes, or squash alongside your watermelon and cantaloupe. These crops develop broad leaf canopies that shade your vines and steal the sunlight they need to ripen properly. They’ll also compete aggressively for the moisture and nutrients your melons pull from the soil.
Instead, focus on shallow-rooted companions with compact growth habits. Radishes, lettuce, and leafy greens sit low without creating shade problems. Keep nitrogen-fixing beans in separate nearby beds where they’ll improve your soil without taking up precious melon space.
Your planting spacing strategy matters most here. Space melon vines at least three feet apart, using vertical trellising or stakes to train them upward and maximize sun exposure. This arrangement keeps plants from crowding each other and reduces disease problems that develop when leaves stay damp and tangled together.
Quick-Growing Ground Cover Plants
Because your melon vines crave unobstructed sunlight and guard their water and nutrients closely, picking the right ground cover really matters. You’ll want plants that establish quickly and suppress weeds within 2–4 weeks, right when your melons are getting their foothold in the soil.
Lettuce and radishes work wonderfully here. They grow fast, stay low to the ground, and won’t cast shade across your vines. Alyssum and oregano are equally solid choices, with shallow root systems that won’t dig down competing for the deep water and nutrients your melons need.
Placement is just as important as plant choice. Position ground covers between your rows or along bed edges, keeping them away from where your heavy vines will sprawl. Avoid dense covers like clover mats or thick grasses that block the sunlight your melons depend on for growth and sweetness.
This approach gives you early weed control without crowding your melons. You’re creating a protective layer that works with your garden’s needs rather than against them, and that’s the whole point.
Plant Radishes and Lettuce as Ground Cover Between Melons
Plant radishes and lettuce between your melon rows to solve several problems at the same time. Radishes finish in just 25–30 days, so you’ll pull them out before your melons start sprawling across the bed. Lettuce stays shallow-rooted and low-growing, which prevents those dense melon vines from blocking out light to everything underneath.
Space your radishes and lettuce roughly 8–12 inches apart in the spaces between melon rows. This keeps them far enough from melon roots and runners so they’re not competing for water and nutrients. Pick early-maturing lettuce varieties and fast-growing radish types that’ll be done expanding before your vines really take off.
While your melons are getting established, these smaller plants handle three jobs at once: they crowd out weeds, help the soil hold onto moisture, and give you fresh harvests to enjoy now. You get actual food from your garden while waiting for the melons to ripen, which beats staring at empty space between rows.
Time Your Planting for Warm Soil and Heat Zone Requirements
Getting your timing right keeps you from planting seeds that’ll just sit in cold soil and sulk. Warm-season melons need genuine heat to cooperate, and that starts with the soil beneath them.
Soil temperature matters more than air temperature when you’re starting seeds. Aim for soil at 70°F (21°C) or warmer—use a soil thermometer to check, not just your gut feeling. In cooler regions, this typically means planting during late spring once soil has genuinely warmed up, usually early summer. If you’re in heat zones 9–10, you can plant earlier once consistent warm weather settles in and nighttime temperatures stay reliably warm.
Melons generally need about 80–90 days from planting to maturity, though temperature and how well you care for them will shift that timeline. Check your local frost-free date first, then monitor your soil warmth before committing seeds to ground. Rushing past this step often leads to slow, spotty germination and weak fruit production later on. Patience here actually saves you time and frustration down the line.
Set Up Vertical Trellising to Maximize Limited Bed Space

When you’re working with limited bed space, two vertical strategies can help you grow more food in the same footprint. Vertical trellises direct your melon vines straight up, which opens up valuable ground space below for companion plantings like basil or lettuce. Arch trellises, meanwhile, span between garden beds and let your runners climb right over the pathway—a smart approach that puts unused air space to work.
Both setups use the same basic principle: growing upward instead of outward. A sturdy wooden or metal frame standing 5 to 6 feet tall works well for vertical trellises, while arch trellises typically measure 3 to 4 feet high and 4 to 6 feet wide. You’ll need soft garden twine or cloth strips to gently tie the vines as they grow, which prevents damage to the stems while supporting heavier fruit.
The practical benefit here is straightforward. By training vines vertically, you’re using cubic space rather than just square footage, so you can fit more plants in your garden without actually making it bigger. Melons grown on trellises also get better air circulation around their leaves, which reduces moisture buildup and fungal problems. Just remember that larger varieties will need additional support—old pantyhose or fabric slings work well for cradling developing fruit as it grows.
Arch Trellis Design Options
When space is tight in your garden beds, vertical growing really shines. An arch trellis takes your compact planting area and stretches it upward, letting you grow more in less ground space.
You’ll want a sturdy arch with a 6–8 ft rise and span to handle sprawling vines without buckling under weight. Here’s what makes the setup work:
- Anchor it securely into the ground to prevent swaying when fruit gets heavy
- Position it on the sunny side where air moves freely, keeping plants healthier and disease at bay
- Leave 1.5–2 ft clearance from bed edges so you can reach plants without struggling or stepping on soil
- Train lateral runners upward as they develop to maximize your vertical growing space
Consider extending your arch over to a neighboring bed or installing a second one nearby. This creates a continuous growing corridor where watermelons and cantaloupes climb freely, keeping fruit off the ground while air circulates beautifully around them.
Vertical Growth Support Benefits
Once your arch trellis is anchored and positioned, your vines start climbing while your cramped bed suddenly opens up. By lifting watermelon and cantaloupe growth vertically, you reclaim precious horizontal space and can squeeze in additional plants below. This vine support system keeps fruit elevated off soil, which dramatically reduces disease risk while improving airflow around foliage.
| Benefit | Impact | Result |
|---|---|---|
| Reduced ground footprint | More plants per bed | Higher yield |
| Improved airflow | Less fungal disease | Healthier vines |
| Better sun exposure | Sweeter fruit | Superior quality |
| Easier harvesting | Less bending | Happy gardener |
Your vertical gardening setup aligns perfectly with two-square-per-plant spacing, where vines spread upward and supported platforms cradle developing fruit. You’ll enjoy easier harvesting since you’re not bending down to reach low-hanging gourds, plus better sun exposure hits each melon more directly. The result is genuinely impressive yields in tight spaces. Trellising turns your spacing constraints into real growing opportunities rather than limitations.
Water and Fertilize Both Crops on a Consistent Schedule

Both watermelons and cantaloupes are thirsty plants that reward consistent watering with sweeter, juicier fruit. You’re aiming for about 1–2 inches of water per week, though rainfall and soil type will shift your target up or down.
Start with drip irrigation or soaker hoses, which deliver water directly to roots while keeping leaves dry and disease-free. Check soil moisture at 2–4 inches deep twice weekly—that’s where the roots actually do their work. Water deeply once or twice per week rather than sprinkling lightly every day, since deep soaking encourages stronger root systems that can handle stress better.
Apply mulch around your vines to hold moisture in the soil and regulate temperature, which cuts down on how much water evaporates before plants can use it. A 2–3 inch layer of straw or wood chips does the job nicely.
After fruit sets, pay attention to how your plants look and adjust watering based on stress signs like wilting or slow growth. Consistent irrigation prevents both yield loss and quality problems, keeping your watermelons and cantaloupes growing well together in the same space.
Monitor Airflow and Prune Vines to Prevent Disease

While you’re keeping your watermelons and cantaloupes consistently watered, what happens above the soil matters just as much. Air circulation stops fungal diseases before they can spread through your crop. Space your plants far enough apart that you can see daylight between them, preventing the dense canopies that trap moisture and invite trouble.
Prune those lower leaves and runners that touch the soil—they’re direct pathways for pathogens living in the dirt. Train your vines onto a trellis or arch to lift foliage up and away from damp ground. Aim for 12 to 24 inches of clearance between dense foliage and nearby plants so breezes can move freely through the canopy.
Scout your plants regularly for powdery mildew, a white coating on leaves, or Fusarium wilt, which causes yellowing and wilting. Remove affected leaves immediately and dispose of them away from your garden. Quick drying after rain is your best defense against disease, and that only happens when air reaches the leaves and soil around your plants.
Avoid Planting Watermelon and Cantaloupe Near Problem Plants
Your watermelons and cantaloupes grow best when they have good neighbors and plenty of space to spread out. Keeping certain plants away from your melon patch prevents problems that can seriously limit what you harvest.
Vine crops like cucumbers, zucchini, and other melons share the same pests and diseases, so planting them close together creates a fast-moving infection risk. Heavy feeders such as corn and tomatoes pull nitrogen from the soil that your melons need to develop properly. Shade-casting plants block the full sun your melons require for developing sweet fruit. Aggressive spreaders like certain vines will crowd your bed and restrict the airflow your melons depend on to stay healthy.
Space your watermelons and cantaloupes at least 3 to 4 feet apart, or more if you’re growing larger varieties. Position them on opposite edges of your bed when possible. This spacing prevents disease spread, reduces competition for nutrients, and lets you harvest a fuller crop. The air moving freely between plants keeps leaves dry and reduces fungal problems that thrive in humid, crowded conditions.
Harvest Melons at Peak Ripeness Without Damaging Vines
Once your melons have proper spacing and good neighbors, it’s time for the payoff—picking them at their peak. A sweet aroma near the stem is your first clue that ripeness is close. Look for a dull skin surface with a yellowish ground spot where the melon sat on the soil. The fruit should feel heavy for its size when you do a lift-test, and pressing gently at the stem end should yield to slight pressure without being mushy.
When you’re ready to harvest, grab a sharp knife and support the melon with your other hand. Cut the stem, leaving 1–2 centimeters attached to the vine. This small piece of stem left behind protects the plant from open wounds where rot can creep in and damage the whole plant. Never yank the fruit off—that rough handling tears the vine and invites problems.
Timing matters too. Watermelons typically need 80–90 days from planting to reach full ripeness, while cantaloupes usually get there a bit sooner. Picking at the right moment means you’ll harvest fruit that tastes its best and keeps your vines healthy enough to keep producing. A careful approach now pays dividends later in the season.
Troubleshoot Common Issues Like Pest Pressure and Powdery Mildew

What’s lurking on the undersides of those beautiful melon leaves? Likely culprits—aphids, spider mites, and cucumber beetles—that’ll compromise your harvest if you’re not vigilant. You’ll want to inspect regularly and act fast.
Monitoring and Prevention
Check the undersides of your leaves weekly, looking for pest colonies and the early damage signs that mean trouble’s brewing. Proper spacing matters more than you might think—keep plants 2 to 3 feet apart to let air move freely around them. Better airflow cuts down powdery mildew risk considerably, since these fungi love the damp, stagnant conditions that crowded plants create.
Avoid watering from overhead whenever possible, since splashing water on leaves creates the humid microclimates where pests and fungal diseases really thrive. Instead, water at soil level and let air circulation do its work.
Taking Action
At the first sign of pests, apply insecticidal soap or neem oil to stop them from spreading to healthy plants. Pruning out dense vine growth and using a trellis system also improves airflow and makes it easier to spot problems early. Catching issues when they’re small keeps your melon patch productive and saves you from bigger headaches down the road.
Plan Next Season Based on What Grew Well Together This Year

As summer fades and you’re harvesting those final melons, grab a notebook and write down what actually worked in your garden bed. Did your watermelons stay contained, or did vines sprawl into neighboring zones? Document which companion planting combinations thrived—maybe radishes protected your plants while lettuce filled ground gaps beautifully.
Review your bed layout honestly. If vining spread caused crowding, you’ll want to plan tighter spacing or vertical trellising for next season. A standard two-square-foot footprint per plant gives melons room to sprawl without tangling with neighbors, and trellising saves about 60 percent of ground space if you use sturdy stakes or cages.
Your notes from this season become your roadmap. Write down the exact positions where crop pairings succeeded, then translate these lessons into a revised Garden Grid plan. When you mark where each plant sits and how much space it actually needed, next year’s planting decisions become much simpler. The specific measurements and positions you record now eliminate the guesswork that leads to overcrowding and poor harvests.


