Divide hostas in early spring when shoots first appear or in fall around September to October—both seasons give your divisions the best chance at establishing themselves. Spring divisions benefit from the growing season ahead, while fall divisions have cooler temperatures to reduce transplant stress.
Gather a sharp knife, garden fork, and a tarp before you start. The tarp keeps your work area organized and prevents soil from scattering across your beds. You’ll also want compost to mix into the planting area.
Each division needs at least three to five shoots with roots about golf-ball sized. This size matters because smaller divisions struggle to store enough energy to push new growth. Look for natural separation points in the root mass rather than forcing cuts through solid sections.
Plant your divisions in shade with compost-rich soil mixed into the planting hole. Hostas are understory plants, so they actually prefer dappled light rather than direct sun. Cut the foliage back by about one-third to balance what the roots can support while they’re recovering from the division. Water deeply and consistently for the first year while the root system expands. The technique itself isn’t complicated, but handling these specific details actually shapes whether your divisions settle in well.
The Best Time to Divide Hostas: Spring or Fall
 1")
Timing matters when you’re splitting up your hostas, and you have two solid windows to work with. Divide them in early spring when shoots first appear, and you’ll give those new roots time to establish as fresh foliage emerges. This is when plants have the most energy to recover and grow.
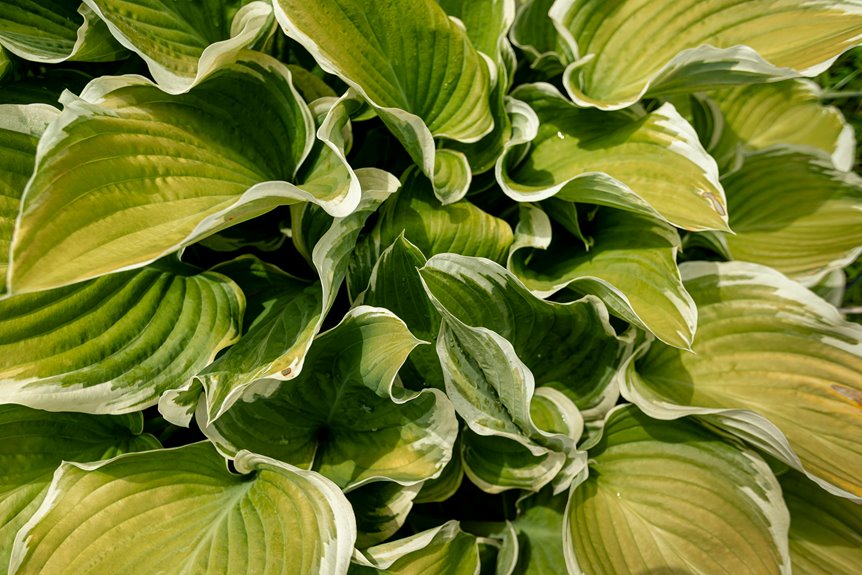
Early spring is the ideal time to divide hostas when shoots first appear, giving new roots time to establish as fresh foliage emerges.
Fall is your second chance, typically around September in northern climates and October down south. The real advantage here is that fall divisions need less watering afterward since cooler temperatures and more moisture in the air do the work for you. Your plants settle in without the stress of summer heat.
Summer divisions are possible, but they require extra attention and more careful watering afterward. You’ll need to check soil moisture regularly and water more often than you would in spring or fall.
The size of your divisions depends on how fast your hostas grow. Slow-growing varieties like blue-leafed types need more space between divisions—plant them at least 12 to 18 inches apart so they have room to fill out without competing for water and nutrients. Fast-growing types handle more frequent dividing and closer spacing without any problems. A healthy division should have at least three to five shoots and a chunk of root that’s roughly the size of a golf ball or larger. Use a sharp spade or garden knife to make clean cuts, and replant divisions in soil mixed with compost so they have good nutrients right away.
Why Your Hosta Needs Division
 2")
Your hostas’ll tell you when they’re ready for division—you just have to know what to look for. When clumps become overcrowded, individual plants struggle for nutrients and space, weakening the whole group. You might notice the center dying back while outer edges still thrive. That’s your signal to divide.
Fast-growing varieties need division every two to three years, while slower types can wait five to ten years. The key is matching your division timing to how quickly your particular hosta grows. Dividing prevents decline and gives each section breathing room for recovery growth. You’re basically hitting the reset button on plant health by separating stressed clumps into individuals that can access water and nutrients more easily.
What Tools Do You Need to Divide Hostas?
 3")
What’s the difference between a messy division job and a clean one? Having the right tools on hand. A garden fork or flat spade lifts clumps while keeping soil intact around the roots, which matters because exposed roots dry out fast. A sharp knife—something like an 8-inch serrated blade or pruning saw—makes clean cuts through tough rhizomes without crushing tissue. Don’t skip the gloves and eye protection when you’re working with soil and sharp edges.
Have a tarp or 5-gallon bucket nearby to transport your divisions without scattering soil everywhere. These tools work together for a reason: the garden fork loosens and lifts, the sharp knife makes precise cuts, and your protective gear keeps you safe while you work. When you’ve got the right equipment ready before you start, dividing hostas becomes straightforward work that actually feels good to do.
Prepare Your Hostas Before Dividing
 4")
Before you start cutting, remove your hosta from its pot or garden bed and gently shake off the excess dirt. You want to see those crowns and buds clearly so you know exactly where to make your cuts. Grab your sharpest knife or a sturdy garden fork—dull tools will crush tissue and invite disease into fresh wounds. Position your tool at the clump’s center and cut straight through to separate the divisions cleanly.
Once you’ve made your divisions, soak them in water for 5–10 minutes before replanting. This simple step rehydrates the roots after the shock of being separated and helps them settle into their new homes more easily. The roots will absorb moisture and feel less stressed as they adjust to being individual plants rather than part of a larger clump.
Gather Essential Dividing Tools
Before you dig up that hosta, take time to gather what you’ll actually need. A sturdy shovel works best for breaking through compacted soil around the plant’s base, while a garden fork lifts root clumps without destroying the delicate soil structure holding them together. You’ll also want a sharp knife—a 10-inch blade works well—for slicing cleanly through dense, woody divisions that resist tearing.
Bring a tarp along too. When you’re moving a 30-to-40-pound root ball across your yard, your back will appreciate not having to carry it in your arms. Heavy gloves protect your hands from sharp edges, and safety glasses keep soil particles out of your eyes when you’re working overhead with that knife.
Set up a bucket or hose nearby before you start digging. Freshly divided sections dry out quickly, so you’ll want water within arm’s reach to keep roots moist until they go back in the ground. Most gardeners find that having everything staged and ready actually makes the whole job faster and less stressful. Nothing’s worse than unearthing a massive clump, then realizing mid-division that you forgot your knife or left the tarp behind.
Remove Soil From Roots
Now comes the dirty work—literally. You’ll want to remove soil from the roots to clearly see the crowns and buds before dividing hosta plants. Shake off excess dirt or rinse the clump thoroughly so you can assess root health and spot at least three shoots per division.
Start by gently shaking the root ball to loosen and remove excess soil. This reveals the root structure so you can actually see what you’re working with instead of guessing under a layer of dirt. If shaking doesn’t do the job, rinse the clump under running water to expose the roots and crowns more completely.
Once the soil is off, you’ll inspect the roots for any mushy spots, dark discoloration, or obvious damage that signals rot or disease. Healthy roots look firm and light-colored, while problem areas feel squishy or smell off. This is also when you can count the shoots—you’ll want at least three viable buds per division for the best chance at recovery.
After inspection, soak the entire clump in water for 5 to 10 minutes. This step rehydrates the plant tissues, making them less brittle and easier to handle when you cut them apart. The roots will also separate more cleanly from each other when they’re pliable rather than stiff and dry.
Before moving forward, remove any damaged leaves or foliage that looks diseased, yellowed, or rotted. Cutting away problem foliage reduces the risk of spreading disease to your divisions and lets the plant focus its energy on root development rather than trying to salvage damaged parts.
Soak Divisions Before Planting
Your freshly divided hosta pieces need a quick drink before they go back in the ground. After you’ve removed the soil from their roots, place those divisions directly into water-filled buckets for 5–10 minutes. This simple step hydrates the roots and markedly reduces transplant shock, which can stress your new plants.
Think of soaking as giving your hostas a refreshing reset. The water cleanup removes damaged leaves and helps buds start properly hydrated for faster establishment. Soaked divisions recover noticeably quicker than dry divisions once transplanted into their new homes.
Time your soaking right after soil removal but before backfilling your planting holes. This way, you’re working with divisions that are genuinely ready to grow.
Dig Out Your Hosta Clump
 5")
Ready to get your hands dirty? Now comes the satisfying part of hosta division—actually digging out your clump. Start by circling around the plant’s perimeter, loosening soil with a garden fork or deep shovel. You’re creating space between the hosta and ground without damaging those precious roots.
Once loosened, carefully lift the entire root ball onto a tarp. This keeps soil contained and makes handling easier, especially with larger plants that can weigh 15-30 pounds or more. If your clump’s massive, don’t worry—you can cut straight through from top down using a sharp knife or flat spade to separate sections.
| Tool | Purpose | Best For |
|---|---|---|
| Garden Fork | Loosens soil gently | Root protection |
| Deep Shovel | Removes root ball | Larger clumps |
| Sharp Knife | Cuts through crowns | Visible division |
| Flat Spade | Separates sections | Heavy plants |
| Tarp | Containment surface | Easy handling |
A garden fork works best when you’re worried about slicing through roots accidentally. Push it down about 8-10 inches around the plant’s edge, then gently lever backward to loosen compacted soil. The deep shovel does heavier work once soil is loosened, sliding under the root ball to lift it free.
For particularly large clumps, a sharp knife or flat spade lets you divide the plant while it’s still somewhat in place. This approach prevents you from struggling to haul a 40-pound mass across your garden. Make cuts decisively from crown to root, creating sections roughly 4-6 inches across—each piece needs at least 3-5 buds to establish successfully.
Split Your Hosta Into Pieces
 6")
Once your root ball sits on the tarp, you’re ready to break it into plantable pieces. Grab a sharp knife or flat spade and cut your hosta clump into sections, making sure each piece has at least three shoots or a few eyes with roots still attached.
For those really dense clumps, a garden fork works nicely to gently pry sections apart while keeping soil around the roots intact. Smaller or slower-growing varieties benefit from a lighter touch and smaller divisions, while the vigorous types can handle more aggressive splitting without complaint.
Before you plant, trim off any damaged leaves and give your divisions a quick 5-10 minute soak in water. This brief hydration cuts down on transplant stress considerably. You’re essentially multiplying one plant into several new ones.
Check Each Hosta Piece for Eyes and Roots
 7")
How can you tell if a hosta division will actually thrive? Look for two things: visible eyes and real roots attached to the piece.
Each division needs at least one eye—those small buds you’ll see poking from the crown where the plant grew. If you’ve got multiple eyes on a single piece, that’s better because you’ll get bushier plants that flower more heavily in year one. The more growth points you start with, the faster your new hostas fill in.
Check the roots next. You want to see actual root structures connected to your division, not just soil stuck to it. Real roots look like thin, whitish strands branching from the base. Healthy roots mean your new plants can drink water and grab nutrients right after you plant them, which matters because divisions are already stressed from being separated.
Before you’re done, look over the leaves closely. Trim away any damaged or brown-edged foliage with clean cuts, using sharp pruners or a knife. Removing damaged parts stops disease from spreading and lets the plant put its energy into growing new roots instead of healing wounds.
Planting and Potting Your New Hosta Divisions
 8")
When you’re ready to pot or plant your divisions, grab a container with drainage holes—this matters because hostas hate sitting in water. Fill it with quality potting soil mixed with fresh organic matter, aiming for about a 60-40 ratio of potting soil to compost or aged bark. The organic matter helps retain moisture while keeping things light and airy for those roots.
Work quickly once you’ve got your divisions in hand. Dig a hole sized to match each root ball, set the division in at the same depth it was growing before, then backfill gently and water thoroughly. This settles the soil around the roots and eliminates air pockets that could dry things out. Those freshly divided roots are vulnerable, so keeping them consistently moist for the first few weeks while they establish themselves will make the real difference in how well your new plants take off.
Choosing The Right Container
What’s the secret to your new hosta division thriving in its pot? Picking a container that actually fits your plant’s needs makes a real difference.
You’ll want a pot that’s roughly twice the width of your division’s root ball. This gives roots plenty of room to spread without feeling squeezed. Always grab a container with drainage holes—waterlogged soil is basically a root-rot invitation, and nobody wants that. The holes let excess water escape instead of sitting around and causing trouble.
Fill your pot with organic-rich potting mix made for shade-loving perennials. This type of blend drains well while keeping enough moisture nearby to support your division while it gets established. You’re looking for something that won’t stay soggy but won’t dry out instantly either.
For larger divisions, go deeper with your container choice. A roomier pot handles a more robust root system and cuts down on transplant shock. Top it off with a light layer of mulch—about an inch or so—to hold in moisture and block weeds from taking over while your hosta settles into its new home.
Soil Preparation And Planting
Now that your container is ready, it’s time to plant your divisions. Getting the soil right makes a real difference in how well your hosta settles in.
Mix fresh organic matter—compost, aged bark, or peat moss—into your planting site to help soil hold water and resist disease. Dig a hole sized to fit your root ball comfortably, then position your division so the top of the roots sits level with the soil surface. Fill in around it with your soil mixture, pressing gently so roots make good contact with the earth and there are no air pockets.
Before planting, soak your divisions in water for 5 to 10 minutes. This simple step hydrates the roots and reduces the shock of moving from one home to another.
Water deeply right after planting, then keep the soil consistently moist for the next few weeks. Your hosta needs steady moisture while it adjusts to its new spot and begins growing new roots into the surrounding soil.
Caring for New Hosta Divisions: Year One
 9")
Your newly divided hostas need some extra attention during their first year as they recover from the shock of being separated. Think of them like new members joining a gardening community—they need real support to settle in properly.
Watering deeply and often keeps roots happy and prevents transplant shock from stalling establishment. Water right after planting, then maintain consistently moist soil throughout year one. The goal is soil that feels like a wrung-out sponge—damp but not waterlogged. Soggy conditions invite root rot, while dry soil stresses fragile new roots trying to establish themselves.
Location matters just as much as water. Plant divisions in shady spots that stay moist naturally, and work 2 to 3 inches of compost or aged bark into the soil before planting. This organic matter acts like a sponge, holding water longer between rain or watering sessions. Without it, even careful watering won’t keep soil consistently moist enough for recovery.
Remove any damaged leaves immediately rather than letting them sit and drain energy from the division. Torn or bruised foliage won’t recover and only pulls resources away from new growth and root development.
Smaller divisions will establish slowly—this is completely normal and doesn’t mean something went wrong. Watch for slugs and set out beer traps or copper tape barriers around vulnerable plants, since new growth attracts these pests like a dinner bell. By the end of year one, your divisions will have settled in and can handle normal care alongside your established hostas.
Can You Divide a Fully Leafed-Out Hosta? Here’s What Changes
 10")
Ideally, you’d divide hostas in early spring when they’re just emerging, but real life rarely aligns perfectly with gardening plans. The good news is that you can absolutely divide a fully leafed hosta—it just takes a little extra care.
Divide hostas in early spring ideally, but fully leafed plants work too—just requires a bit of extra care.
Start by gently tying or bending those leaves back and away from your work area to keep them safe during division. Grab a sharp knife and split your clump carefully, making sure each piece gets intact roots and at least three shoots or a visible bud cluster. This matters because those shoots and buds are what’ll grow into new plants.
Here’s the part that makes the biggest difference: after you transplant your divisions, cut back the foliage to about one-third of its original height. This sounds drastic, but it works because the plant can focus its energy on establishing roots instead of supporting all that leafy growth above ground.
Fully leafed divisions bounce back more slowly than spring-divided ones, so give them some extra attention for the first few weeks. Water them regularly—the soil should stay consistently moist but not waterlogged—and position them in afternoon shade to prevent wilting. These gentler conditions help the root systems settle in properly, and your divisions will come back stronger next season.


