Plant pumpkins in Texas between June and mid-July, with early June offering your best chance at Halloween-ready pumpkins. Fast-maturing varieties like Sugar Pumpkin (75–85 days) or Autumn Gold (80–90 days) work well here—just count backward from when you want to harvest.
Before planting, mix 3–4 inches of compost into your soil to give the plants what they need to grow. Create 12-inch mounds spaced 8–10 feet apart for smaller varieties, then plant 2–3 seeds per mound and thin down to your strongest seedling once they’re up.
The spacing matters because pumpkins sprawl, and crowded plants invite disease and mildew.
Water deeply using drip irrigation rather than sprinkling from above, which leaves foliage wet and vulnerable to fungal problems. Add mulch around each plant to retain moisture, regulate soil temperature, and keep weeds at bay. These steps work together to give your pumpkins the stable growing conditions they need to reach harvest size by fall.
The Best Time to Plant Pumpkins in Texas: June–Mid-July

When should you get those pumpkin seeds in the ground if you’re dreaming of a Halloween harvest? Plant your pumpkins between June and mid-July for the best results in Texas. Pumpkins need 90 to 110 days to mature fully, and this timing window targets an October to early November harvest that lands right before fall frosts arrive.
Early June plantings give you the safest bet for Halloween-ready pumpkins. Late July plantings risk slower-developing varieties that won’t reach full size in time for your jack-o’-lantern plans. By planting during this window, you’re also maximizing your ripening and storage potential for the autumn season ahead.
The reason this timing works is straightforward: Texas heat accelerates growth through summer and early fall, but you need those extra weeks of moderate weather in October to let pumpkins fully develop their thick skin and deep color. Plant too late, and frost catches your pumpkins before they’ve hardened off properly. Plant in June or mid-July, and you’ll have ready-to-carve pumpkins when you need them most.
Choose Your Pumpkin Variety Based on Days to Maturity
When you’re planning your pumpkin patch, matching your variety’s days-to-maturity with your harvest timeline makes all the difference. Smaller varieties like Sugar Pumpkins need roughly 84 days from planting to harvest, while giant varieties can demand 120 days or more of growing time.
If you’re aiming for a Halloween harvest in Texas and planting in early July, fast-maturing varieties give you a comfortable buffer to reach October 31st without rushing. Larger pumpkins, on the other hand, need you to start earlier—sometimes as early as May—so they have enough time to reach full size before frost arrives.
Your seed packet holds the specific timeline for each variety you’re considering. That information tells you exactly when to plant and what to expect from your chosen pumpkin, so you can plan backward from your desired harvest date rather than hoping things work out.
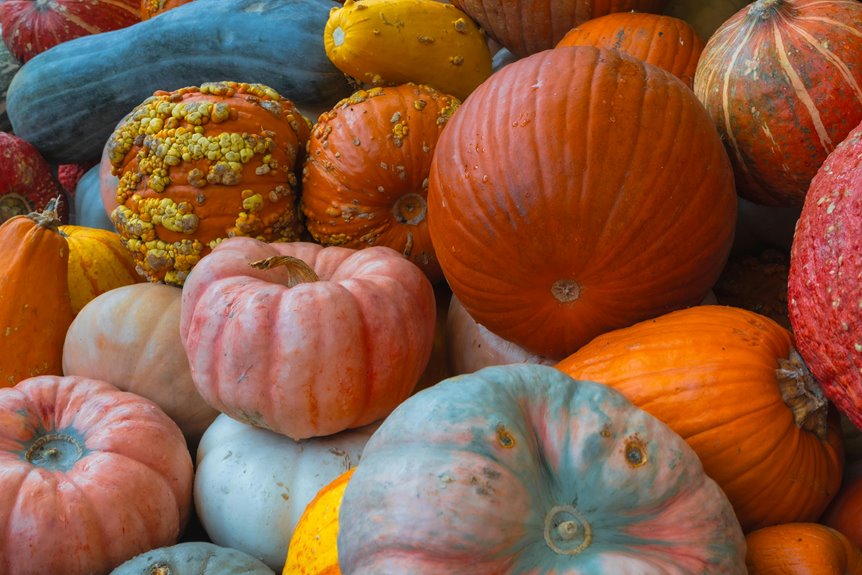
Fast-Maturing Varieties for Halloween
If you’re planning to carve a jack-o’-lantern by Halloween, your choice of pumpkin variety makes a real difference in whether you’ll succeed. You want varieties that mature in around 84 days so they’re ready by October 31st. In Texas, planting in early July gives you that perfect timing window.
| Variety | Days to Maturity | Best For | Planting Window |
|---|---|---|---|
| Sugar Pumpkin | 75–85 days | Pies, small carving | Early July |
| Autumn Gold | 80–90 days | Jack-o’-lanterns | Early July |
| Howden | 100–110 days | Large carving | Late June |
| Giant varieties | 120+ days | Competitive shows | Not ideal |
Sugar Pumpkins and Autumn Gold varieties both fit the early July planting window nicely and give you a solid safety margin. Sugar Pumpkins mature fastest at 75 to 85 days, making them the least risky if you’re cutting it close on time. Autumn Gold runs slightly longer at 80 to 90 days but delivers the classic jack-o’-lantern look people expect.
Howden pumpkins need about 100 to 110 days, which means you’d have to plant in late June to finish by Halloween. Giant varieties demand 120 days or more and really aren’t practical for October deadlines unless you’re willing to plant back in June and gamble on summer weather.
Here’s the practical approach: look at your seed packet and work backward from October 31st. Count out the exact number of days listed for maturity, and that tells you your latest planting date. If you’re tempted by giant varieties for their impressive size, understand that they’re risky for Halloween carving—the timeline just doesn’t favor them unless you’re in this for competition rather than a front-porch display.
Extended-Season Pumpkin Selections
Beyond the Halloween rush, you’ve got plenty of options if you’re after pumpkins for Thanksgiving decorations or late-season harvests. Extended-season varieties typically need 100–120 days to mature, which gives you flexibility with later plantings. The smart approach is working backward from your target harvest date, then matching it to a variety’s days-to-maturity.
If you’re planting in late June or July, choose pumpkins requiring 85–90 days instead. This timing helps your pumpkins ripen before the first frost hits your area. Texas heat complicates the equation, so select heat-tolerant extended-season types that’ll actually produce fruit despite scorching temperatures.
Your best resource is checking seed packets carefully and reaching out to Texas A&M AgriLife Extension Service specialists. They’ll recommend varieties proven to thrive in your specific region, which takes the guesswork right out of selecting what to plant.
Matching Ripening Time to Goals
Picking the right pumpkin variety means working backward from when you actually want to harvest. Grab your seed packet and find the days-to-maturity number, then count backward from your target date to figure out when to plant.
For Halloween in Texas, look for varieties that need 90–110 days to mature. Plant those seeds in June or July, and your pumpkins should be ready by late October. If you’re aiming for Thanksgiving instead, sow seeds in late July through early August to hit that late-November window.
The timing strategy is straightforward: plant longer-maturity varieties earlier in the season, and save shorter-season types for later planting. Texas weather loves to throw curveballs though, so check your specific seed packet’s recommendations and be ready to adjust if a cold snap or unexpected heat arrives. This kind of simple backward planning means your pumpkins will show up right when you need them, not weeks too early or frustratingly late.
Work Backward From Your Target Harvest Date

When’s your ideal harvest date? That’s where you start—it’s your anchor point for everything that comes next. Grab your seed packet and look for the days-to-maturity number, which tells you exactly how long your variety needs to grow from seed to harvest. Let’s say you want Halloween pumpkins ready by October 31st. If your variety needs 90–110 days to mature, you’d plant in June or July to hit that target.
For Thanksgiving harvests, you’d shift your planting to late July instead. Here’s where it gets practical: add a couple of weeks as a buffer because Texas weather doesn’t always play by the rules. Your plants might speed up during a hot, dry stretch or slow down if you get unexpected cool snaps and rain. When you work backward from your harvest date using this simple math, you’re not guessing anymore. You’re planning with actual numbers, which means fewer surprises come fall.
Prepare Soil With Drainage and Organic Matter in Mind

Once you’ve locked in your planting dates, it’s time to prepare the underground conditions that pumpkins actually need. Start by testing your soil to understand how water moves through it—pumpkins really don’t like sitting in moisture. Aim for slightly acidic soil with a pH between 5.5 and 6.8, using agricultural lime to raise the pH if your soil tests lower.
Now here’s where the work pays off: mix in 3 to 4 inches of compost or well-rotted manure into the top 8 to 12 inches of soil. This organic matter does double duty by loosening clay-heavy Texas soils while creating tiny spaces that hold water where plant roots can actually reach it, rather than letting it puddle around the base.
Plant your pumpkins on raised mounds about 12 inches high and 2 to 3 feet across. These mounds naturally slope water away from the developing fruit, which prevents the rot that kills pumpkins during their growth phase. If your soil drains particularly poorly, skip the mounds and build raised beds instead—even 6 to 8 inches higher than ground level makes a real difference in keeping roots healthy through heavy rains.
Space Seeds and Thin Seedlings for Healthy Growth

Now that your mounds are ready, spacing matters more than you’d think—it’s the difference between a healthy patch and a tangled mess fighting for resources. Plant 2-3 seeds per mound, then thin to the strongest 2 plants once they sprout within a week.
Smaller varieties need 8-10 feet between hills to give vines room without overcrowding their neighbors. Giant pumpkins demand at least 20 feet since their vines sprawl beyond 10 feet with ease. This spacing works because it improves air circulation around leaves and reduces moisture buildup that invites disease and fungal problems.
Think of spacing as giving each plant its own territory. When you thin seedlings early, you’re directing energy toward robust growth rather than splitting resources among weaker competitors. One strong plant will always outperform two plants fighting for the same nutrients and water. This simple step separates patches that produce healthy fruit from ones that disappoint come harvest time.
Water and Fertilize Pumpkins Through Development

Pumpkins need about 25-30 inches of water spread across the entire growing season to reach their full potential. The best approach is using drip irrigation or soaker hoses, which deliver water gradually and let you stay in control of moisture levels. Water deeply whenever the soil starts to feel a bit dry to the touch, then allow it to drain naturally—this encourages roots to grow down searching for moisture rather than staying shallow.
The real action happens during fruit development and maturation, so don’t hold back on watering during these weeks. Overhead watering on the leaves creates problems like powdery mildew and other fungal diseases, so aim water at the soil instead. Mulch around your plants helps keep foliage dry while also regulating soil moisture and temperature throughout the season.
For feeding your pumpkins, apply a high-nitrogen fertilizer about two weeks after the seeds germinate to support early vine growth. Reapply fertilizer monthly through harvest to keep fueling both the vines and developing fruit. Once your pumpkins turn orange and the vines start looking tired, ease back on watering gradually. Stop watering entirely about a week before harvest—this helps the skin harden and improves how well they store afterward.


