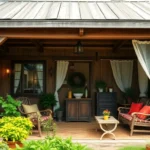
We’ve all watched our kids stare longingly out the window while their energy builds up like a pressure cooker. Creating the perfect garden play area isn’t just about keeping them entertained – it’s about giving them a space where imagination runs wild and childhood memories are made.
Your backyard holds incredible potential to become an adventure playground that’ll have your children racing outside instead of reaching for screens. From simple DIY projects that won’t expensive to creative installations that transform unused corners into magical play zones we’re here to help you unlock your garden’s hidden possibilities.
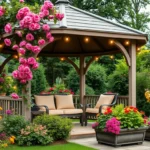
Whether you’re working with a compact patio or sprawling lawn we’ll show you how to design a play area that grows with your family and enhances your outdoor living experience. Get ready to discover budget-friendly ideas that’ll turn your garden into the neighborhood’s favorite destination.
Create a Dedicated Sandbox Area for Endless Digging Fun
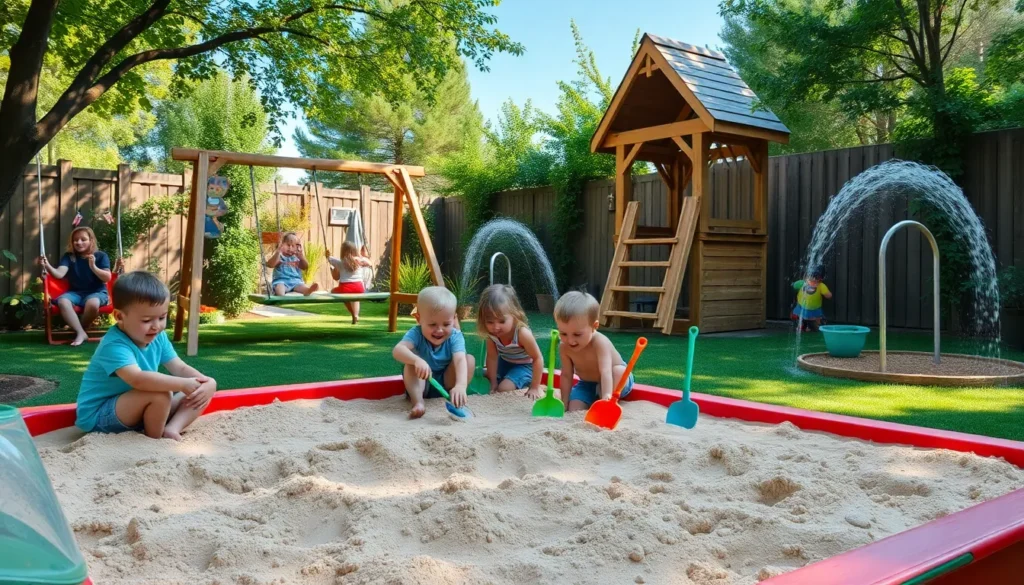
Sandbox play areas rank among the most beloved outdoor features for children of all ages. We’ve found that sandboxes provide countless hours of creative entertainment while developing fine motor skills and imaginative thinking.
Choose the Right Location and Size
Location determines the success of your sandbox installation in the garden play area. We recommend selecting a spot that receives partial shade during peak afternoon hours to keep sand comfortable for extended play sessions. Distance from trees prevents falling leaves and debris from contaminating the play surface regularly.
Size considerations depend on the number of children who’ll use the space simultaneously. A 4×4 foot sandbox accommodates two toddlers comfortably while an 8×8 foot area works better for multiple children or older kids. We suggest keeping the depth between 12 to 18 inches for optimal digging experiences without creating safety hazards.
Drainage becomes crucial for maintaining clean sand throughout different weather conditions. We position sandboxes on slightly elevated ground or install a gravel base underneath to prevent water accumulation. Accessibility from the house allows easy supervision while children engage in independent play activities.
Select Safe Sand Materials
Play sand differs significantly from construction sand in terms of safety and texture quality. We always choose washed play sand that’s been screened for harmful particles and meets safety standards for children’s use. This specialized sand feels softer against skin and won’t cause irritation during extended play periods.
Quality indicators include fine grain consistency and dust free composition when purchasing sandbox sand. We avoid beach sand or sandbox sand containing silica dust which can pose respiratory risks when children play actively. River sand and manufactured play sand offer excellent alternatives that maintain their texture through multiple seasons.
Storage considerations help maintain sand cleanliness between play sessions effectively. We recommend covering the sandbox with fitted lids or tarps to prevent contamination from animals and weather exposure. Regular sand replacement every 1 to 2 years ensures continued safety and optimal play conditions.
Add Creative Sandbox Accessories
Digging tools transform basic sand play into elaborate construction projects and imaginative adventures. We stock sandboxes with various sized shovels, buckets, rakes, and molds to encourage different types of creative expression. Kitchen utensils like measuring cups and funnels add educational elements to sandbox activities.
Water features enhance sand consistency for better building and molding capabilities during play. We install simple spigots or provide watering cans nearby so children can create the perfect sand mixture independently. Spray bottles work well for younger children who need assistance controlling water amounts.
Storage answers keep sandbox accessories organized and readily available for spontaneous play sessions. We build simple wooden boxes with hinged lids or use weatherproof containers that double as seating around the sandbox perimeter. Pegboards mounted on nearby fences provide convenient hanging storage for larger tools and equipment.
Build a Swing Set for Classic Outdoor Entertainment

Swing sets represent one of the most timeless and beloved additions we can make to our garden play areas. They provide hours of entertainment while helping children develop balance, coordination, and strength through natural play movements.
Consider Different Swing Types
Traditional swings offer the classic swinging experience that children have enjoyed for generations. These standard flat seat swings work well for kids of all ages and provide a familiar play experience that encourages solo or social play.
Rope swings create an adventurous playground element that challenges children’s grip strength and coordination. We recommend using thick, weather-resistant rope attached to sturdy tree branches or swing set frames for optimal safety and durability.
Disk swings provide a unique spinning and swinging combination that adds variety to traditional play patterns. These round platform swings allow multiple children to play together while developing core strength and spatial awareness.
Ensure Proper Safety Clearances
Six feet of clearance should surround swing sets on all sides to prevent collisions with structures, fences, or other playground equipment. This safety zone allows children to swing freely without risk of injury from nearby obstacles.
Fall zones require additional consideration beyond the basic clearance measurements. We need to account for the full arc of swing movement, which typically extends two times the height of the swing set in both directions.
Overhead clearance must provide at least 24 feet of open space above the swing set to accommodate the full range of motion. Tree branches, power lines, or structures within this zone pose serious safety hazards that we must address before installation.
Add Ground Protection Materials
Mulch serves as an excellent impact-absorbing surface material that we can easily maintain and replace over time. Wood chips or shredded bark mulch should extend 6 feet beyond the swing set perimeter and maintain a depth of 9-12 inches for optimal protection.
Rubber chips provide superior impact absorption compared to organic materials and resist decomposition from weather exposure. These recycled rubber pieces offer consistent protection levels and require less frequent replacement than traditional mulch options.
Sand creates an affordable ground protection option that children enjoy for additional play opportunities. We recommend maintaining a 12-inch depth of clean play sand within the safety zone, though regular maintenance prevents contamination from leaves and debris.
Design a Natural Climbing Structure Using Trees and Logs

Natural climbing structures transform ordinary gardens into adventure zones that challenge children physically while connecting them with nature. We’ll explore how existing trees and fallen logs can become the foundation for exciting play features that encourage active outdoor play.
Incorporate Existing Trees Safely
Tree swings create timeless play experiences that we can install using sturdy branches capable of supporting weight safely. We recommend consulting arborists to assess branch strength before installing any swing hardware, ensuring the tree remains healthy while providing secure attachment points.
Birds nest platforms offer elevated play spaces that we can construct around tree trunks using weatherproof materials. These circular or square platforms give children their own special hideaway while maintaining the tree’s natural growth patterns. We position these platforms at safe heights, typically 3 to 4 feet from the ground, making them accessible through small ladders or rope climbing aids.
Safety inspections become essential when we incorporate living trees into play structures, as branches and bark conditions change seasonally. We check all hardware connections monthly and remove any loose or damaged components immediately to prevent accidents.
Create Log Balance Beams
Log balance walks challenge children’s coordination skills when we arrange logs of different widths and lengths across the play area. We select logs ranging from 6 inches to 12 inches in diameter, creating progressive difficulty levels that grow with children’s abilities. These natural balance beams work best when we secure them firmly to prevent rolling or shifting during use.
Nature walks emerge when we arrange logs in winding paths that encourage exploration throughout the garden space. We create interesting patterns by varying log heights from ground level to 6 inches elevated, adding complexity without compromising safety. Small gaps between logs allow for stepping stone challenges that develop spatial awareness.
Ground preparation beneath log features requires level surfaces and proper drainage to prevent water accumulation. We recommend placing logs on compacted soil or sand bases, ensuring stability while allowing natural weathering processes to occur safely.
Build Rope Climbing Elements
Rope ladders suspended between trees or sturdy posts create vertical climbing challenges that we can adjust for different skill levels. We use marine grade rope with minimum 1/2 inch diameter, ensuring adequate grip strength while resisting weather damage. These climbing features work best when we space rungs 12 to 15 inches apart, accommodating various ages and abilities.
Net climbs constructed from heavy duty rope create three dimensional climbing experiences that we can customize for available space. We design these rope webs to span between multiple anchor points, creating geometric patterns that challenge different muscle groups. The rope intersections require secure knotting techniques that we inspect regularly for wear and loosening.
Installation height for rope climbing elements should never exceed 8 feet to maintain safe fall distances, and we always provide adequate ground cushioning beneath these features. We recommend installing rope elements over soft surfaces like mulch, sand, or rubber matting to minimize injury risks during inevitable tumbles.
Install a Trampoline for High-Energy Bouncing Activities

Trampolines provide an excellent outlet for children’s boundless energy while developing balance and coordination skills. We’ve found that proper installation creates a safe bouncing environment that becomes the centerpiece of any garden play area.
Select the Appropriate Size
Choosing a trampoline that fits comfortably in the garden area ensures adequate safety clearance around the perimeter. We recommend measuring your available space first, then selecting a trampoline size that allows at least 6 feet of clearance on all sides for safe bouncing activities.
Small trampolines measuring 8 to 10 feet work perfectly for compact gardens and younger children under age 8. Medium options ranging from 12 to 14 feet accommodate multiple children and provide more bouncing space for active play sessions. Large trampolines spanning 15 to 17 feet offer maximum jumping area but require spacious gardens with ample clearance zones.
Consider your children’s ages and the number of simultaneous users when making size decisions. We’ve observed that families with multiple children benefit from larger trampolines that accommodate group play while maintaining safety standards.
Plan for Safety Net Installation
Installing a safety net prevents falls and injuries during bouncing activities, making it an essential trampoline accessory. We strongly recommend choosing trampolines that include safety nets or purchasing compatible enclosure systems separately.
Safety nets should extend above the jumping surface by at least 6 feet to contain bouncing children effectively. Look for nets made from UV-resistant materials that won’t deteriorate under sun exposure. Quality enclosure systems feature curved poles that bend away from the jumping area, reducing impact risks if children contact the frame.
Proper net installation requires securing all connection points according to manufacturer specifications. We suggest checking net tension regularly and replacing worn components immediately to maintain optimal safety protection throughout the trampoline’s lifespan.
Choose the Best Ground Preparation
Ensuring the ground is level, firm, and clear of obstacles creates a stable foundation for safe trampoline installation. We recommend removing rocks, sticks, and debris from the installation area before positioning the trampoline frame.
Level ground prevents uneven stress on the trampoline frame and reduces tipping risks during use. Use a level tool to check the surface, adding or removing soil as needed to achieve uniformity. Firm ground provides adequate support without creating soft spots that might cause frame settling over time.
Clear the area of overhanging branches, garden structures, and other obstacles that could interfere with bouncing activities. We suggest maintaining a clear vertical space of at least 24 feet above the trampoline to accommodate high bouncing without obstruction risks.
Construct a Playhouse or Fort for Imaginative Adventures

Building a playhouse or fort creates the perfect centerpiece for creative play and role-playing adventures in your garden. We’ll help you design structures that serve as imaginative havens while maintaining safety and durability.
Design Age-Appropriate Structures
Designing structures that match children’s developmental stages ensures both safety and engagement. Younger children thrive with low platforms, small slides, and simple climbing elements that build confidence without overwhelming them. We recommend keeping structures under 4 feet in height for toddlers and preschoolers.
Older children benefit from more challenging features like climbing walls, cargo nets, or treehouses built around existing trees. These elements encourage physical development while providing exciting adventure opportunities. Consider incorporating multiple levels and varied difficulty zones to accommodate different age groups simultaneously.
Height and complexity must align with the intended users to prevent accidents and maximize enjoyment. We suggest consulting local playground safety guidelines when determining appropriate dimensions for each age bracket.
Use Weather-Resistant Materials
Selecting durable materials protects your investment and ensures long-term safety for outdoor play structures. Treated wood, metal, and high-quality plastics withstand various weather conditions without frequent maintenance or replacement needs.
Cedar shingles offer natural weather resistance while providing attractive aesthetic appeal that blends with garden environments. We’ve found that salvaged windows can add character to playhouses while maintaining structural integrity when properly sealed and installed.
Metal components like galvanized steel hardware prevent rust and corrosion that could compromise structural safety. These materials help structures maintain their appearance and functionality through seasons of rain, snow, and intense sunlight exposure.
Include Interactive Features
Interactive elements transform basic structures into captivating play environments that stimulate creativity and physical activity. Playhouse kitchens allow children to engage in pretend cooking adventures while developing social skills through role-playing scenarios.
Water play areas, low balance beams, and DIY obstacle courses with stepping stones and tunnels create diverse play opportunities within the same structure. We recommend incorporating cargo nets between trees or woodland pump tracks to encourage both physical exercise and imaginative exploration.
These features can be easily customized using common materials and tools, making them accessible for most DIY skill levels. Consider seasonal additions like chalkboard walls or garden plots that children can tend themselves.
Establish a Water Play Zone for Summer Cooling

Water play areas provide the perfect solution for keeping children cool and engaged during hot summer days. These installations transform ordinary garden spaces into refreshing entertainment zones that combine physical activity with sensory exploration.
Set Up Sprinkler Systems
DIY sprinkler systems offer an affordable way to create instant water fun in any garden space. Converting a plastic bottle into a homemade sprinkler takes just minutes and provides hours of cooling entertainment for kids of all ages.
Sprinkler dance contests encourage children to move and groove while staying cool during summer heat waves. Setting up multiple sprinkler zones allows for creative choreography sessions where kids can express themselves through movement while enjoying refreshing water spray.
Portable sprinkler attachments connect easily to standard garden hoses and create adjustable water patterns for different play preferences. These systems work particularly well for families who want flexibility in their water play setup without permanent installations.
Create Splash Pad Areas
Homemade slip and slide installations bring water park excitement directly to your backyard using simple plastic sheeting and stakes. This DIY approach creates thrilling sliding experiences that rival commercial water attractions at a fraction of the cost.
Water gun target practice combines skill development with cooling water play by setting up various targets throughout the garden area. Children enhance their hand eye coordination while staying refreshed during active outdoor play sessions.
Nature soup stations encourage sensory exploration by providing natural materials like rocks, twigs, leaves, and flowers for mixing with water. These setups stimulate creativity and scientific thinking as children experiment with different combinations and textures.
Pouring stations equipped with measuring cups and pitchers help develop fine motor skills while providing endless water play opportunities. These educational setups teach basic math concepts through hands on learning experiences that feel like pure fun.
Install Kiddie Pool Spaces
Kiddie pools serve as versatile water play foundations that accommodate various activities beyond simple splashing and swimming. These contained water areas provide safe environments for younger children to explore water play under close supervision.
Water balloon activities transform ordinary kiddie pools into exciting game zones where children can enjoy tosses, catches, and gentle water fights. These pools contain the mess while maximizing the fun factor for birthday parties and summer gatherings.
Water balloon yo yos create unique entertainment experiences that combine traditional toys with refreshing water elements. This innovative approach keeps children engaged for extended periods while providing continuous cooling relief during hot weather.
Pool based treasure hunts encourage diving and searching skills as children look for hidden objects in shallow water environments. These activities develop confidence in water while providing structured entertainment that parents can easily supervise.
Develop a Sports and Games Area for Active Play

We’ll transform your garden into an active playground by incorporating sports courts and game zones that encourage physical activity year round. This dedicated space provides older children and teens with captivating alternatives to screen time while promoting healthy competition and skill development.
Design Multi-Sport Court Surfaces
We recommend using versatile materials that accommodate multiple sports on a single surface. Concrete or asphalt provides the most durable foundation for basketball, tennis, and badminton courts. Paint different colored zones and court markings to designate exact game boundaries and create visual interest.
Modular sports tiles offer another excellent option for multi-sport surfaces. These interlocking tiles provide cushioning for joints while delivering consistent ball bounce across different games. Weather resistant materials ensure your court remains playable through various seasons with minimal maintenance requirements.
Size your court based on available space and intended activities. A 20×30 foot area works well for half court basketball and doubles as a badminton court. Smaller 15×25 foot spaces can accommodate modified games while still providing ample room for active play.
Install Basketball Hoops
We suggest choosing between portable and permanent basketball hoop installations based on your garden layout. Portable hoops offer flexibility to move the playing area as needed while permanent installations provide superior stability for serious players.
Adjustable height mechanisms make basketball hoops suitable for children of all ages. Start with lower settings for younger players and gradually increase the height as skills develop. Most quality systems adjust from 7.5 to 10 feet to accommodate different skill levels.
Position the hoop at least 6 feet from fences, trees, or structures to ensure safe play zones. Adequate lighting extends playing time into evening hours during shorter winter days. Consider installing outdoor LED fixtures to illuminate the court area effectively.
Create Lawn Game Spaces
We recommend establishing designated areas for classic lawn games that bring families together outdoors. Bocce ball requires a level 12×3 foot court surface that we can create using sand or fine gravel for authentic gameplay. Mark boundaries with industry timber or decorative stones for a polished appearance.
Croquet benefits from well maintained grass areas approximately 35×28 feet for regulation play. Smaller modified versions work perfectly in compact gardens while still providing competitive fun. Install permanent wickets in strategic locations to maintain consistent game setup.
Mini golf courses add creative entertainment value to garden play areas. Design custom holes using industry features like hills, curves, and obstacles to create unique challenges. PVC pipes, wooden ramps, and decorative elements help construct memorable putting experiences that rival commercial courses.
Plant a Sensory Garden for Educational Exploration

Building upon our active play zones, we can create educational opportunities that engage children through nature exploration. Sensory gardens transform ordinary garden spaces into interactive learning environments where children discover the natural industry through touch, smell, sight, and sound.
Choose Child-Safe Plants
Safety becomes our primary concern when selecting plants for children’s exploration areas. We recommend non-toxic varieties that encourage hands-on interaction without posing health risks to curious young explorers.
Sunflowers provide towering visual interest while remaining completely safe for children to touch and examine. Their large seed heads create natural counting opportunities and bird-watching experiences throughout the growing season.
Bleeding heart (Dicentra spectabilis) offers unique heart-shaped flowers that fascinate children with their distinctive appearance. Kids love discovering the “heart” shape when they gently squeeze the blooms, creating memorable garden moments.
Gayfeather (Liatris spicata) produces tall purple spikes that attract butterflies and provide excellent examples of plant structure. Children can safely observe pollinators while learning about garden ecosystems and wildlife interactions.
Avoid plants with sharp spines, thorns, or toxic properties that could harm exploring hands. We always research plant safety before introducing new varieties to ensure worry-free garden exploration for families.
Include Different Textures and Scents
Textural variety creates captivating sensory experiences that develop children’s observational skills and natural curiosity. We incorporate multiple surface types to stimulate tactile exploration throughout the garden space.
Smooth stones positioned along pathways provide satisfying textures for small hands to discover. Children naturally gravitate toward these surfaces, creating opportunities for sorting games and creative play activities.
Fuzzy leaves from plants like lamb’s ear offer soft, velvety textures that children love to stroke repeatedly. These plants demonstrate how nature creates different surface materials for various environmental adaptations.
Prickly seed pods introduce children to defensive plant structures while remaining safe to handle carefully. We select varieties with interesting but non-harmful textures that teach respect for nature’s diversity.
Fragrant herbs like lavender and rosemary enhance the olfactory experience while providing educational opportunities about plant uses. Children learn to identify plants through scent recognition, developing important observational skills for future gardening interests.
Add Interactive Garden Elements
Movement and sound elements transform static garden spaces into ever-changing environments that capture children’s attention and imagination. We incorporate features that respond to natural forces and human interaction.
Wind chimes create musical opportunities that teach children about air movement and sound production. Different materials produce varying tones, allowing kids to understand how natural forces create garden music.
Water features provide soothing sounds while demonstrating water cycles and encouraging wildlife visits. Simple fountains or dripper systems create focal points that maintain children’s interest throughout different seasons.
Bird feeders and birdbaths attract local wildlife, turning gardens into natural classrooms for animal observation. Children develop patience and observation skills while learning about local ecosystems and wildlife behavior patterns.
Balloon flowers (Platycodon grandifloras) offer unique interactive experiences when children gently squeeze the buds to create popping sounds. This natural entertainment teaches cause and effect relationships while providing endless garden amusement.
Pathway designs using hexagonal and triangular patterns create visually captivating walkways that encourage exploration. Different shapes and materials help children develop spatial awareness while handling through sensory garden areas.
Build Adventure Pathways and Obstacle Courses

Adventure pathways transform ordinary garden spaces into exciting exploration zones that challenge children physically while sparking their imagination. We’ll show you how to create winding trails and natural obstacle courses that blend seamlessly into your garden industry.
Create Stepping Stone Trails
Tree stump stepping stones offer the perfect balance challenge for developing coordination skills. We recommend arranging flat natural rocks or reclaimed tree stumps in a meandering pattern through garden borders or woodland areas. These trails provide essential sensory feedback while encouraging children to navigate carefully from stone to stone.
Natural rock arrangements create visual interest while serving as functional play elements. Position larger stones about 12-18 inches apart for younger children and increase spacing for older kids who can handle bigger jumps. The irregular spacing keeps children engaged and prevents predictable movement patterns.
Woodland integration allows stepping stone trails to weave naturally through existing plantings. We suggest incorporating these pathways around shrubs and flower beds to create discovery routes that change with the seasons. This approach maximizes garden space while providing year-round exploration opportunities.
Design Balance Challenge Routes
Reclaimed wood balance beams set low to the ground provide safe stability training for young adventurers. We recommend using 2×6 or 2×8 lumber pieces mounted 6-12 inches above ground level to create challenging yet secure walking surfaces. These beams can connect different play areas while serving as natural pathway elements.
Tree stump arrangements offer varying height challenges that grow with children’s abilities. Position stumps of different sizes in sequence to create progressive difficulty levels. We suggest securing larger stumps firmly in the ground and sanding rough surfaces to prevent splinters while maintaining natural texture.
Sculptural steel beam installations provide modern design elements that complement contemporary garden styles. Low-profile metal beams offer weather resistance and durability while creating sleek balance challenges. These features work particularly well in minimalist garden designs where natural materials might clash with existing hardscaping.
Install Tunnel and Crawling Spaces
Willow arch tunnels create living play structures that evolve with your garden’s growth. We recommend planting flexible willow branches in parallel rows and weaving them together as they grow to form natural crawling spaces. These structures require patience but reward families with unique, ever-changing play elements.
Simple wooden frame tunnels covered with weather-resistant fabric offer immediate crawling adventures. Build rectangular frames using 2×4 lumber and stretch outdoor canvas or vinyl material over the top. We suggest making these tunnels 3-4 feet high and 6-8 feet long to accommodate children of various ages.
Natural shrub tunnels use existing or planned landscaping to create secret passageways. Dense plantings like boxwood or privet can be trained to form archways over garden paths. These living tunnels provide shade and mystery while requiring minimal construction beyond strategic pruning and plant placement.
Set Up Outdoor Art and Craft Stations

Transitioning from physical activities to creative expression, we can establish dedicated art areas that inspire artistic exploration throughout the year. These stations provide children with opportunities to develop fine motor skills while captivating their imagination in natural settings.
Install Weather-Proof Art Easels
Weather-proof art easels transform our garden into an outdoor art studio where creativity flourishes year-round. We can choose between DIY options using plexiglass for durability against outdoor elements or purchased easels that offer convenience and proven weather resistance. Custom-built easels allow us to adjust height specifications for different age groups, while commercial options provide tested stability in various weather conditions.
DIY installations using plexiglass create versatile surfaces that withstand rain and sun exposure without warping or deteriorating. We should secure these easels to prevent tipping during windy conditions and position them where natural light provides optimal illumination. Purchased models typically feature aluminum frames and weather-resistant surfaces that require minimal maintenance while offering adjustable heights for growing children.
Storage answers become essential for art supplies, so we can install waterproof containers nearby to hold weather-resistant paints, markers, and paper. Regular maintenance includes wiping down surfaces and checking stability to ensure safe creative sessions throughout the seasons.
Create Mud Kitchen Areas
Mud kitchen areas encourage sensory play using recycled materials that transform discarded items into captivating play stations. We can repurpose old pots, pans, and wooden utensils to create realistic cooking environments where children explore textures and practice imaginative scenarios. These installations require minimal investment while providing maximum entertainment value through hands-on exploration.
Safety considerations include selecting a location with proper drainage to prevent standing water that could create slip hazards. We should ensure the designated area remains accessible for supervision while providing enough space for multiple children to play simultaneously. Smooth edges on all recycled materials prevent cuts and injuries during enthusiastic play sessions.
Water access enhances the mud kitchen experience, so we can position these areas near garden hoses or install simple water dispensers for controlled access. Regular cleaning of utensils and periodic soil refreshing maintain hygienic play conditions while keeping the area appealing for continued use.
Design Chalk Drawing Spaces
Chalk drawing spaces provide dedicated areas for artistic expression using large patios or smooth driveway sections that accommodate various creative projects. We should select surfaces that offer optimal drawing conditions through proper preparation, ensuring they remain clean and smooth for easy chalk application. These designated areas prevent conflicts over space while encouraging collaborative art projects among children.
Surface preparation involves regular cleaning to remove debris and weathering that could interfere with chalk adherence. We can enhance these spaces by adding storage answers for chalk supplies and spray bottles for easy cleanup after creative sessions. Covered areas extend usability during light rain while providing shade during sunny days.
Creative enhancement includes introducing stencils, measuring tools, and color organization systems that inspire more complex artistic projects. We should encourage temporary installations like chalk obstacle courses and hopscotch grids that combine physical activity with artistic expression, maximizing the educational value of these creative spaces.
Conclusion
Creating an captivating garden play area doesn’t have to expensive or require professional expertise. With these DIY-friendly ideas we’ve shared you can transform any outdoor space into a wonderland that keeps children active entertained and connected with nature.
The key is starting small and building gradually based on your family’s interests and available space. Whether you choose a simple sandbox or an elaborate obstacle course each element contributes to your children’s physical development creativity and love for outdoor play.
Remember that the most successful play areas grow and evolve with your children’s changing needs. By combining different zones and activities you’ll create a ever-changing outdoor environment that provides years of joy and countless adventures right in your own backyard.
Frequently Asked Questions
What are the benefits of creating a garden play area for children?
Garden play areas keep children entertained while fostering imagination and creating lasting memories. They encourage outdoor play instead of screen time, promote physical development, and can transform any backyard into an adventure playground. These spaces enhance family outdoor living experiences and provide budget-friendly entertainment solutions for children of all ages.
How do I choose the right location for a sandbox?
Select a location with partial shade and elevated ground for proper drainage. Ensure the area is visible from your house for supervision and away from areas where pets frequent. The location should be easily accessible but not interfere with other garden activities or foot traffic patterns.
What type of sand is safest for children’s play?
Use washed play sand that meets safety standards and is specifically designed for children’s play areas. Avoid construction sand, which may contain harmful particles or chemicals. Look for sand labeled as “play sand” from reputable suppliers, and ensure it’s free from dust and contaminants.
How much clearance space do swing sets need for safety?
Swing sets require at least 6 feet of clearance on all sides, with additional space in the swing’s path of travel. The fall zone should extend twice the height of the swing set in front and back. This ensures children have adequate space to swing safely without colliding with obstacles.
What ground protection materials work best under play equipment?
Mulch, rubber chips, and sand are excellent ground protection options. Mulch is cost-effective and natural but requires regular replacement. Rubber chips provide superior impact absorption and longevity. Sand offers good drainage and cushioning but needs regular maintenance to prevent compaction and contamination.
How can I safely incorporate existing trees into play structures?
Consult a certified arborist before installing any tree-based play equipment. Ensure trees are healthy with sturdy branches that can support weight. Conduct regular safety inspections for signs of disease or damage. Use proper hardware designed for tree installations and avoid damaging the bark or root system.
What size trampoline should I choose for my garden?
Select a trampoline size based on available space and number of users. Ensure at least 6 feet of clearance around the entire perimeter. Smaller trampolines (8-10 feet) work for compact spaces and younger children, while larger ones (12-15 feet) accommodate multiple users and provide more bouncing space.
What materials are best for building outdoor playhouses?
Use weather-resistant materials like cedar, pressure-treated lumber, or composite materials for durability. Ensure all materials are child-safe and free from toxic chemicals. Consider modular designs that can grow with your children and incorporate features like windows, doors, and interactive elements for enhanced play value.
How can I create an affordable DIY sprinkler system?
Use PVC pipes with drilled holes, soaker hoses, or simple sprinkler attachments connected to garden hoses. Create adjustable water patterns using different nozzle types. Consider timer systems for automatic operation and ensure proper water pressure for optimal performance while maintaining water conservation.
What plants are safe for children’s sensory gardens?
Choose non-toxic plants like sunflowers, marigolds, lavender, and mint that offer different textures and scents. Avoid plants with thorns, poisonous berries, or toxic leaves. Include herbs like basil and rosemary for aromatic experiences, and ensure all plants are clearly identified and researched for child safety.
How do I maintain outdoor art and craft stations?
Use weather-resistant materials and provide covered storage for supplies. Clean surfaces regularly and check for wear or damage. Rotate art materials seasonally and ensure chalk areas are properly sealed. Create drainage systems for water-based activities and establish rules for equipment care and cleanup.