Growing roses from cuttings might seem like a gardening challenge reserved for experts, but we’re here to show you it’s surprisingly achievable for beginners too. This cost-effective propagation method lets you multiply your favorite rose varieties without spending a fortune at the nursery.
We’ve discovered that rose cuttings offer several advantages over purchasing new plants. You’ll preserve the exact characteristics of your beloved roses while creating identical copies that’ll bloom just like their parent plants. Plus, there’s something deeply satisfying about nurturing a small cutting into a thriving rose bush.
The process requires minimal equipment and fits perfectly into any gardener’s budget. With the right timing and techniques, you’ll watch your cuttings develop roots and transform into healthy plants within weeks. We’ll guide you through each step to ensure your success with this rewarding gardening skill.
Understanding the Basics of Growing Roses From Cuttings
Growing roses from cuttings builds upon the foundational knowledge we’ve established about this rewarding propagation method. Let’s dive deeper into the essential concepts that’ll guide your success.
What Are Rose Cuttings and Why Use Them
Rose cuttings are stem segments taken from healthy parent plants that develop their own root systems when placed in suitable growing conditions. We select these pieces from current year’s growth, typically measuring 6 to 8 inches in length and containing several leaf nodes where roots will eventually emerge.
Creating new plants through cuttings offers us complete genetic consistency with the parent rose. Unlike growing roses from seeds, which produces unpredictable variations, cuttings guarantee we’ll receive identical blooms, fragrance, and growth habits as our original plant.
Softwood cuttings work exceptionally well for most rose varieties, particularly when taken from the flexible new growth that bends easily without snapping. Hardwood cuttings provide another option during dormant seasons, though they require more patience as root development occurs more slowly.
Benefits of Propagating Roses From Cuttings
Cost savings represent one of our most compelling reasons for choosing rose cuttings over purchasing nursery plants. We can create dozens of new roses from a single parent plant, eliminating the expense of buying individual specimens that often cost $15 to $30 each.
Preservation of cherished varieties becomes possible when we propagate roses that may be discontinued or difficult to find commercially. Heritage roses and unique cultivars in our gardens can continue thriving through successive generations of cuttings.
Disease resistance transfers directly from parent to offspring when we select healthy, vigorous stems for propagation. Roses that demonstrate strong immunity to common ailments like black spot or powdery mildew will pass these traits to their cutting grown descendants.
Root system development occurs naturally without grafting complications that sometimes plague store bought roses. Our cutting grown roses develop their own roots rather than relying on different rootstock, potentially improving cold hardiness and reducing sucker growth issues.
Best Time of Year for Taking Rose Cuttings
Late spring through early summer provides optimal conditions for softwood rose cuttings, typically from May through July in most temperate climates. We target this period because roses are actively growing and stems contain higher hormone levels that promote rapid root formation.
Morning hours offer the best timing for harvesting cuttings when plant tissues are fully hydrated from overnight moisture. We avoid taking cuttings during hot afternoon periods when stems may be stressed from heat and lower water content.
Post bloom periods work exceptionally well since roses have completed their energy intensive flowering cycle and can redirect resources toward root development. We often find success with cuttings taken immediately after deadheading spent flowers.
Fall cutting collection suits gardeners in mild winter climates where freezing temperatures won’t damage newly rooted plants. September through October allows sufficient time for root establishment before dormancy, though success rates may be lower than spring propagation efforts.
Selecting the Right Rose Varieties for Cutting Propagation

Choosing the right rose variety significantly impacts your success rate when propagating from cuttings. We’ve found that non-grafted roses typically offer the best results for home gardeners starting their cutting propagation journey.
Easiest Rose Types to Grow From Cuttings
Shrub roses top our list for beginner-friendly propagation due to their naturally robust nature and strong rooting capabilities. These hardy varieties adapt well to cutting propagation and develop strong root systems quickly.
Climbers excel at propagation because of their vigorous growth habits and natural tendency to root along their stems. Popular climbing varieties like Leander demonstrate excellent success rates when grown from cuttings.
Floribundas provide reliable results for cutting propagation since they combine the best traits of hybrid teas with cluster-blooming characteristics. These roses typically root well and establish themselves faster than many other types.
Miniature roses offer advantages for cutting propagation due to their compact size and manageable growth patterns. Their smaller scale makes them perfect for indoor rooting setups and container growing.
Exact varieties that have proven successful include Hurdy Gurdy, OGR Yolande d’Aragon, Peppermint Twist, Leander, and Lullaby.
Roses That Are Difficult to Propagate From Cuttings
Grafted roses present the biggest challenge for cutting propagation because they consist of two different plant varieties joined together. The rootstock comes from one variety while the flowering portion comes from another, making it difficult to predict what type of plant you’ll actually grow.
Most hybrid tea roses fall into this category since they’re commonly sold as grafted plants in nurseries. When you take cuttings from grafted roses, you risk growing only the rootstock variety rather than the desired flowering rose.
Choosing Healthy Parent Plants
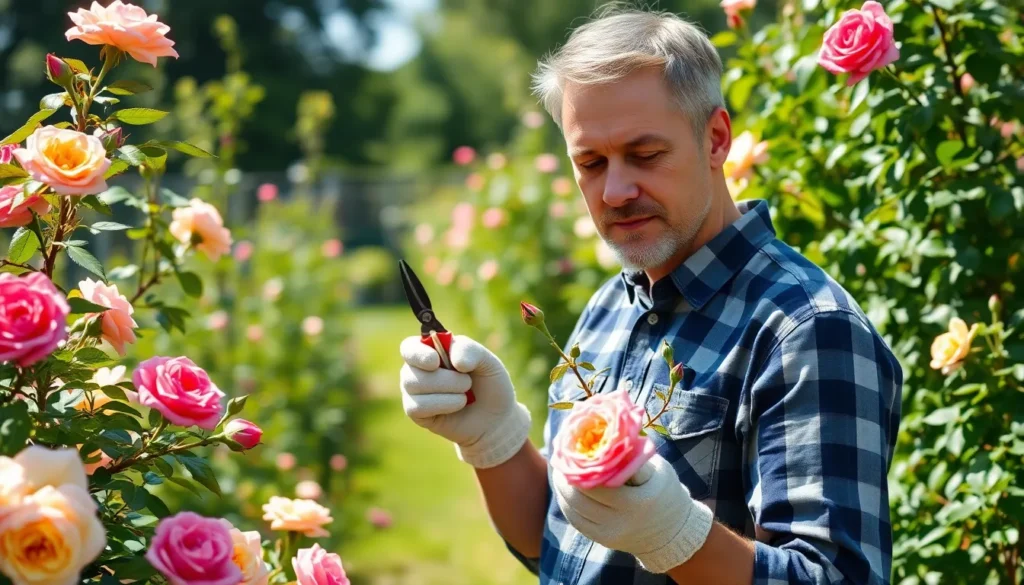
Strong, green stems that have recently finished blooming provide the best material for successful cutting propagation. We recommend selecting stems that show no signs of disease, pest damage, or stress from environmental factors.
Proper stem preparation involves cutting 4 to 8 inches of healthy growth with multiple nodes present along the length. Remove all but the top two sets of leaves to reduce moisture loss while maintaining enough foliage for photosynthesis.
Wounding the bottom of each cutting enhances rooting success by exposing more cambium layer to rooting hormone and encouraging faster root development. Make a small scrape or cut at the base of each stem before treating with rooting compounds.
Gathering Essential Tools and Materials for Rose Cutting Success

Having the right equipment makes the difference between successful propagation and disappointing failures. We’ll walk you through each essential item that transforms rose cutting from guesswork into reliable results.
Required Cutting Tools and Equipment
Sharp pruners are absolutely critical for creating clean cuts that prevent fungal infections from destroying your cuttings[4]. Clean cuts heal faster and provide better chances for root development than ragged tears that invite disease.
Quality gloves protect your hands from thorns while allowing you to work confidently around rose stems. Choose gloves that offer dexterity without sacrificing protection from sharp thorns.
Fresh water keeps cuttings hydrated during the preparation process and prevents wilting before you can get them into rooting medium. We recommend having a container of water ready before you start cutting.
Rooting Hormones and Growth Supplements
Rooting hormone powder like Hormex #8 significantly increases your success rate by stimulating root development at the cutting site[2][5]. These commercial products contain auxins that trigger the natural rooting process in plant tissue.
Liquid rooting compounds such as Dip n Grow offer an alternative application method that some gardeners find easier to use than powder formulations[2][5]. Both powder and liquid forms deliver similar results when applied correctly.
Misting systems provide consistent moisture without overwatering your cuttings during the rooting phase[2]. While optional, these systems reduce the daily maintenance required and help maintain optimal humidity levels.
Proper Potting Mix and Container Selection
A balanced potting mix of 50% potting soil and 50% perlite creates the ideal drainage conditions that rose cuttings need to develop roots without rotting[2]. This ratio prevents waterlogged conditions while maintaining adequate moisture retention.
Small individual pots work best for single cuttings, allowing you to monitor each cutting’s progress and transplant successful ones without disturbing others. Propagation trays serve well when you’re processing multiple cuttings simultaneously.
Drainage holes in containers are non-negotiable since excess water trapped around cutting bases leads to rot and failure. We always verify that our containers allow proper water drainage before planting any cuttings.
Taking Rose Cuttings the Right Way

Success with rose propagation starts with proper cutting techniques. We’ll guide you through each step to maximize your rooting success rates.
Identifying the Perfect Stem for Cutting
Select stems that are about 6 inches long with at least two sets of healthy leaves. Current season’s growth provides the best material for successful propagation since these stems have optimal hormone levels for root development.
Look for vigorous, healthy stems with strong green coloration. These stems indicate active growth and contain the energy reserves needed for root formation.
Avoid stems with flowers or developing buds. Flowering stems divert essential energy away from root development, significantly reducing your success rates.
Choose stems that feel firm and show no signs of disease or damage. Weak or compromised stems rarely develop strong root systems and often fail during the rooting process.
Making Clean, Angled Cuts
Cut just below a node where leaves meet the stem using sharp, clean pruning tools. Nodes contain concentrated growth hormones that stimulate root development at the cutting site.
Make your cut at a 45-degree angle to increase surface area for rooting. This angled approach provides more contact area with rooting medium and improves water uptake.
Ensure your cutting tools are sterilized before each use. Clean tools prevent disease transmission between plants and reduce the risk of cutting failure.
Take cuttings in late spring or early summer when new growth is readily available. This timing coincides with peak hormone levels that naturally promote root formation.
Preparing Cuttings for Rooting
Remove all but the top two sets of leaves to prevent excessive moisture loss. Fewer leaves reduce water stress while maintaining enough photosynthetic capacity for energy production.
Dip the cut end into rooting hormone powder such as Hormex #8 to enhance root development. Rooting hormones significantly improve success rates by stimulating faster, stronger root formation.
Plant cuttings about 2 inches deep in a moistened mix of potting soil and perlite using a 50/50 ratio. This mixture provides proper drainage and aeration while maintaining consistent moisture levels.
Water thoroughly to settle soil around the cuttings without creating waterlogged conditions. Proper moisture balance prevents both dehydration and root rot during the critical rooting period.
Maintain consistent humidity using misting systems when possible. Higher humidity levels reduce stress on cuttings while they develop their root systems over the typical 6 to 8 week rooting period.
Creating Optimal Growing Conditions for Rose Cuttings

After you’ve prepared and planted your rose cuttings, success depends on providing the right environmental conditions during the critical rooting phase.
Temperature and Humidity Requirements
Temperature control plays a crucial role in rose cutting success. We recommend maintaining a consistent temperature between 65°F to 75°F (18°C to 24°C) throughout the rooting period. Fluctuating temperatures can stress your cuttings and slow root development significantly.
Humidity levels need constant attention for optimal results. Keep your rose cuttings in a high humidity environment using a misting system or by covering the container with a clear plastic bag. This method creates a greenhouse effect that prevents moisture loss through the leaves while roots develop.
Monitor both factors daily to ensure consistency. Temperature swings beyond the recommended range can cause cutting failure, while low humidity leads to dehydration before roots can form properly.
Light Exposure Needs
Bright, indirect light provides the perfect balance for developing cuttings. Place your rose cuttings where they’ll receive plenty of illumination without direct sun exposure. Direct sunlight can overheat your cuttings and reduce rooting success rates dramatically.
Position containers near east or north facing windows for ideal conditions. These locations offer consistent light without the harsh afternoon sun that can damage tender new growth. Artificial grow lights work well too if natural lighting isn’t adequate.
Avoid placing cuttings in dark areas or full shade. While protection from direct sun is important, your cuttings still need sufficient light energy to support the root development process.
Watering Techniques for New Cuttings
Soil moisture requires careful balance throughout the rooting period. Ensure your potting medium stays consistently moist but never waterlogged, as soggy conditions lead to rot and cutting failure.
Water gently but thoroughly immediately after planting your cuttings. Use a fine spray or watering can with a rose attachment to avoid disturbing the delicate stems. The initial watering should saturate the entire rooting medium evenly.
Maintain steady moisture levels without overwatering during the 6 to 8 week rooting phase. Check soil moisture daily by inserting your finger into the potting mix. Water when the top inch feels slightly dry but the deeper layers remain moist.
Monitoring Root Development and Growth Progress

We’ll track our rose cuttings’ progress through careful observation and regular monitoring during the critical 6 to 8 week rooting period.
Signs of Successful Root Formation
New growth indicates successful rooting when we spot fresh leaves unfolding or tiny stems emerging from our cuttings. These visible signs typically appear after 6 to 8 weeks of consistent care and optimal growing conditions.
Resistance to gentle tugging provides another reliable indicator that roots have formed beneath the soil surface. When we lightly pull on the cutting and feel resistance, it means the developing root system has anchored the plant securely in the potting medium.
Healthy appearance manifests through vibrant green foliage and sturdy stem structure as the cutting establishes its independent root system. We’ll notice the cutting looks more robust and displays better color saturation compared to when we first planted it.
Troubleshooting Common Rooting Problems
Fungal rot develops when we use dull cutting tools or maintain poor hygiene during the propagation process. Sharp, clean pruners prevent this common issue by creating clean cuts that heal quickly and reducing disease transmission between plants.
Water stress occurs when moisture levels fluctuate too dramatically, either from underwatering or overwatering our cuttings. We’ll maintain consistent moisture without creating waterlogged conditions that lead to devastating root rot.
Yellowing leaves signal environmental stress or improper care conditions that need immediate attention. We’ll adjust humidity levels, lighting conditions, or watering frequency to address these warning signs before they compromise our cutting’s survival.
Timeline for Root Establishment
| Phase | Duration | Key Activities |
|---|---|---|
| Cutting Preparation | Day 1 | Take 5-9 inch cuttings with 3+ nodes |
| Initial Rooting | Weeks 1-3 | Maintain high humidity and consistent moisture |
| Root Development | Weeks 4-6 | Monitor for early growth signs |
| Established Roots | Weeks 6-8 | Prepare for transplanting |
Cutting preparation begins with selecting healthy stems measuring 5 to 9 inches long that contain at least three nodes for optimal rooting potential. We’ll complete this initial step during the ideal harvesting window in late spring through early summer.
Rooting development spans the crucial 6 to 8 week period when our cuttings focus their energy on establishing a strong root system. During this phase, we’ll maintain consistent environmental conditions and resist the urge to disturb the developing roots.
Transplanting readiness arrives once we observe multiple signs of successful root formation and the cutting demonstrates vigorous growth. We’ll carefully move our newly rooted roses into larger containers or permanent garden locations to continue their development into mature plants.
Transplanting Rooted Rose Cuttings Successfully

Once we’ve confirmed strong root development in our rose cuttings, we’re ready to begin the transplanting process that ensures their continued growth and eventual garden success.
When to Move Cuttings to Larger Pots
Timing becomes critical after 6 to 8 weeks when our rose cuttings develop well-established root systems that signal readiness for transplanting. We can verify this readiness by gently checking for white, healthy roots extending from the drainage holes or by carefully lifting a cutting to examine root development.
Moving cuttings to larger containers allows root systems to expand properly without becoming root-bound in their original small pots. We should select pots that are 2 to 3 inches larger in diameter than the current containers to provide adequate growing space.
Selecting the right potting medium remains important during this transition, so we continue using a well-draining mix similar to our original rooting medium. Fresh potting soil combined with perlite maintains the drainage properties our developing roses need.
Handling the transplant process requires gentle care to avoid damaging fragile new roots during the move. We water the cuttings thoroughly before transplanting and keep the root ball intact to minimize transplant shock.
Hardening Off Process
Gradual exposure to outdoor conditions over a full week prevents shock and helps our rooted cuttings adapt to environmental changes they’ll experience in the garden. We start this process by placing containers outside for just 2 to 3 hours during mild morning conditions.
Increasing outdoor time daily allows our rose cuttings to slowly acclimate to temperature fluctuations, wind, and direct sunlight. Each day we extend their outdoor exposure by an additional 2 to 3 hours until they can remain outside for full days.
Protecting from extreme weather during the hardening off period keeps our vulnerable cuttings safe from sudden temperature drops or intense afternoon sun. We bring them indoors during storms, high winds, or when temperatures drop below 50°F.
Monitoring for stress signs helps us adjust the hardening schedule if our cuttings show wilting, leaf drop, or other indicators of environmental stress. Slowing down the process ensures better adaptation than rushing through this critical phase.
Preparing for Garden Planting
Selecting the ideal planting location requires full sun exposure with at least 6 hours of direct sunlight daily and well-draining soil that won’t hold excess water around our rose roots. We test soil drainage by digging a hole and filling it with water to ensure it drains within 24 hours.
Preparing the planting site involves digging holes twice as wide as our root balls and mixing the existing soil with compost to improve both drainage and nutrition. We dig each hole to the same depth as our container to maintain proper planting levels.
Timing the final transplant works best during cooler morning or evening hours when temperatures are moderate and our roses face less immediate stress from heat. Spring and early fall provide optimal conditions for establishing newly transplanted roses.
Watering thoroughly after planting helps settle soil around the roots and eliminates air pockets that could dry out our transplants. We apply a 2 to 3 inch layer of mulch around each plant to retain moisture and regulate soil temperature while our roses establish in their new garden home.
Caring for Young Rose Plants After Transplanting

Once we’ve successfully transplanted our rooted rose cuttings, consistent care becomes essential for establishing strong, healthy plants that’ll thrive for years to come.
Fertilizing New Rose Plants
Wait four to six weeks after transplanting before introducing fertilizer to newly established rose plants. Young roots need time to settle into their new environment without the stress of nutrient overload.
Choose a balanced, slow-release fertilizer specifically formulated for roses when it’s time to begin feeding. These specialized fertilizers provide the right nutrient ratios that roses need for optimal growth and flowering.
Follow package instructions carefully to avoid over-fertilization, which can burn delicate root systems and damage young plants. We recommend starting with half the suggested amount and gradually increasing as plants mature.
Apply fertilizer around the base of each plant, keeping it several inches away from the stem to prevent root burn. Water thoroughly after application to help nutrients penetrate the soil.
Pruning and Shaping Techniques
Remove dead or weak stems first when pruning young rose plants to encourage healthy, vigorous growth. These unproductive branches drain energy from the plant without contributing to overall health.
Cut above outward-facing buds at a 45-degree angle to promote bushy growth and better air circulation. This technique directs new growth away from the center of the plant.
Shape the plant by selectively removing crossing or inward-growing branches that compete for space and light. Clean cuts heal faster and reduce the risk of disease entry points.
Sterilize pruning tools between plants using rubbing alcohol to prevent spreading diseases. Sharp, clean tools make precise cuts that heal quickly.
Protection From Pests and Diseases
Monitor regularly for common pests like aphids, spider mites, and Japanese beetles that can quickly damage young rose plants. Early detection makes treatment more effective and less invasive.
Use insecticidal soap or horticultural oil as needed for pest control, applying these treatments during cooler parts of the day to avoid leaf burn. These organic options are gentle on young plants while effectively controlling insects.
Water at the base of plants rather than overhead to prevent fungal diseases that thrive in wet foliage conditions. Drip irrigation or soaker hoses work well for this purpose.
Apply fungicides if diseases like powdery mildew or black spot appear, following label directions for application rates and timing. Prevention is easier than treatment, so maintain good air circulation around plants.
Remove diseased leaves promptly and dispose of them in the trash rather than composting to prevent disease spread. Clean up fallen leaves regularly to eliminate overwintering disease spores.
Conclusion
Growing roses from cuttings opens up endless possibilities for expanding our garden without very costly. We’ve covered everything from selecting the right varieties and timing our cuts to creating optimal growing conditions and nurturing young plants through their first year.
The journey from cutting to blooming rose typically takes 12-18 months but the reward of watching our propagated roses flourish makes every step worthwhile. With patience and consistent care we can successfully multiply our favorite varieties and share them with fellow gardeners.
Remember that each cutting represents a genetic clone of its parent plant preserving those special characteristics we love most. Whether we’re propagating heritage varieties or modern favorites this time-tested method connects us to generations of gardeners who’ve shared our passion for roses.
Frequently Asked Questions
Can beginners successfully grow roses from cuttings?
Yes, growing roses from cuttings is definitely achievable for beginners. While it requires some patience and proper technique, it’s not limited to expert gardeners. With the right tools, timing, and care, novice gardeners can successfully propagate their favorite rose varieties at home, making it a cost-effective way to expand their garden.
What are the main benefits of growing roses from cuttings?
Growing roses from cuttings offers several advantages: genetic consistency with the parent plant, significant cost savings compared to buying nursery plants, preservation of cherished varieties, and transfer of disease resistance. You’ll also experience the satisfaction of nurturing new plants from start to finish while creating exact replicas of your favorite roses.
When is the best time to take rose cuttings?
The optimal time for taking rose cuttings is late spring through early summer when plants are actively growing. This timing ensures the stems are at their healthiest state with maximum energy for root development. Avoid taking cuttings during extreme weather conditions or when plants are stressed from drought or disease.
Which rose varieties work best for cutting propagation?
Non-grafted roses generally yield the best results for cutting propagation. Shrub roses, climbers, floribundas, and miniature roses are the easiest types to propagate. Specific successful varieties include Hurdy Gurdy and Leander. Avoid grafted roses, particularly hybrid tea roses, as they can produce unpredictable growth outcomes and may not replicate the parent plant’s characteristics.
What essential tools do I need for rose cutting propagation?
You’ll need sharp, clean pruning shears, quality gardening gloves, fresh water, rooting hormone, appropriate containers with drainage holes, and a well-draining potting mix combined with perlite. Optional tools include a misting system for humidity control. Sterilizing your cutting tools is crucial to prevent disease transmission during the propagation process.
How long does it take for rose cuttings to develop roots?
Rose cuttings typically require 6 to 8 weeks to develop a strong root system. During this critical period, maintain consistent humidity and monitor for signs of successful rooting, such as new growth, resistance to gentle tugging, and healthy leaf appearance. Patience is key, as rushing the process can harm developing roots.
What growing conditions do rose cuttings need?
Rose cuttings thrive in consistent temperatures between 65°F to 75°F (18°C to 24°C) with high humidity levels. Provide bright, indirect light and keep the potting medium consistently moist but not waterlogged. Consider using clear plastic covers or misting systems to maintain optimal humidity during the rooting period.
How do I know when my rose cuttings are ready for transplanting?
Your rose cuttings are ready for transplanting when they show new growth, resist gentle tugging (indicating established roots), maintain healthy leaf color, and have been rooting for 6-8 weeks. Before transplanting outdoors, gradually acclimate them through a hardening-off process to prevent shock from environmental changes.
What care do young rose plants need after transplanting?
Newly transplanted roses need consistent watering, proper spacing, and well-draining soil. Wait 4-6 weeks before applying balanced, slow-release fertilizer to avoid root burn. Monitor regularly for pests and diseases, use organic treatments when necessary, and apply mulch to retain moisture. Gentle pruning encourages healthy growth and strong plant structure.