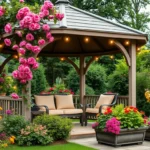
We’ve all walked past those stunning garden rockeries that make us stop and stare – those perfectly balanced combinations of stone and plants that transform ordinary spaces into breathtaking landscapes. If you’ve been dreaming of creating your own rocky paradise but don’t know where to start, you’re in the right place.
Garden rockeries aren’t just for expert landscapers or massive estates. We’ll show you how these versatile features can work in any space, from sprawling backyards to compact urban gardens. Whether you’re dealing with a challenging slope or simply want to add dramatic visual interest to a flat area, rockeries offer endless possibilities for creative expression.
The best part? You don’t need a huge budget or professional installation to achieve impressive results. We’ve gathered practical ideas that range from simple weekend projects to more ambitious transformations, all designed to help you create a rockery that perfectly complements your garden’s unique personality and your lifestyle.
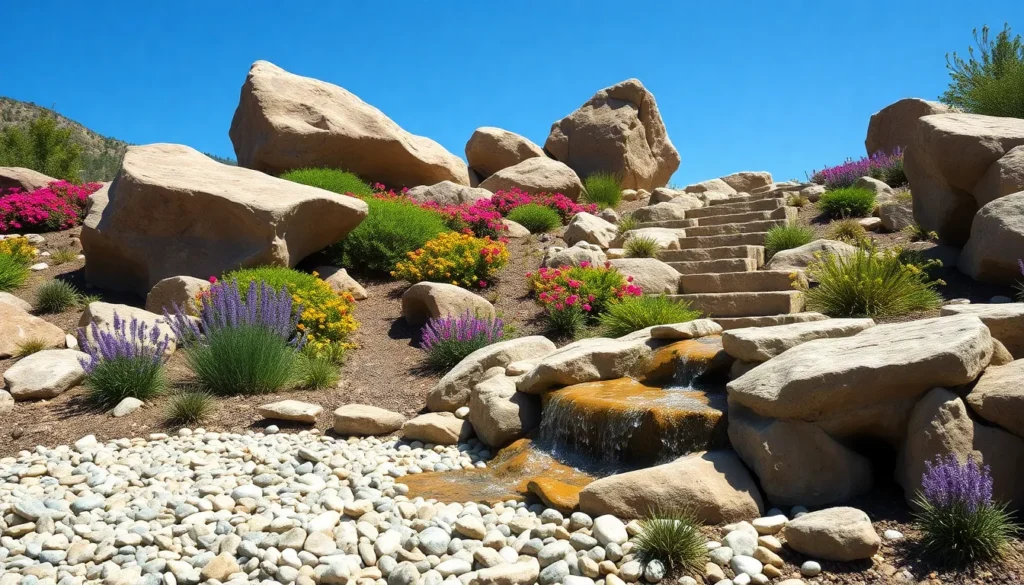
Create a Natural Stone Cascade Design
Building a natural stone cascade transforms your rockery into a flowing masterpiece that mimics nature’s own artistic arrangements. We’ll guide you through creating this eye-catching feature that becomes the focal point of your garden space.
Choose Varied Stone Sizes for Visual Interest
Selecting stones of different dimensions creates the foundation for an authentic-looking cascade design. We recommend gathering rocks ranging from 6 inches to 24 inches in diameter to establish proper scale relationships throughout your rockery.
Large boulders serve as statement pieces while medium-sized stones fill transitional areas between major elements. Smaller rocks create texture and visual flow that connects the entire composition naturally.
Mix angular and rounded stones to replicate the varied weathering patterns found in natural rock formations. This combination prevents your cascade from looking too uniform or artificially arranged.
Consider using 3 to 5 different stone types like limestone, sandstone, and granite to add color variation and textural contrast. Each stone type weathers differently and contributes unique characteristics to your overall design.
Position Larger Rocks as Anchor Points
Anchor stones establish the structural backbone of your cascade and determine how water would naturally flow through the design. We place these substantial pieces first to create the primary visual framework.
Position your largest boulder at the highest point of the cascade to serve as the water source in your imagined flow pattern. This placement creates a natural starting point that draws the eye upward.
Space secondary anchor stones 3 to 4 feet apart along the cascade path to maintain visual balance without overcrowding. These intermediate stones should be 60 to 70 percent the size of your primary anchor.
Angle larger rocks slightly forward to create natural shelving where smaller plants can establish root systems. This positioning also enhances the illusion of water movement through your stone arrangement.
Bury anchor stones one-third of their height into the ground to ensure stability and create the appearance that they’ve settled naturally over time.
Fill Gaps with Smaller Pebbles and Gravel
Smaller aggregate materials complete your cascade design by filling spaces between major stones and creating smooth transitions. We use pea gravel ranging from 1/4 inch to 3/4 inch diameter for the most natural appearance.
River rock creates excellent filler material that suggests water-worn surfaces throughout your cascade design. These smooth stones reflect light differently than angular materials and add subtle sparkle to shadowed areas.
Decomposed granite provides fine textural contrast when scattered around larger stones and helps establish planting pockets for alpine plants. This material also improves drainage around your rockery features.
Layer different gravel sizes to create depth and prevent the monotonous appearance that single-size materials often produce. Start with larger pebbles near major stones and transition to finer materials toward the edges.
Pack smaller stones firmly between larger ones to prevent shifting while still allowing proper water drainage through your cascade design.
Build a Terraced Alpine Garden Layout

Terraced alpine garden layouts bring the majestic beauty of mountain landscapes directly to our backyard spaces. We’ll create dramatic elevation changes that showcase drought tolerant plants while managing water flow naturally.
Select Drought-Resistant Alpine Plants
Sedum varieties form the backbone of our alpine plant selection with their succulent leaves that store water efficiently. These hardy perennials thrive in well drained soil conditions and withstand temperature fluctuations typical of mountain environments.
Ferns add lush greenery and textural contrast to shaded pockets between rock formations. We position these moisture loving plants in naturally cooler areas where they’ll receive protection from intense afternoon sun.
Creeping phlox delivers vibrant seasonal blooms across rocky terrain while requiring minimal water once established. This low growing perennial spreads naturally to fill gaps between stones and creates stunning color carpets during spring flowering periods.
Additional alpine specialists include alpine asters, mountain avens, and hardy sedges that complement our primary plant selections. We choose species native to high altitude regions since they’ve adapted to harsh growing conditions over centuries.
Create Multiple Levels for Plant Diversity
Multiple terraced levels allow us to establish distinct microclimates that support various plant communities. Each elevation change creates unique growing conditions with different sun exposure patterns and moisture retention levels.
Small terraced sections work more effectively than single large areas for soil stabilization and plant arrangement flexibility. We divide steep slopes into manageable segments that prevent erosion while creating interesting visual layers.
Horizontal and vertical rock placement forms natural pockets where different plant species can establish according to their exact needs. Large boulders serve as anchor points while smaller stones create planting crevices for alpine specialists.
Varied exposure angles across multiple levels ensure some plants receive full sun while others benefit from partial shade conditions. This diversity supports a broader range of alpine species within our garden design.
Install Proper Drainage Between Tiers
Sandy soil amendments help rapid water drainage that prevents root rot in alpine plants adapted to rocky mountain conditions. We mix coarse sand with existing soil to improve drainage characteristics throughout each terraced level.
Gravel layers between tiers direct excess water away from plant root zones while maintaining proper moisture levels. This drainage system mimics natural alpine environments where water flows quickly through rocky substrates.
Stone chippings and grit improve soil structure while preventing plant overcrowding in confined growing spaces. We incorporate these materials around individual plants to enhance drainage and provide visual continuity with our rock features.
Dry stone walls between terraces serve dual purposes by preventing soil erosion and creating authentic alpine garden aesthetics. These structures allow water to flow through naturally while maintaining the integrity of each planted level.
Design a Mediterranean-Style Rock Garden

Mediterranean rock gardens bring the sun-soaked charm of coastal regions to your backyard. This design approach combines drought-tolerant plants with natural stone elements to create a industry that thrives in warm, dry conditions.
Incorporate Lavender and Rosemary Plantings
Lavender serves as the cornerstone of Mediterranean rock garden design with its drought tolerance and low maintenance requirements. Purple spikes of lavender blooms create stunning color contrasts against warm stone backdrops while releasing their signature fragrance throughout the garden. Plant varieties like English lavender or French lavender in well-drained soil where they’ll flourish for years with minimal care.
Rosemary complements lavender plantings perfectly as another fragrant herb that thrives in Mediterranean conditions. This evergreen shrub provides year-round structure with its needle-like foliage and delicate blue or white flowers. Position rosemary plants near pathways where brushing against them releases their aromatic oils, improving the sensory experience of your rock garden.
Ornamental grasses add texture and movement to soften the structured elements of stone and herbs. Mediterranean grasses like fountain grass or blue fescue provide seasonal interest while requiring minimal water once established. Their wispy plumes catch sunlight and create gentle motion that brings life to static stone arrangements.
Use Warm-Toned Limestone and Sandstone
Limestone creates the classic Mediterranean foundation with its warm, honey-colored tones that complement the region’s architectural heritage. This natural stone weathers beautifully over time, developing a patina that enhances its authentic appearance. Build retaining walls, terraced levels, and seating areas using limestone blocks to establish the structural framework of your Mediterranean rock garden.
Sandstone offers similar warm tones with varied textures that add visual interest to your garden design. Its natural layers and grain patterns create depth when used for paving, wall construction, or decorative accents. Choose sandstone in shades ranging from pale cream to rich amber to match your garden’s color palette and surrounding industry elements.
Stone walls and terraces serve multiple purposes beyond aesthetics by creating microclimates for different plant communities. Build dry stone walls using traditional techniques to allow for proper drainage while providing structure for terraced planting areas. These elevated sections help manage water runoff and create distinct zones for various Mediterranean plants with different growing requirements.
Add Gravel Pathways for Authentic Appeal
Gravel pathways connect different areas of your Mediterranean rock garden while reducing plant competition and maintenance needs. Choose gravel colors that complement your stone elements, such as warm beige, cream, or light brown tones that echo the Mediterranean coastline. These pathways provide excellent drainage and create clearly defined walking areas that protect your plantings from foot traffic.
Ground cover plants soften the edges of gravel pathways and add living texture to hardscape elements. Mediterranean ground covers like creeping thyme, woolly thyme, or Mediterranean spurge spread naturally between stones and require minimal care once established. Their low-growing habit creates seamless transitions between gravel areas and planted spaces.
Mosaic details inject color and cultural authenticity into pathway designs by incorporating traditional Mediterranean artistry. Add small mosaic patterns using ceramic tiles or colored stones to create focal points along your gravel paths. These decorative elements reflect the rich cultural heritage of Mediterranean design while adding personalized touches to your rock garden layout.
Construct a Japanese-Inspired Zen Rockery

Japanese-inspired zen rockeries bring tranquility and mindfulness to any garden space through their emphasis on minimalism and natural harmony. These contemplative gardens, known as karesansui, create peaceful environments that invite meditation and reflection.
Balance Asymmetrical Stone Arrangements
Stone placement follows asymmetrical principles that mirror nature’s spontaneous beauty rather than rigid geometric patterns. We arrange rocks in odd-numbered groupings, typically three or five stones, to create visual balance while maintaining organic flow. Large boulders serve as primary focal points, representing mountains or islands in traditional Japanese design philosophy.
Position these anchor stones first to establish your garden’s structural foundation. Medium-sized rocks complement the larger elements by filling visual gaps and creating secondary viewing points. Smaller stones complete the composition by adding texture and connecting the major elements seamlessly.
Natural landscapes inspire these arrangements, so we avoid symmetrical patterns that appear forced or artificial. Each stone group should feel like it occurred naturally over time, weathered by wind and water into its current position.
Include Ornamental Grasses and Moss
Ornamental grasses provide gentle movement and seasonal interest that contrasts beautifully with static stone elements. Hakonechloa, also known as Japanese forest grass, offers flowing texture and golden autumn color that enhances the garden’s natural appeal. These grasses thrive in partial shade and create soft transitions between harder industry features.
Moss develops naturally in shady, moist areas and adds timeless character to your zen rockery. We encourage moss growth by maintaining consistent moisture levels and providing filtered light conditions. This velvety groundcover creates an aged appearance that suggests decades of peaceful existence.
Combine these living elements strategically around your stone arrangements. Grasses work well as backdrop plantings, while moss settles naturally into crevices and shaded areas between rocks. Both plants require minimal maintenance once established, supporting the zen garden’s low-maintenance philosophy.
Create Peaceful Meditation Spaces
Dedicated quiet areas form the heart of any successful zen rockery design. We establish these contemplative zones by creating natural boundaries using bamboo fencing or evergreen hedges that screen distractions and define sacred space. These enclosures don’t need to be tall or imposing; subtle barriers work effectively to create intimacy.
Raked gravel or sand serves dual purposes in meditation areas by symbolizing flowing water and encouraging mindful practice. The repetitive act of raking creates meditative rhythm while maintaining the garden’s pristine appearance. Choose fine gravel or coarse sand that holds rake patterns well without being too difficult to maintain.
Seating placement enhances the meditation experience by providing comfortable viewing angles of key garden features. We position simple wooden benches or flat stones where visitors can sit quietly and absorb the garden’s peaceful energy. These seats should face the most visually compelling stone arrangements while remaining integrated with the overall design.
| Element | Purpose |
|---|---|
| Asymmetrical stone placement | Creates natural, balanced visual appeal |
| Ornamental grasses/moss | Adds texture, contrast, and natural beauty |
| Enclosure/boundary | Defines space, promotes focus |
| Raked gravel/sand | Encourages mindfulness, symbolizes water |
Establish a Woodland Rock Garden Theme

Creating a woodland rock garden brings the serene beauty and natural harmony of forest environments into our outdoor spaces. This design approach combines the rustic charm of fallen logs with carefully selected shade plants to create an authentic woodland atmosphere.
Plant Shade-Loving Ferns and Hostas
Ferns thrive in the shaded environments that woodland rockeries naturally provide. These lush green plants add texture and movement to our rock garden while requiring minimal maintenance once established. We can choose from varieties like Christmas ferns, Japanese painted ferns, and lady ferns to create layers of foliage that complement the rocky terrain.
Hostas provide beautiful contrast to the ruggedness of rocks with their large, dramatic leaves. These shade-loving perennials come in many varieties, from blue-green ‘Sum and Substance’ to variegated ‘Patriot’ hostas. We should position hostas in pockets between rocks where they can spread naturally and create focal points throughout our woodland garden.
Use Native Forest Stones and Boulders
Native forest stones make our woodland rock garden look naturally integrated into the surrounding industry. Local fieldstone, weathered granite, and moss-covered limestone create authentic foundations that blend seamlessly with existing terrain. We can source these materials from local quarries or industry suppliers to ensure they match our region’s geological character.
Large boulders serve as focal points and add dramatic depth to our woodland garden design. These substantial stones create natural shelving for plants while establishing the structural backbone of our rockery. We should bury boulders partially into the ground for stability and angle them to create realistic formations that mimic natural forest outcroppings.
Incorporate Natural Fallen Log Elements
Fallen logs create an organic, natural feel that enhances the authentic woodland atmosphere we’re building. These weathered timber elements provide additional planting opportunities for moss, small ferns, and woodland wildflowers. We can position logs strategically to create natural boundaries between different garden zones while adding horizontal lines that balance the vertical elements of our rocks and plants.
Adding logs also provides valuable wildlife habitats that support beneficial insects, small mammals, and amphibians. Decomposing wood creates rich soil amendments over time, feeding the surrounding plants naturally. We should choose partially decayed hardwood logs like oak or maple that will weather gracefully and integrate seamlessly into our woodland rock garden network.
Install a Water Feature Rock Garden

We can transform our rockery into a serene water oasis by combining decorative stones with flowing water elements. This ever-changing approach creates a tranquil focal point that blends stone, water, and plant life for maximum visual impact.
Build a Small Pond or Stream Element
Excavating the designated area to our desired shape and size forms the foundation of our water feature. We’ll need to select a location with proper drainage and ample sunlight since water features require these conditions for optimal plant health and easy maintenance.
Lining the excavated space with a high-quality pond liner prevents water loss and protects our investment. We must edge the liner securely around the perimeter to eliminate potential leak points that could drain our water feature over time.
Installing a small circulation system keeps our water fresh and prevents stagnation. Submersible pumps rated between 200-400 gallons per hour work well for most residential pond installations, while solar-powered options reduce electricity costs.
Select Water-Loving Plants for Edges
Choosing marsh marigold (Caltha palustris) creates brilliant yellow spring blooms that thrive with roots near water. These hardy perennials tolerate various water levels and add vibrant color during the growing season.
Planting Japanese iris (Iris ensata) along pond edges provides elegant purple or white flowers that bloom in early summer. We should ensure these moisture-loving plants receive adequate water depth of 2-4 inches for optimal growth.
Incorporating creeping Jenny (Lysimachia nummularia) creates a cascading ground cover effect around water edges. This fast-spreading plant produces bright yellow flowers and tolerates both wet and dry conditions, making it perfect for transitional zones.
Selecting plants that match our garden’s overall aesthetic and climate ensures long-term success. We’ll want to group plants with similar water requirements together to simplify our maintenance routine.
Position Rocks to Direct Water Flow
Placing larger boulders as focal points helps define our water feature while creating natural-looking banks. These substantial stones should weigh 50-200 pounds each and serve as anchor points that establish the structural backbone of our design.
Arranging smaller stones and gravel fills gaps between major rocks while creating appealing texture variations. We can use river rock ranging from 1-4 inches in diameter to build natural transitions between different stone sizes.
Tilting rocks backward or leaning them against the pond liner enhances the natural appearance while guiding water movement. This technique mimics how stones naturally settle in riverbeds and creates interesting water flow patterns.
Strategic rock placement directs water flow toward exact areas while preventing erosion around plant roots. We’ll position flat stones to create gentle waterfalls and use rounded boulders to split water streams into multiple channels.
Create a Vertical Rock Wall Garden

Building a vertical rock wall garden maximizes space while creating dramatic height and visual interest in our rockery design. This technique transforms flat areas into stunning focal points that combine structural elements with living beauty.
Construct Retaining Wall Structure
Select diverse rock sizes and types to enhance both visual appeal and structural stability. We recommend combining mortared stone, stacked stone, or flagstone materials to create texture variations throughout the wall design. Larger rocks serve as focal points for anchoring the entire structure, while smaller stones and gravel help unify the overall appearance.
Prepare the foundation by excavating and compacting a base layer of gravel or crushed stone before beginning construction. Building the wall requires stacking rocks or stone blocks layer by layer to achieve our desired height. Each layer should maintain a slight backward tilt for enhanced stability and to prevent potential collapse over time.
Position structural elements strategically by burying larger foundation stones deeper into the ground for maximum support. Stone placement becomes critical as we build upward, ensuring each rock interlocks securely with surrounding materials. The backward lean we create naturally distributes weight and pressure throughout the wall system.
Plant Cascading Succulents and Sedums
Fill rock pockets and gaps with drought tolerant succulents and sedums that thrive in rockery conditions. These plant varieties excel in vertical gardens due to their natural ability to spread and cascade over wall edges, creating soft transitions between hard stone surfaces.
Choose alpine plants and flowering vines to add vertical color and seasonal interest throughout the growing season. Mixed plantings provide habitat opportunities for beneficial pollinators while maintaining the low maintenance characteristics we desire in rock wall gardens.
Integrate raised garden beds adjacent to or within the rock wall structure to expand our planting options. These elevated growing spaces accommodate ornamental grasses, perennials, and mixed plantings that complement the vertical rock elements.
Balance color and texture contrasts when selecting both rocks and plants to maximize visual impact without creating overly busy designs. Organized plant placement ensures our vertical garden maintains its structural beauty while supporting healthy plant growth.
Ensure Proper Wall Drainage Systems
Install perforated drainage pipes behind the wall structure to help effective water movement away from the retaining system. Gravel backfill surrounds these drainage elements, preventing water buildup that could compromise wall stability over time.
Create weep holes or drainage vents at the base level to allow accumulated water to escape naturally from behind the wall. These drainage points prevent hydrostatic pressure from building up and potentially damaging our rock wall structure.
Design water flow patterns that direct moisture away from plant root zones while maintaining adequate soil moisture levels. Proper drainage systems protect both our structural investment and plant health by preventing root rot and soil erosion issues.
Monitor drainage performance regularly to ensure our water management systems continue functioning effectively throughout different weather conditions. Well designed drainage extends the lifespan of our vertical rock wall garden while reducing long term maintenance requirements.
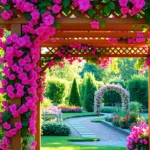
Design a Cottage Garden Rockery Style

Cottage garden rockeries blend natural stone elements with vibrant flowering plants to create charming, informal landscapes. This timeless style transforms any garden space into a romantic retreat that feels both welcoming and naturally beautiful.
Mix Colorful Perennial Flowering Plants
Selecting perennials with varying heights and flowering times ensures continuous color displays throughout the seasons. We recommend choosing plants that thrive in rockery conditions such as sedum varieties, creeping phlox, and alpine asters for year-round visual interest. Flowering perennials like candytuft and rock cress provide early spring blooms while plants such as autumn joy sedum extend the color palette into fall.
Plant placement should consider both sun exposure and drainage requirements to maximize flowering potential. Taller perennials work best as backdrop elements behind smaller rock formations while trailing varieties excel when planted to cascade over stone edges. We’ve found that grouping plants in odd numbers creates more natural looking arrangements that complement the informal cottage style.
Use Weathered Limestone and Fieldstone
Weathered limestone creates the perfect foundation for cottage garden rockeries with its naturally aged appearance and neutral tones. Fieldstone adds rustic charm through its irregular shapes and weathered surfaces that develop character over time. These natural materials integrate seamlessly into informal industry designs while providing excellent drainage for alpine and Mediterranean plants.
Incorporating limestone into pathways connects different garden areas while maintaining the cottage aesthetic. Fieldstone works exceptionally well for creating retaining walls that appear to have naturally formed over decades. We suggest mixing different sizes of these stones to achieve the most authentic weathered look that matches traditional cottage garden styles.
Create Informal, Naturalistic Arrangements
Naturalistic plant arrangements mimic how vegetation grows in wild mountain environments rather than formal garden borders. We achieve this look by tucking flowering plants into natural crevices between rocks and allowing sprawling varieties to grow organically over stone surfaces. This approach creates the impression that plants have naturally colonized the rockery over time.
Stone placement should appear random rather than structured with larger boulders serving as anchor points throughout the design. Smaller rocks fill gaps between major elements while creating pockets for plant growth that seem naturally formed. We recommend studying natural rock outcroppings to understand how stones settle and weather together in authentic mountain landscapes.
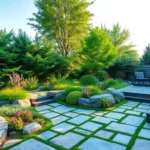
Build a Modern Minimalist Rock Feature

Creating a modern minimalist rock feature transforms your garden into a sophisticated outdoor sanctuary. This approach emphasizes simplicity and clean design principles while maintaining natural beauty.
Choose Uniform Stone Colors and Shapes
Selecting stones with consistent colors and shapes forms the foundation of minimalist rock garden design. We recommend focusing on single-color palettes like charcoal gray slate, warm beige limestone, or pristine white quartzite to create visual harmony throughout your space. Large boulders and medium-sized stones work best when they share similar textures and geometric qualities.
Uniformity doesn’t mean monotony when you vary stone sizes strategically. Consider using three distinct size categories: statement boulders measuring 24-36 inches, medium stones ranging 12-18 inches, and accent pieces between 6-12 inches. This creates depth while maintaining the cohesive aesthetic that defines modern minimalist design.
Geometric shapes like rectangular blocks, angular chunks, and smooth river stones enhance the contemporary feel. Avoid mixing too many different stone types in one area, as this can create visual chaos that contradicts minimalist principles.
Plant Architectural Succulents and Grasses
Architectural succulents provide structural interest without overwhelming your clean stone arrangements. We suggest incorporating agave varieties, barrel cacti, and sculptural aloe species that offer bold geometric forms and require minimal maintenance. These plants thrive in well-draining rocky soil and complement the modern aesthetic perfectly.
Ornamental grasses add movement and softness to counterbalance hard stone surfaces. Fountain grass, blue fescue, and feather reed grass create elegant vertical lines that enhance the minimalist composition. Plant these in strategic clusters rather than scattering them randomly throughout the space.
Seasonal interest comes from selecting plants with varying textures and subtle color changes. Silver-leafed succulents like dusty miller provide year-round structure, while grasses offer gentle movement in breezes and beautiful seed heads in autumn.
Maintain Clean Lines and Simple Geometry
Organizing your rock feature using geometric principles creates visual order and reinforces the minimalist aesthetic. We establish focal points using the largest stones first, then build outward using smaller elements to create natural transitions between different areas of the garden.
Rectangular planting beds with defined edges work better than curved, organic shapes for modern designs. Use metal or concrete edging to create crisp boundaries between planted areas and stone displays. This prevents plants from spreading into unwanted areas and maintains the structured appearance.
Balance becomes crucial when arranging stones and plants in geometric patterns. Follow the rule of odd numbers by grouping stones in clusters of three, five, or seven to create visual interest while maintaining symmetry. Leave adequate negative space between groupings to prevent the design from feeling cluttered or overwhelming.
Establish a Wildlife-Friendly Rock Habitat

Creating a rockery that supports local biodiversity transforms our garden spaces into thriving ecosystems. We’ll structure our design to provide essential shelter and basking areas for various creatures while mimicking natural rocky environments.
Create Shelter Spaces for Small Animals
Positioning rocks and branches along pathways creates natural refuges for frogs, toads, and beneficial insects. We nestle logs or large stones partly underground to form cool, moist hideaways that small animals depend on for survival. Packing soil and gravel behind stones provides stability while retaining moisture levels that benefit both plants and soil-dwelling creatures.
Arranging stones in irregular patterns increases habitat complexity and offers multiple escape routes for wildlife. We create rock piles by stacking stones to form varied microhabitats that accommodate different species’ needs. These structures provide sun-warmed surfaces where reptiles and amphibians can regulate their body temperature during cooler periods.
Crevices between rocks serve as crucial hiding spots from predators while offering nesting opportunities for various small animals. We ensure gaps remain accessible by varying stone sizes and avoiding overly tight arrangements that might exclude wildlife.
Plant Native Species for Local Wildlife
Selecting native perennials, grasses, and small shrubs creates food sources and shelter for local pollinators, birds, and other wildlife. We choose species that thrive in rocky, well-drained soil conditions typical of rockery environments. Native plants support local ecosystems more effectively than non-native varieties because they’ve evolved alongside regional wildlife species.
Ornamental grasses and sedges offer vertical structure while providing year-round interest and wildlife value. We incorporate drought-tolerant native species that require minimal maintenance once established. These plants create seed sources for birds and nectar sources for pollinators throughout growing seasons.
Mixing plant heights and flowering times ensures continuous food availability for wildlife visitors. We tuck smaller plants into rock crevices while positioning larger specimens in open areas where they can establish robust root systems.
Include Bug Hotels and Nesting Areas
Integrating bug hotels among rocks provides essential nesting sites for solitary bees and other beneficial insects. We stack hollow stems, drill holes in wood pieces, and bundle sticks together to create diverse accommodation options. These structures support insects that pollinate our plants and control garden pests naturally.
Positioning bug hotels in sunny, sheltered locations near flowering plants ensures easy access to nectar and pollen sources. We place them at varying heights to accommodate different insect species’ preferences. South-facing locations receive optimal morning sun that many beneficial insects prefer for warming up before daily activities.
Creating combinations of materials like bamboo tubes, pine cones, and bark pieces attracts diverse insect species with different nesting requirements. We maintain these structures by replacing materials as they decompose while leaving occupied sections undisturbed during active seasons.
Conclusion
Creating your perfect garden rockery doesn’t have to be overwhelming – we’ve shown you that there’s a style and approach for every space and skill level. Whether you’re drawn to the tranquil minimalism of Japanese zen gardens or the vibrant charm of cottage-style rockeries your vision can become reality with the right planning and plant selection.
The key to rockery success lies in understanding your garden’s unique conditions and choosing elements that work harmoniously together. From proper drainage systems to strategic stone placement each decision contributes to a thriving network that’ll reward you for years to come.
We encourage you to start small and let your rockery evolve naturally over time. Remember that the most beautiful rock gardens often develop their character through seasonal changes and gradual plant establishment creating spaces that feel authentically connected to their surroundings.
Frequently Asked Questions
What is a garden rockery and why should I consider creating one?
A garden rockery is a landscaped area that combines natural stones with carefully selected plants to create an attractive focal point. Rockeries enhance ordinary spaces with stunning visual appeal, work in gardens of any size, and require minimal maintenance once established. They’re perfect for adding texture, height, and year-round interest to your outdoor space while accommodating various plant varieties.
Do I need landscaping experience to build a rockery?
No, creating a rockery is accessible to everyone regardless of experience level. You can start with simple weekend projects using basic materials like stones and drought-tolerant plants. The key is proper planning, selecting appropriate materials for your climate, and following fundamental design principles. Many rockery styles can be built gradually over time.
What types of plants work best in rockeries?
Drought-resistant plants are ideal for rockeries, including alpine varieties like sedum, creeping phlox, and ornamental grasses. For shaded areas, consider ferns and hostas. Mediterranean-style rockeries benefit from lavender and rosemary. Choose plants that thrive in well-drained soil and match your local climate conditions for best results.
How do I ensure proper drainage in my rockery?
Use gravel layers and sandy soil amendments between planting areas to improve drainage. Fill gaps with materials like pea gravel or river rock. For terraced designs, install drainage systems between tiers. Proper stone placement and angling larger rocks create natural water flow, preventing root rot and maintaining healthy soil moisture levels.
What types of stones should I use for my rockery?
Select stones that complement your garden style and local environment. Use a mix of sizes – large boulders as anchor points, medium stones for structure, and smaller rocks for texture. Mediterranean designs work well with warm-toned limestone and sandstone, while woodland rockeries benefit from native forest stones and weathered fieldstone.
Can I incorporate water features into my rockery design?
Yes, water features add tranquil beauty to rockeries. Install a high-quality pond liner and circulation system for small ponds or streams. Select water-loving plants like marsh marigold and Japanese iris for pond edges. Use strategic rock placement to direct water flow naturally, creating the appearance of natural riverbeds while preventing erosion.
How do I create a wildlife-friendly rockery?
Position rocks and branches to create shelter spaces and basking areas for small animals. Arrange stones in irregular patterns to increase habitat complexity. Plant native species that provide food sources and shelter. Integrate bug hotels among rocks in sunny locations to support beneficial insects and promote local biodiversity.
What’s the difference between various rockery styles?
Different styles reflect distinct aesthetics: Alpine gardens feature terraced levels with drought-resistant plants; Mediterranean designs use warm stones with fragrant herbs; Japanese zen rockeries emphasize minimalism and asymmetrical arrangements; woodland styles incorporate shade-loving plants with native stones; cottage garden rockeries blend informal plantings with weathered stones for rustic charm.