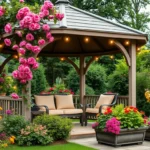
Transforming your outdoor space into a stunning patio retreat doesn’t have to drain your wallet. We’ve discovered that creating an inviting garden patio on a budget is entirely achievable with the right approach and creative thinking. Whether you’re working with a tiny balcony or a sprawling backyard, smart planning and resourceful decorating can deliver impressive results without the hefty price tag.
We understand that everyone deserves a beautiful outdoor sanctuary where they can unwind and entertain guests. That’s why we’ve compiled proven strategies that maximize your investment while minimizing costs. From repurposing everyday items to choosing budget-friendly materials that look expensive, these ideas will help you create the patio of your dreams.
The secret lies in knowing where to splurge and where to save. We’ll show you how to prioritize your spending on high-impact elements while finding creative alternatives for everything else, ensuring your patio makeover stays within budget without compromising on style or functionality.
Create a Cozy Seating Area With Repurposed Materials
Building comfortable seating areas doesn’t require expensive outdoor furniture when you know how to repurpose materials creatively. We’ll show you three budget-friendly approaches that transform everyday items into stylish garden patio seating answers.
Use Old Pallets to Build Custom Furniture
Pallet furniture offers incredible value at just $20-40 per piece compared to $200-500 for store-bought outdoor furniture. We recommend checking local warehouses, shipping companies, and construction sites where businesses often give away used pallets for free.
Sand your pallets thoroughly with 120-grit sandpaper to prevent splinters and create smooth surfaces. Apply outdoor wood stain or paint in colors like weathered gray, navy blue, or classic white to match your garden patio aesthetic. Most pallets measure 48 inches by 40 inches, providing perfect dimensions for benches, coffee tables, and sectional seating.
Stack two pallets vertically and secure them with 3-inch wood screws to create bench backs with built-in storage. Add waterproof cushions made from outdoor fabric remnants, foam padding, and basic sewing skills. Popular pallet furniture projects include L-shaped sectionals, ottoman storage boxes, and side tables with planters built into the top surface.
Transform Cinder Blocks Into Modern Seating
Cinder blocks cost only $1-3 each at home improvement stores and create surprisingly modern seating arrangements. We suggest buying blocks in quantities of 12-20 pieces to build substantial seating areas that accommodate multiple guests comfortably.
Stack blocks in rectangular formations with 2×10 pressure-treated lumber laid across the top for instant bench seating. Paint the blocks with concrete paint in bold colors like coral, turquoise, or charcoal to add personality to your garden patio space. Each standard cinder block measures 16 inches long, 8 inches wide, and 8 inches tall.
Create U-shaped seating configurations by arranging blocks around fire pits or central table areas. Fill the hollow centers with succulents, herbs, or colorful flowers to combine seating with built-in planters. This dual-purpose approach maximizes both function and visual appeal while maintaining your budget constraints.
Repurpose Indoor Furniture for Outdoor Use
Indoor furniture pieces like dining chairs, side tables, and bookcases adapt beautifully to outdoor spaces with proper weatherproofing treatments. We recommend starting with solid wood or metal pieces that show minor wear but maintain structural integrity.
Apply marine-grade polyurethane or outdoor furniture paint to protect surfaces from moisture, UV rays, and temperature fluctuations. Remove fabric cushions and replace them with outdoor-rated materials like Sunbrella fabric, vinyl, or quick-dry foam that resists mold and mildew formation.
Vintage wooden chairs transform into charming garden patio seating when painted in bright colors and paired with weather-resistant cushions. Old dressers become outdoor storage benches by removing drawers, adding hinged tops, and installing waterproof seals. Even damaged furniture pieces work well since outdoor patinas and distressed finishes add character rather than detract from appearance.
Design a DIY Fire Feature for Under $100
 1")
Fire features transform ordinary patios into captivating outdoor retreats that extend usable hours well into the evening. We’ll show you three affordable approaches that deliver impressive results without straining your budget.
Build a Simple Fire Bowl With Basic Supplies
Creating a basic fire bowl requires only a metal container and decorative stones for a stunning centerpiece. We recommend using a large steel or cast iron bowl that can withstand high temperatures and weather exposure.
Start by selecting a metal container at least 24 inches in diameter for adequate fire space. Place the bowl on a stable, level surface away from overhanging branches or structures. Fill the bottom with a 2-inch layer of sand for heat distribution and drainage.
Add decorative stones around the perimeter to create visual appeal and contain the fire area. River rocks work exceptionally well because they don’t crack under heat stress. Simply add firewood and kindle your first fire for an instant gathering spot that costs under $50 to complete.
Position the fire bowl at least 10 feet from any structures and keep a water source nearby for safety. This straightforward approach delivers maximum impact with minimal investment.
Create a Fire Pit Using Recycled Bricks
Recycled bricks offer an eco-friendly and budget-conscious method for building a permanent fire pit. We’ve found that old bricks from construction sites or demolition projects provide excellent materials at fraction of retail costs.
Gather approximately 40-50 bricks for a standard 36-inch diameter fire pit. Mark your circle using spray paint or rope to ensure proper dimensions. Dig a shallow trench about 4 inches deep to create a stable foundation for the first brick layer.
Lay the first row of bricks in your marked circle without mortar for easy adjustments. Stack additional rows while slightly offsetting each brick for structural integrity. Leave gaps between bricks for airflow, which ensures proper combustion and reduces smoke production.
Complete the project by adding a metal fire ring insert to protect the bricks from direct flame contact. This recycled brick approach typically costs between $60-80 and creates a durable fire feature that lasts for years.
Install Solar-Powered Fire Effect Lights
Solar-powered fire effect lights provide the ambiance of flames without actual fire hazards or ongoing fuel costs. We recommend this modern alternative for families with small children or areas with fire restrictions.
Choose LED lights with realistic flame patterns that charge during daylight hours. Mount them in decorative lanterns or place them around existing planters for scattered fire effects throughout your patio space.
Position the solar panels in areas receiving 6-8 hours of direct sunlight for optimal charging. Most quality units provide 8-10 hours of illumination after a full charge cycle.
Install multiple units at varying heights to create depth and visual interest across your outdoor space. This approach costs approximately $30-60 depending on the number of lights and delivers consistent ambiance without maintenance requirements or safety concerns.
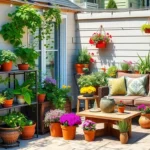
Add Vertical Gardens to Maximize Small Spaces
 2")
Vertical gardens transform limited patio areas into lush green spaces without consuming valuable floor space. We’ll explore three effective methods that use vertical surfaces to create stunning garden displays while staying within budget.
Build a Pallet Herb Garden Wall
Reclaimed pallets offer an excellent foundation for creating wall mounted herb gardens that combine functionality with visual appeal. We can source these pallets for free from local businesses or purchase them at minimal cost from hardware stores.
Preparing your pallet involves sanding rough surfaces, applying weather resistant stain, and lining the back with industry fabric to contain soil. Position the pallet vertically against a wall or fence where it’ll receive adequate sunlight for herb growth.
Fill each pocket with high quality potting soil and plant herbs like basil, oregano, thyme, and parsley in separate sections. This arrangement allows us to harvest fresh herbs while creating an attractive green backdrop for our patio space.
Maintenance requires regular watering since vertical planters dry out faster than ground level gardens. We recommend installing a simple drip irrigation system using recycled plastic bottles with small holes to ensure consistent moisture distribution.
Create Hanging Planters From Recycled Containers
Repurposing household containers into hanging planters reduces waste while adding vertical interest to our patio design. Plastic bottles, wooden crates, old colanders, and tin cans all make excellent hanging planters with proper preparation.
Drill drainage holes in the bottom of each container to prevent water accumulation and root rot. Paint or decorate containers to match our patio color scheme, creating a cohesive look throughout the vertical garden display.
Secure hanging planters using strong rope, chain, or wire attached to overhead structures like pergolas, awnings, or sturdy tree branches. Ensure the mounting points can support the weight of soil and water filled containers.
Select appropriate plants based on container size and hanging height, choosing trailing varieties like petunias, ivy, or cherry tomatoes for dramatic cascading effects. Group containers at varying heights to create visual depth and prevent overcrowding.
Install a Trellis System for Climbing Plants
Trellises maximize vertical growing space while supporting climbing plants that add natural privacy screens to our patio areas. We can construct simple trellises using wooden lattice panels, metal wire grids, or even repurposed materials like old bed frames.
Position trellises strategically to create natural boundaries, block unsightly views, or provide shade over seating areas. Anchor them securely in the ground or attach them to existing structures like walls or fences for stability.
Choose climbing plants that suit our climate and maintenance preferences, such as roses for fragrant blooms, grape vines for edible harvests, or morning glories for quick seasonal coverage. These plants use vertical space effectively while adding visual interest throughout the growing season.
Support plant growth by providing adequate spacing between plants and regular pruning to encourage healthy climbing patterns. We should also ensure the trellis material can handle the mature weight of fully grown climbing plants.
Establish Ambient Lighting on a Shoestring Budget
 3")
Creating magical outdoor ambiance doesn’t require expensive electrical installations or professional lighting designers. We can transform our patio into an enchanting evening retreat using simple, cost-effective lighting answers.
String Up Affordable Solar Lights
Solar lights deliver excellent ambient lighting while being both cost-effective and eco-friendly. We don’t need to worry about electricity bills or complex wiring since these lights harness the sun’s energy during the day and automatically illuminate our space at night. Installation couldn’t be easier – simply string them along fence lines, wrap them around patio railings, or drape them between posts or trees.
Different styles of solar string lights offer various moods for our outdoor space. Edison bulb solar strings create a vintage cafe atmosphere, while fairy light versions add delicate sparkle to our evenings. Globe-style solar lights provide steady, warm illumination that’s perfect for dining areas. We can find quality solar string lights starting at just $15-25, making them one of the most budget-friendly lighting options available.
Make DIY Lanterns From Mason Jars
Mason jars transform into charming homemade lanterns with minimal effort and maximum impact. We can create these rustic lighting fixtures using materials we likely already have at home. Fill the jars with battery-operated fairy lights for a magical glow, add floating candles with water for a romantic ambiance, or layer decorative pebbles at the bottom with LED tea lights for texture and warmth.
Customizing our mason jar lanterns is where creativity really shines. Paint the jars with frosted glass spray for a soft, diffused light, or wrap them with twine and lace for a shabby chic look. We can even punch holes in the lids to create star patterns that cast beautiful shadows. These versatile lanterns cost us less than $5 each to make and can be hung from shepherd’s hooks, placed on tables, or lined along pathways.
Use Battery-Operated Candles for Safety
Battery-operated candles provide all the warmth and ambiance of traditional candles without the fire risks or weather concerns. We can place these safe alternatives anywhere on our patio without worrying about wind, rain, or curious pets and children. Modern battery candles feature realistic flickering flames and warm LED light that’s nearly indistinguishable from real wax candles.
These flameless options offer incredible versatility for our outdoor lighting design. We can group multiple battery candles of different heights for dramatic centerpieces, place them inside glass hurricanes for protection, or scatter them throughout planters for subtle accent lighting. Quality battery-operated candles start around $3-8 each and run for weeks on a single set of batteries, making them both economical and convenient for regular patio use.
Create Natural Privacy Screens Without Breaking the Bank
 4")
Privacy transforms any patio into a personal retreat, and we can achieve this sanctuary feeling without expensive installations. Smart screening answers cost significantly less than permanent structures while delivering the seclusion we desire.
Plant Fast-Growing Bamboo or Shrubs
Fast-growing bamboo creates natural privacy screens that flourish quickly and cost remarkably little to establish. We recommend clumping bamboo varieties like Fargesia or Buddha’s Belly, which grow 3-5 feet annually and won’t spread aggressively throughout your yard. These species typically cost $25-40 per plant and reach screening height within 2-3 years.
Shrubs offer another budget-friendly privacy option that delivers year-round coverage. Evergreen varieties like privet, boxwood, or arborvitae grow rapidly and can be purchased as small plants for $15-30 each. We suggest spacing them 3-4 feet apart for complete coverage within two growing seasons.
Native shrubs provide the most cost-effective long-term solution since they require minimal watering and maintenance once established. Check with local nurseries for native species that thrive in your climate zone and often cost 30-50% less than exotic varieties.
Build a Lattice Screen With Inexpensive Materials
Lattice screens deliver instant privacy while adding architectural interest to your patio space. We can construct attractive screens using basic lumber and lattice panels from home improvement stores, with total costs ranging $40-80 per 8-foot section.
Wood lattice panels cost approximately $25-35 each and can be mounted between simple 2×4 posts for structural support. Pre-made lattice sections save time and effort while maintaining a professional appearance that enhances your patio’s overall design.
Plastic lattice offers a maintenance-free alternative that costs slightly more upfront but eliminates staining and weather protection needs. These panels resist fading and warping, making them ideal for harsh weather climates where wood requires frequent maintenance.
We recommend painting or staining wooden screens before installation to extend their lifespan and coordinate with existing patio colors. Adding climbing plants like morning glories or sweet peas transforms functional screens into living walls that bloom throughout the growing season.
Use Outdoor Curtains Made From Drop Cloths
Drop cloths transform into elegant outdoor curtains that provide flexible privacy at a fraction of traditional fabric costs. Canvas drop cloths cost $8-15 each and create substantial panels that withstand weather while maintaining an upscale appearance.
We suggest adding grommets or fabric ties to standard drop cloths for easy hanging and removal during storms. Simple rope or tension wire systems cost under $20 and allow us to position curtains exactly where privacy is needed most.
Waterproofing spray extends the life of canvas curtains and prevents mildew in humid conditions. Treatment costs approximately $5-8 per bottle and protects multiple panels while maintaining the fabric’s natural texture and appearance.
Striped or patterned drop cloths add visual interest without increasing costs significantly. We can also customize plain canvas with outdoor fabric paint to create unique designs that complement our patio’s color scheme and personal style preferences.
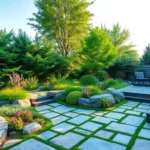
Install Low-Cost Flooring Options That Look Expensive
 5")
Transforming your patio’s foundation sets the stage for an upscale outdoor retreat without premium costs. We’ll explore proven flooring answers that deliver maximum visual impact while keeping expenses minimal.
Lay Gravel or Pea Stone for a Clean Look
Gravel surfaces create sophisticated patio foundations at remarkably low costs. We can clear existing grass areas and install landscaping fabric as a base layer to prevent weeds from sprouting through the stones. Pea stone offers smooth texture perfect for barefoot walking while providing excellent drainage during rainy seasons.
This flooring option works exceptionally well for large backyard spaces where traditional materials would become prohibitively expensive. The textural contrast between natural stones and surrounding garden elements adds clean visual appeal that rivals costlier alternatives. Maintenance requirements stay minimal since weeds can’t penetrate through properly installed fabric barriers.
Use Concrete Pavers in Creative Patterns
Concrete pavers unlock endless design possibilities when we handle installation ourselves. We can arrange standard pavers in herringbone patterns, circular designs, or geometric layouts that rival professional installations at fraction of the cost. Spacing pavers with moss or ground cover between them creates informal barefoot friendly surfaces perfect for family gatherings.
DIY paver patios achieve elegant durability while delivering substantial savings compared to hired contractors. We can customize shapes to fit unique yard dimensions and create flowing transitions between different outdoor zones. Creative patterns using alternating colors or sizes add sophisticated visual interest that appears far more expensive than actual material costs.
Apply Outdoor Rugs to Define Spaces
Outdoor rugs instantly warm up hard patio surfaces while adding color and texture at budget friendly prices. We can use weather resistant rugs to define separate seating areas, dining zones, or conversation spaces without permanent installations. Strategic placement creates visual boundaries that make small patios feel larger and more organized.
These versatile design elements bring indoor comfort outdoors while protecting feet from hot stone or concrete surfaces during summer months. We can easily swap seasonal colors or patterns to refresh the patio’s appearance throughout the year without major renovation expenses.
Build Functional Storage Solutions for Garden Tools
 6")
Smart storage answers keep our patio organized while maintaining its aesthetic appeal on a budget. Functional garden tool storage eliminates clutter and makes outdoor tasks more efficient.
Construct a Simple Shed From Reclaimed Wood
Building a simple shed from reclaimed wood provides essential storage while adding rustic charm to our patio space. We can source reclaimed wood from construction sites, old barns, or online marketplaces for significantly less than new materials. The weathered texture and natural patina of reclaimed wood create an authentic vintage look that complements any garden aesthetic.
Constructing our storage shed requires basic tools like a drill, saw, and hammer along with simple hardware. We’ll need approximately 10-15 boards for walls, 6-8 pieces for the roof frame, and basic hinges for the door. The entire project typically costs between $75-150 depending on the size and available materials. This DIY approach delivers a custom storage solution that costs 60-70% less than purchasing a pre-built shed.
Create Hidden Storage Benches
Hidden storage benches serve dual purposes as seating and tool storage while maximizing our patio’s functionality. We can build these versatile pieces using basic lumber or repurpose old wooden crates and storage boxes. Adding hinged tops transforms ordinary seating into clever storage compartments for garden tools, cushions, and outdoor accessories.
Constructing hidden storage benches requires minimal materials including 2×4 lumber for the frame, plywood for the seat, and heavy duty hinges. We’ll spend approximately $40-80 per bench depending on size and finish choices. These multipurpose pieces eliminate the need for separate storage units while providing comfortable seating for guests.
Install Wall-Mounted Organizers
Wall mounted organizers maximize vertical space while keeping frequently used tools within easy reach. We can install simple pegboard systems, magnetic strips, or custom wooden racks on existing walls or fence surfaces. These organizers work particularly well for lightweight tools like hand trowels, pruning shears, and watering accessories.
Installing basic wall organizers costs between $25-60 and takes less than two hours to complete. We’ll need wall anchors, screws, and our chosen organizational system whether it’s pegboard, magnetic strips, or custom hooks. This storage method keeps our patio floor clear while ensuring garden tools remain visible and accessible for quick outdoor projects.
Add Water Elements for Tranquil Ambiance
 7")
Water features transform our budget-friendly patio into a peaceful retreat. We can easily incorporate soothing water elements without very costly.
Build a Small Container Water Garden
Container water gardens offer the simplest way to add aquatic beauty to our patio space. We’ll need a large, waterproof container like a plastic tub or galvanized stock tank as our foundation. Filling the container with water creates an instant water feature that requires minimal maintenance.
Adding water plants like lilies or papyrus brings natural elegance to our container garden. These plants thrive in aquatic environments and provide visual interest throughout the growing season. We can arrange multiple containers of different sizes to create depth and variety in our water display.
Positioning our container water garden near seating areas maximizes its calming effect. The gentle movement of water plants and occasional ripples create a meditative atmosphere that enhances our outdoor relaxation time.
Install a Simple Solar Fountain
Solar fountains provide cost-effective water circulation without electrical wiring complications. These fountains use sunlight to power small pumps that create gentle water movement and soothing sounds. We can choose from various sizes and styles to match our patio’s aesthetic.
Placing solar fountains directly in container water gardens or separate decorative vessels offers flexibility. The fountains work automatically during daylight hours and require no ongoing electricity costs. We should position them where they’ll receive adequate sunlight for optimal performance.
Maintenance remains minimal since solar fountains have few moving parts. Regular cleaning of the solar panel and pump ensures consistent operation throughout the season.
Create a Rain Chain Water Feature
Rain chains serve as affordable alternatives to traditional downspouts while adding visual appeal. These decorative chains guide rainwater from our roof to the ground or collection basin below. We can select from simple cup designs to elaborate link patterns that complement our patio style.
Pairing rain chains with basins or surrounding stones creates visually striking water features. During rainfall, we’ll enjoy watching water cascade down the chain links into our collection area. Adding plants around the base enhances the natural appearance of this functional feature.
Installing rain chains requires minimal tools and expertise compared to complex water features. We simply attach the chain to our existing gutter system and position a collection basin or decorative stones at the bottom to complete our budget-friendly water element.
Conclusion
We’ve shown you that creating your dream garden patio doesn’t require very costly. With these practical strategies you can transform any outdoor space into a stunning retreat that rivals expensive professional designs.
The key lies in smart planning and creative resourcefulness. By repurposing materials building DIY features and choosing budget-friendly alternatives you’ll achieve remarkable results while staying within your financial limits.
Remember that the best patios reflect your personal style and meet your exact needs. Whether you’re working with a tiny balcony or spacious backyard these budget-conscious approaches will help you create an outdoor sanctuary you’ll love for years to come.
Start with one or two projects that excite you most then gradually build your perfect patio paradise. Your wallet and your family will thank you for it.
Frequently Asked Questions
How much does it cost to create a budget-friendly patio retreat?
Creating a beautiful patio retreat can cost as little as $200-500 for basic transformations. Key budget items include fire bowls ($50), DIY storage benches ($40-80), solar lighting ($15-25), and gravel flooring. By repurposing materials like pallets and using creative DIY solutions, you can achieve an upscale look without premium costs.
What are the cheapest materials for patio seating?
Old pallets are the most cost-effective seating material, often available for free or under $20. Cinder blocks offer another budget option for modern configurations. You can also repurpose indoor furniture by weatherproofing it with outdoor-rated sealants and fabrics, extending their life for outdoor use.
How can I add lighting to my patio without electrical work?
Solar string lights are the easiest solution, starting at $15-25 with no installation required. Create DIY mason jar lanterns for under $5 each, or use battery-operated candles ($3-8 each) for safe, versatile lighting. These options provide excellent ambient lighting without professional electrical installation.
What’s the most affordable way to create privacy on a patio?
Plant fast-growing bamboo or evergreen shrubs for natural, low-maintenance privacy screens. Build lattice screens using inexpensive wood or plastic materials. Outdoor curtains made from canvas drop cloths offer a flexible, customizable option that can be weather-treated for durability.
How do I create vertical gardens in small patio spaces?
Build pallet herb garden walls using free or low-cost reclaimed pallets. Create hanging planters from recycled containers like plastic bottles and colanders. Install trellis systems for climbing plants, which provide natural privacy screens while maximizing vertical space without consuming floor area.
What are budget-friendly patio flooring options?
Gravel or pea stone provides excellent drainage and sophisticated appearance with minimal maintenance costs. Concrete pavers arranged in creative patterns offer DIY-friendly installation and elegant durability. Outdoor rugs add color and texture while defining spaces and making hard surfaces more comfortable.
How can I add water features to my patio affordably?
Create container water gardens using waterproof containers filled with aquatic plants like lilies. Install solar fountains that use sunlight for power without electrical costs. Build rain chain water features as affordable alternatives to traditional downspouts, adding tranquil water sounds to your space.
What storage solutions work best for small patio spaces?
Build simple sheds from reclaimed wood ($75-150) for rustic charm and ample storage. Create dual-purpose storage benches ($40-80 each) that provide seating and organization. Install wall-mounted organizers like pegboards ($25-60) to maximize vertical space and keep tools accessible.