Transforming your outdoor space doesn’t require a massive budget or professional landscaper. We’ve discovered that the most stunning gardens often come from creative DIY projects that reflect your personal style and vision.
Whether you’re working with a sprawling backyard or a compact urban patio, we’ll show you how simple materials and weekend projects can create extraordinary results. From repurposed containers turned into vibrant planters to handcrafted garden structures that add architectural interest, these DIY ideas prove that beautiful gardens are within everyone’s reach.
We’re excited to share practical projects that’ll help you maximize your garden’s potential while keeping costs low. These aren’t complicated builds requiring specialized tools – they’re approachable answers that deliver impressive visual impact and functionality to any outdoor space.
Create a Stunning Garden Path with Recycled Materials
Transforming discarded materials into beautiful walkways showcases creativity while keeping costs minimal. We’ll explore practical approaches that turn everyday waste into functional garden features.
Using Old Bricks and Stones
Salvaged bricks from construction sites or demolition projects offer unlimited design possibilities for garden pathways. We recommend collecting bricks of similar sizes to ensure even surfaces and stable walking areas. Different patterns like herringbone, basket weave, or simple straight lines create distinct visual effects that complement various garden styles.
Preparation involves clearing the pathway area to a depth of 4 inches and adding a base layer of sand or gravel. We suggest using a rubber mallet to level each brick and maintain consistent spacing throughout the installation. Weathered bricks with character marks tell stories while providing excellent drainage between joints.
Natural stones from creek beds or fields create rustic pathways that blend seamlessly with industry features. We find that irregular shaped stones work best when arranged puzzle style with smaller pieces filling gaps. Moss naturally grows between stone joints adding organic texture and visual interest over time.
Edge restraints using salvaged materials prevent pathway spreading and maintain clean borders. We often repurpose concrete blocks or large stones as natural boundaries that define walking areas. Proper edging extends pathway lifespan while reducing maintenance requirements throughout growing seasons.
Repurposing Wooden Pallets for Walkways
Disassembled pallet boards provide excellent pathway materials when properly treated for outdoor conditions. We recommend selecting pallets marked with HT stamps indicating heat treatment rather than chemical processing. Sanding rough surfaces prevents splinters while preserving natural wood character that weathers beautifully.
Creating modular pathway sections allows easy installation and future modifications as garden layouts evolve. We typically cut pallet boards into 2 foot sections that interlock or butt together forming continuous walking surfaces. Pre drilling holes prevents wood splitting during assembly and ensures long lasting connections.
Treating reclaimed wood with natural sealers protects against moisture damage and extends pathway durability. We apply linseed oil or eco friendly wood preservatives that penetrate deeply without harmful chemical runoff. Regular annual treatments maintain appearance while protecting investment in recycled materials.
Installing proper drainage underneath wooden walkways prevents rot and maintains structural integrity. We excavate pathway areas and add gravel bases that allow water flow while supporting wooden surfaces above ground level. Adequate spacing between boards promotes air circulation and faster drying after rain events.
Build Custom Raised Garden Beds on a Budget

Creating raised garden beds doesn’t require expensive materials or professional installation when you know the right techniques. We’ll show you how to build durable, attractive raised beds using affordable materials that deliver excellent results.
Constructing with Cedar Planks
Cedar planks offer the perfect balance of affordability and longevity for DIY raised bed construction. We recommend starting with cedar because it naturally resists rot and insects without requiring chemical treatments.
Materials you’ll need for cedar construction:
| Material | Purpose | Estimated Cost |
|---|---|---|
| Cedar planks | Frame construction | $30-50 per bed |
| Wood screws or nails | Assembly | $5-10 |
| Weather-resistant wood glue | Extra stability | $3-5 |
| Sand or gravel | Drainage layer | $10-15 |
Building steps we recommend:
- Measure your desired bed dimensions and cut cedar planks accordingly
- Assemble the frame using wood screws for stronger joints than nails provide
- Apply weather-resistant wood glue at all connection points for enhanced durability
- Create a drainage layer with sand or gravel before adding soil
- Fill with topsoil mixed with organic matter to promote optimal plant growth
Using Concrete Blocks for Durability
Concrete blocks provide exceptional longevity and require minimal maintenance once installed. We find this method particularly effective for gardeners seeking permanent raised bed answers.
Essential materials for concrete block beds:
- Concrete blocks for wall construction
- Sand or gravel base for proper foundation
- Quality topsoil and compost mixture
Installation process we follow:
- Establish a level foundation using sand or gravel as the base layer
- Stack concrete blocks systematically to form sturdy bed walls
- Ensure blocks interlock properly for maximum structural integrity
- Fill the completed bed with topsoil, compost, and organic matter blend
Additional budget-friendly options include planter wall block raised gardens that incorporate built-in seating features. Galvanized planters converted from large containers offer another cost-effective approach. Elevated wood planter boxes constructed from reclaimed materials provide easy access while maximizing your garden investment.
Design Unique Plant Containers from Household Items

Finding creative alternatives to traditional planters doesn’t require expensive trips to the garden center. We can transform everyday household items into stunning plant containers that add personality and charm to our gardens.
Transforming Old Tires into Colorful Planters
Old tires make excellent planters when we give them a vibrant makeover. Cleaning the tires thoroughly removes any debris and dirt that could harm our plants.
Painting transforms these discarded items into eye-catching garden features. We can use bright colors like turquoise, coral, or sunshine yellow to create focal points in our garden spaces. Spray paint works best for even coverage on rubber surfaces.
Drilling drainage holes in the tire’s bottom prevents water from pooling around plant roots. We should create 4-6 holes using a drill with a large bit to ensure proper water flow.
Stacking multiple painted tires creates tiered planters that maximize growing space. We can plant cascading flowers like petunias in the top tier and trailing varieties like sweet potato vine in lower sections.
Converting Plastic Bottles for Herb Gardens
Plastic bottles offer an ideal solution for creating compact herb gardens in small spaces. We can use 2-liter soda bottles or large water jugs to house our favorite cooking herbs.
Cutting the bottle horizontally about one-third from the top creates a perfect planter size for individual herbs. The bottom section holds soil while the top portion can serve as a protective dome for seedlings.
Creating drainage holes prevents root rot in our container herbs. We should punch 3-4 small holes in the bottle’s bottom using a heated nail or small drill bit.
Mounting these bottle planters on walls or fences maximizes vertical growing space. We can secure them with brackets or strong zip ties to create living herb walls near our kitchen windows.
Labeling each container helps us identify different herbs as they grow. We can use waterproof markers or adhesive labels to mark basil, oregano, thyme, and other culinary favorites.
Establish a Vertical Garden System for Small Spaces

Maximizing growing space becomes essential when we’re working with limited garden areas. Vertical gardening systems offer practical answers that transform walls and fences into productive growing surfaces.
Modular wall planters attach directly to existing structures and eliminate the need for floor space while supporting herbs, vegetables, and decorative plants. We can create these systems using recycled materials like old pallets or wooden crates for an inexpensive approach. Painting these repurposed materials adds a personalized touch that complements our garden’s aesthetic.
Soda bottle planters provide compact growing answers for herbs and succulents when we clean empty bottles thoroughly and drill drainage holes in the bottom. These lightweight containers work perfectly for vertical mounting systems and cost virtually nothing to carry out.
Creating Living Walls with Pocket Planters
Slat wall systems offer customizable frameworks that accommodate various planter sizes and materials including wood or metal components. We can build these structures to fit exact wall dimensions and attach small planters at different heights for visual interest.
Terra cotta pot arrangements create striking displays when we angle pots strategically along vertical surfaces. This design approach works exceptionally well for flowering plants and provides excellent drainage naturally.
Fabric pocket planters use mesh or cloth materials attached to frames for easy installation and maintenance. These lightweight systems accommodate multiple plants in compact spaces and allow us to change plantings seasonally without major modifications.
Building Ladder-Style Plant Displays
Repurposed ladders transform into unique vertical displays when we attach hooks, shelves, or window boxes to each rung. Leaning these converted ladders against fences or walls provides stable support while creating interesting focal points.
Trellis functionality emerges when we use lower ladder rungs to support climbing plants like peas or beans. This dual-purpose approach maximizes both vertical growing space and structural utility in our garden design.
Construct Functional Garden Storage Solutions

We can transform our outdoor spaces with smart storage answers that keep our gardening tools organized and protected from the elements.
Making Tool Organizers from PVC Pipes
Creating a PVC pipe tool holder offers us a versatile and budget-friendly way to organize our garden equipment. We can mount these organizers directly on walls or fences to maximize our storage space while keeping tools easily accessible.
Building the organizer requires cutting PVC pipes into various lengths to accommodate different tool sizes. We secure the pipes to a backing board or fence using pipe clamps or zip ties for quick assembly. Customizing compartments allows us to create exact slots for shovels, rakes, hoes, and smaller hand tools.
Weatherproofing our PVC organizers involves selecting UV-resistant pipes and adding protective caps to prevent water accumulation. We can also drill drainage holes at the bottom of each pipe section to ensure moisture doesn’t collect inside.
Building Weather-Resistant Storage Benches
Constructing weatherproof benches with hidden compartments gives us dual-purpose furniture that provides both seating and storage for our garden supplies. We achieve the best results using weather-resistant materials like cedar wood or recycled plastic that can withstand outdoor conditions.
Designing the bench structure starts with creating a sturdy frame that can support both weight and weather exposure. We build the seat with a hinged lid mechanism that allows easy access to the storage compartment below. Adding waterproof seals around the lid prevents moisture from entering and damaging our stored items.
Installing outdoor storage cabinets offers us another weather-resistant option specifically designed for garden use. We position these cabinets in strategic locations around our garden to create convenient storage zones for different types of equipment and supplies.
Improving garden aesthetics becomes possible when we choose storage answers that complement our existing outdoor decor. We can paint or stain our benches to match our garden’s color scheme while maintaining their protective finish against the elements.
Install Creative Water Features Using Simple Supplies

Water features bring tranquil sounds and visual appeal to any garden space, and you can create them using materials you likely already have at home. We’ll show you how to transform everyday items into stunning water displays that serve as focal points while keeping costs minimal.
Repurposed containers make excellent foundation pieces for DIY water features. Galvanized buckets, old whiskey barrels, iron teapots, and resin globes can all house submersible pumps that create continuous water circulation. Stack stones, concrete blocks, or pieces of wood around these containers to build rock fountains, tiered birdbaths, or cascading waterfalls that add dimension to your garden.
Pondless waterfalls offer space-saving answers for smaller gardens since they use hidden reservoirs with recirculating pumps instead of requiring full pond installations. These systems eliminate the maintenance headaches that come with traditional water features while still providing the soothing sounds of flowing water. Create modern water walls using glass sheets, wood panels, or metal surfaces that can be customized to fit any patio dimensions.
Crafting Solar-Powered Fountains
Solar-powered fountains combine environmental consciousness with practical garden enhancement by requiring only a solar panel, compatible water pump, and water basin for complete operation. These setups work perfectly in birdbaths, galvanized buckets, or decorative bowls that you can position in sunny garden locations without needing electrical wiring or access to power outlets.
Garden centers stock complete fountain kits, though sourcing individual components allows for more creative custom designs customized to your exact space. The pump mechanism circulates water from the basin up through a fountain head, then gravity returns the water back to the basin in a continuous cycle. Position the solar panel in the sunniest spot possible to ensure consistent water flow throughout daylight hours.
Weather-resistant materials ensure your solar fountain continues operating through various seasonal conditions. Test different fountain head attachments to create various water patterns, from gentle bubbling effects to more dramatic spray displays that match your garden’s overall aesthetic.
Designing Rain Chain Collection Systems
Rain chains provide an attractive alternative to traditional downspouts while guiding water runoff from gutters directly into collection areas below. We can create these functional art pieces using metal cups, ceramic vessels, or repurposed glass bottles that create pleasant tinkling sounds as water flows through each link.
Attach the top of your rain chain securely to the gutter outlet, then direct the bottom end toward a rain barrel, decorative collection pot, or established garden bed where the water can benefit your plants. This system reduces soil erosion around your home’s foundation while supporting water conservation efforts that lower utility bills.
Collection containers beneath rain chains serve dual purposes by storing harvested rainwater for later garden use and preventing water from pooling in unwanted areas. Connect multiple rain chains along different gutter sections to maximize water collection across your entire roof system, creating a network that transforms storm runoff into valuable garden resources.
Develop Natural Pest Control Methods with DIY Traps

Building effective pest deterrents protects our garden investments without relying on harsh chemicals. Natural control methods preserve beneficial insects while targeting troublesome pests through strategic DIY answers.
Creating Beer Slug Traps
Beer slug traps eliminate destructive slugs using their natural attraction to fermented beverages. Dig a shallow hole near affected plants and fill it with beer, creating an irresistible lure that slugs can’t escape from. Position multiple traps throughout vulnerable garden areas, spacing them 3-4 feet apart for maximum coverage.
Replace the beer every 2-3 days to maintain effectiveness, as stale beer loses its attractive properties. Choose inexpensive beer varieties since the alcohol content matters more than quality for this pest control method. Empty trapped slugs regularly to prevent the traps from becoming breeding grounds for other unwanted insects.
Combine beer traps with companion plants like rosemary and lavender to create multiple defense layers against garden pests. This approach maximizes protection while minimizing maintenance requirements throughout the growing season.
Making Companion Planting Arrangements
Companion planting arrangements create natural pest barriers using strategic plant combinations that repel unwanted insects. Plant marigolds throughout vegetable gardens to deter nematodes while adding vibrant color to functional growing spaces. These flowers release compounds that naturally discourage soil-dwelling pests from attacking nearby crops.
Position basil plants near tomatoes and peppers to repel aphids while improving the flavor of neighboring vegetables. Essential oils from herbs like rosemary, parsley, and lavender create aromatic barriers that many insects find unpleasant. Space companion plants 12-18 inches apart to ensure adequate airflow while maintaining protective coverage.
Rotate companion plantings seasonally to prevent pests from adapting to exact plant arrangements. Mix different herb varieties throughout garden beds to create diverse scent profiles that confuse and deter various pest species. Document successful combinations for future planting seasons, noting which partnerships provide the most effective pest control results.
Fashion Garden Art and Decorative Elements

Transforming your garden into an artistic sanctuary doesn’t require expensive materials or professional skills. We can create stunning visual elements using simple techniques that add personality and charm to our outdoor spaces.
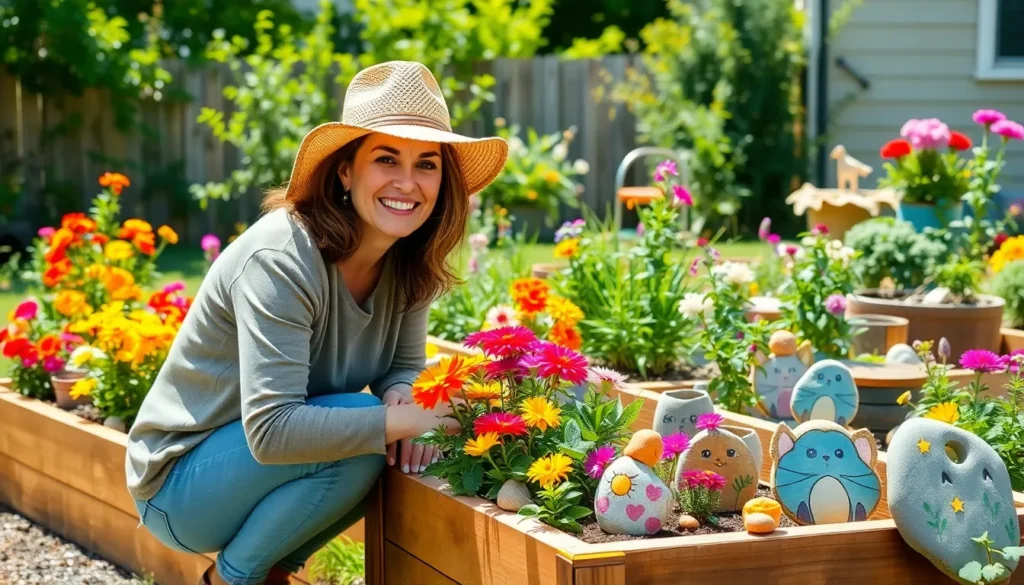
Painting Rocks for Colorful Accents
Painted rocks offer one of the most accessible ways to introduce vibrant colors throughout our garden beds and pathways. We start by collecting smooth stones from our property or nearby areas, selecting various sizes to create visual interest across different spaces.
Acrylic paints work best for this project since they adhere well to stone surfaces and resist fading. We can decorate our rocks with garden themed designs like flowers, insects, or abstract patterns that complement our existing industry. Bold geometric shapes create modern focal points, while nature inspired motifs blend seamlessly with plant collections.
Applying a clear weather resistant sealant protects our artwork from rain, snow, and UV damage. We recommend coating each painted rock with two thin layers, allowing complete drying between applications. Strategic placement among plants or along garden borders creates delightful surprises that visitors discover while exploring our outdoor space.
This budget friendly create engages family members of all ages and provides endless creative possibilities. We can update our rock collection seasonally, switching summer butterflies for autumn leaves or winter snowflakes.
Crafting Wind Chimes from Garden Waste
Wind chimes made from repurposed garden materials combine sustainability with soothing sounds that enhance our outdoor atmosphere. We collect natural elements like twigs, branches, seed pods, shells, and dried flowers that accumulate during regular garden maintenance.
Combining these organic materials with recycled metal pieces, colorful beads, or small bells creates unique sound combinations. We thread our materials onto strong fishing line or thin wire, varying lengths to produce different tones when wind moves through the assembly.
Tree branches, pergolas, and porch ceilings provide ideal hanging locations where breezes can activate our homemade chimes. The gentle sounds create a calming auditory backdrop that transforms our garden into a peaceful retreat space.
DIY wind chimes reflect our personal style while demonstrating resourcefulness in reusing materials that might otherwise become waste. We can customize each creation to match seasonal themes or coordinate with existing garden decor elements.
Set Up Efficient Irrigation Systems Without Professional Help

Maintaining consistent garden watering doesn’t require expensive professional installation when we can create effective irrigation systems using affordable materials and simple techniques.
Building Drip Irrigation with Plastic Bottles
Transform everyday plastic bottles into targeted watering systems that deliver water directly to plant roots while conserving resources. We’ll need plastic bottles, a drill, nails, tubing, and access to a water source for this budget-friendly irrigation method.
Start by drilling small holes in the bottom of each plastic bottle to create controlled water release points. Position bottles strategically near plants that require regular watering, ensuring the holes face toward root zones for maximum efficiency.
Connect bottles to your water source using flexible tubing that allows for customized water distribution throughout the garden. Secure tubing connections with nails when necessary to prevent disconnection during use.
Monitor water flow rates by adjusting hole sizes based on individual plant requirements, with smaller holes providing slower drip rates for moisture-sensitive plants.
Installing Soaker Hose Networks
Create comprehensive watering coverage using soaker hoses that distribute water evenly along their entire length through tiny pores. We’ll require soaker hoses, a manifold system, and a programmable timer to establish this efficient network.
Lay soaker hoses strategically across garden beds following natural plant groupings and maintaining consistent spacing between rows for optimal coverage.
Connect multiple hoses to a central manifold that regulates water pressure and ensures balanced distribution throughout the entire system. This connection method prevents uneven watering that can occur with single-hose installations.
Install a programmable timer to automate watering schedules based on seasonal requirements and plant growth stages. Automated systems reduce water waste while maintaining consistent moisture levels during peak growing periods.
Test the network regularly by checking soil moisture levels at various points to ensure adequate water penetration and adjust timing schedules accordingly.
Establish Composting Systems for Garden Nutrition

Transforming kitchen scraps and garden waste into nutrient-rich soil amendments creates sustainable growing conditions while reducing household waste. Composting systems can be built using simple materials and methods that fit various garden sizes and budgets.
Creating Tumbler Composters from Barrels
Tumbler composters accelerate decomposition through regular mixing and improved aeration compared to static compost piles. Start by selecting a food-grade plastic barrel or drum, then clean it thoroughly to remove any residue or chemicals. Drill holes approximately 1/4 inch in diameter around the entire surface, spacing them about 6 inches apart to ensure proper airflow throughout the composting material.
Mount the barrel horizontally on a sturdy stand made from metal pipes or wooden frames, allowing it to rotate freely for easy turning. Position the stand at a comfortable working height to make adding materials and harvesting compost more convenient. Install a removable door or access panel on one end for loading organic waste and removing finished compost.
Turn the barrel every few days to mix contents and accelerate the composting process, which typically completes in 6-8 weeks under optimal conditions. This method works particularly well for small gardens or urban spaces where rodent-resistant, portable answers are essential. Barrel tumblers produce finished compost faster than traditional bins due to increased oxygen circulation and regular agitation.
Building Three-Bin Composting Stations
Three-bin systems organize composting into distinct stages: fresh material collection, active decomposition, and finished compost storage. Construct each bin using wood pallets, wire fencing, or simple lumber to create open structures that allow proper airflow while containing organic materials.
Size each compartment at least 4 feet by 4 feet to generate sufficient heat for effective microbial activity and decomposition. Wire fencing provides excellent ventilation while containing materials, making it ideal for active composting bins. Pallets offer sturdy construction and are widely available at low cost, perfect for DIY builders seeking durable answers.
| Composting Stage | Bin Purpose | Typical Duration |
|---|---|---|
| Fresh Material | Collection of new organic waste | 2-4 weeks |
| Active Decomposition | Hot composting with regular turning | 8-12 weeks |
| Finished Compost | Cured, ready-to-use soil amendment | Storage until use |
Position the bins side by side for easy material transfer between stages as composting progresses. Fill the first bin with fresh kitchen scraps, yard waste, and brown materials like dried leaves or shredded paper. Move partially decomposed material to the second bin for active composting, turning it regularly to maintain proper moisture and temperature. Transfer finished compost to the third bin for curing and storage until you’re ready to apply it to garden beds.
This continuous system ensures a steady supply of finished compost while efficiently managing organic waste throughout the year. Three-bin stations handle larger volumes of material compared to single containers, making them perfect for households with substantial garden and kitchen waste.
Conclusion
We’ve shown you that creating a beautiful garden doesn’t require expensive tools or professional expertise. From repurposed containers and natural pest control to efficient irrigation systems and artistic touches, these DIY projects prove that creativity trumps budget every time.
The best part about these garden DIY ideas is their flexibility. Whether you’re working with a sprawling backyard or a tiny balcony, there’s something here that’ll work for your space and skill level.
Start with one project that excites you most and gradually expand your DIY garden toolkit. You’ll be amazed at how these simple changes transform your outdoor space while keeping money in your pocket and waste out of landfills.
Frequently Asked Questions
Can I create a beautiful garden on a tight budget?
Yes! You can transform any outdoor space into a stunning garden using DIY projects with recycled and repurposed materials. Creative solutions like using old tires as planters, wooden pallets for pathways, and plastic bottles for vertical gardens can achieve professional-looking results without breaking the bank.
What materials can I use to create garden paths cheaply?
Salvaged bricks, stones, and wooden pallets make excellent pathway materials. Heat-treated pallets are ideal for outdoor use when properly treated and sealed. These recycled materials can create unique, attractive walkways while keeping costs minimal and ensuring proper drainage.
How do I build raised garden beds without spending much money?
Use affordable materials like cedar planks, concrete blocks, or planter wall blocks. These materials are durable and can be assembled into functional raised beds with basic tools. Reclaimed wood and repurposed materials can further reduce costs while maintaining quality.
What household items can become plant containers?
Old tires, plastic bottles, wooden crates, and food containers make excellent planters. Clean them thoroughly, add drainage holes, and apply weather-resistant paint or sealant. These alternatives are often more creative and cost-effective than store-bought planters.
How can I maximize planting space in a small garden?
Vertical gardening systems using wall planters, soda bottle towers, and repurposed ladders maximize growing space without using floor area. Living walls with pocket planters and modular systems allow you to grow more plants in compact spaces efficiently.
What are some DIY garden storage solutions?
Create tool organizers from PVC pipes that mount on walls, build storage benches with hidden compartments, or install outdoor cabinets. These solutions keep tools organized, protected from weather, and easily accessible while maintaining your garden’s aesthetic appeal.
How can I add water features to my garden inexpensively?
Build rock fountains using repurposed containers, create pondless waterfalls with hidden reservoirs, or install solar-powered fountains for eco-friendly operation. Rain chain collection systems also provide attractive water management while supporting conservation efforts.
What natural methods work for pest control in gardens?
Beer slug traps effectively eliminate slugs without chemicals. Companion planting with marigolds, basil, and other herbs creates natural pest barriers. Seasonal rotation of companion plants maintains effectiveness while supporting overall garden health naturally.
How can I add artistic elements to my garden affordably?
Paint rocks with acrylic paints and weather-resistant sealants to create colorful accents. Craft wind chimes from repurposed garden materials and natural elements. These projects add personal touches while encouraging creativity and resourcefulness in garden design.
What’s the easiest way to set up garden irrigation on a budget?
Build drip irrigation systems using plastic bottles to deliver water directly to roots, or install soaker hose networks for comprehensive coverage. Add programmable timers to automate watering schedules, ensuring consistent moisture while conserving water resources effectively.
How do I start composting in my garden?
Build tumbler composters from food-grade barrels for efficient decomposition, or create three-bin composting stations to manage organic waste. These systems work with various garden sizes and budgets, providing nutrient-rich soil amendments while reducing household waste.