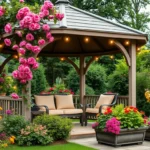
Transform your garden into a stunning outdoor oasis without very costly! Cinder blocks aren’t just for construction – they’re versatile building materials that can revolutionize your gardening game. We’ve discovered countless creative ways these affordable concrete blocks can elevate your industry design while solving common gardening challenges.
From raised garden beds to stylish planters and functional retaining walls, cinder blocks offer endless possibilities for DIY enthusiasts. Their durability makes them perfect for creating long-lasting garden structures that withstand weather extremes. Plus, their hollow design provides excellent drainage and allows for creative planting opportunities that traditional materials simply can’t match.
Whether you’re a seasoned gardener or just starting your green thumb journey, we’ll show you how to maximize your outdoor space with budget-friendly cinder block projects. These practical answers will help you create organized growing areas, define garden boundaries, and add architectural interest to any yard size.
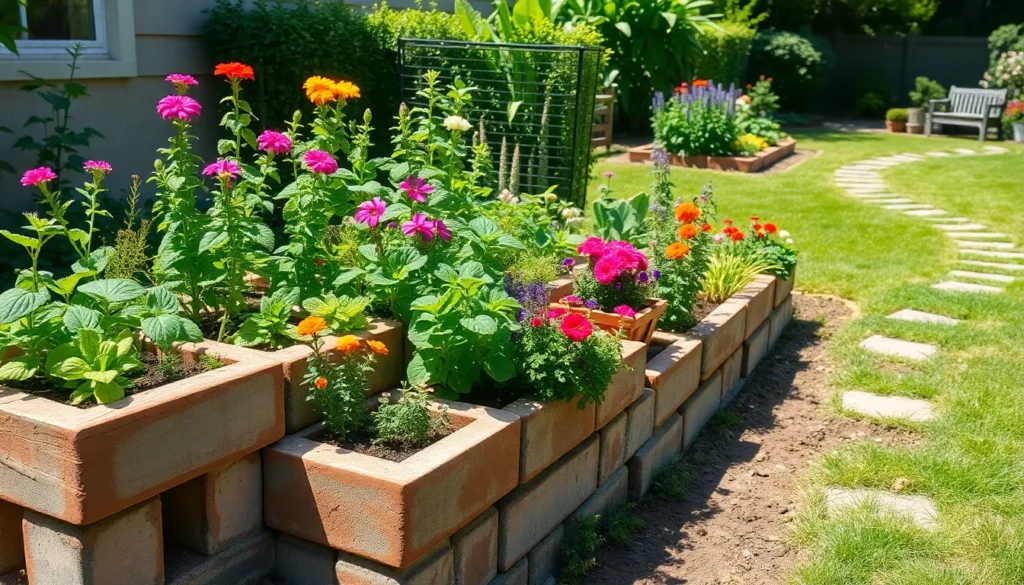
Raised Garden Beds With Cinder Blocks
Building raised garden beds with cinder blocks offers gardeners an affordable and durable solution for creating organized growing spaces. We’ll explore how these versatile building materials can transform your gardening experience through their practical benefits and straightforward construction process.
Benefits of Cinder Block Raised Beds
Exceptional drainage tops our list of cinder block advantages for raised garden beds. The hollow design naturally creates air pockets that prevent waterlogged soil conditions while allowing excess moisture to escape through the bottom openings.
Long lasting durability makes cinder blocks an investment that pays off over decades of gardening seasons. These concrete blocks withstand harsh weather conditions, freeze thaw cycles, and soil pressure without cracking or deteriorating like wooden alternatives.
Instant soil warming occurs when cinder block walls absorb and retain heat from sunlight during the day. This thermal mass effect extends growing seasons by keeping plant roots warmer during cool nights and early spring planting periods.
Easy height customization allows us to stack blocks to our preferred gardening level without bending or kneeling. We can create beds ranging from 8 inches to 24 inches tall by simply adding additional courses of blocks.
Cost effective construction delivers professional looking results at a fraction of traditional raised bed materials. A standard 4×8 foot cinder block raised bed typically costs 60% less than equivalent cedar or composite lumber options.
Step by Step Construction Guide
Level the ground by removing grass and debris from your chosen garden bed location. Use a rake to smooth the soil surface and check for evenness with a long board or level tool.
Mark your perimeter using spray paint or stakes and string to outline the exact dimensions of your raised bed. Standard dimensions work well at 4 feet wide by 8 feet long for easy reach access.
Excavate a shallow trench approximately 2 inches deep along your marked perimeter lines. This foundational groove helps stabilize the first course of blocks and prevents shifting over time.
Place the first course of cinder blocks with their hollow cores facing upward in your prepared trench. Check each block for level using a bubble level and adjust the soil underneath as needed.
Add subsequent layers by stacking additional courses of blocks in a running bond pattern where vertical joints don’t align. This interlocking method increases structural stability without requiring mortar.
Fill with quality soil by adding a mixture of compost, topsoil, and organic matter to create nutrient rich growing medium. Leave 2 inches of space below the top edge to prevent soil spillage during watering.
Best Plants for Cinder Block Raised Beds
Vegetables thrive in the well draining environment that cinder block beds provide, particularly root crops like carrots, radishes, and beets. These plants benefit from the loose soil structure and consistent moisture levels.
Herbs flourish in the slightly alkaline conditions that concrete blocks naturally create over time. Mediterranean herbs such as oregano, thyme, and rosemary particularly appreciate this pH environment.
Leafy greens like lettuce, spinach, and kale perform exceptionally well in cinder block raised beds due to the improved soil temperature regulation. The thermal mass helps prevent bolting during temperature fluctuations.
Perennial flowers including lavender, sedum, and ornamental grasses create stunning displays while taking advantage of the excellent drainage characteristics. These plants establish strong root systems in the structured growing environment.
Small fruit plants such as strawberries and compact blueberry varieties adapt perfectly to raised bed growing conditions. The elevated planting area improves air circulation and makes harvesting more convenient.
Vertical Garden Walls Using Cinder Blocks

Vertical cinder block gardens maximize your growing space while creating stunning living walls that transform any outdoor area. We’ll show you how these affordable blocks stack into beautiful tiered structures that accommodate diverse plant collections.
Creating a Living Wall Structure
Stack cinder blocks in pyramid or tiered formations to create visually striking vertical gardens that offer easy plant access. Multiple block sizes add dimensional interest to your living wall while providing varied planting depths for different species. We recommend securing blocks with industry adhesive for freestanding structures or attaching them directly to existing walls for added stability.
Line the hollow spaces with industry fabric or plastic sheeting to prevent soil loss and direct water flow efficiently. This lining creates a barrier that keeps growing medium contained while allowing proper drainage. Place a base layer of lining material on the ground beneath freestanding structures to protect your patio or deck surfaces from water damage.
Position blocks with openings facing outward to create individual planting pockets throughout your vertical garden. Different stacking patterns like alternating layouts or stepped arrangements provide unique aesthetic appeal while maximizing planting opportunities.
Plant Selection for Vertical Gardens
Choose plants that thrive in limited soil volumes and adapt well to vertical growing conditions. Succulents like sedum and echeveria excel in cinder block gardens because they require minimal water and soil depth. Trailing plants such as creeping jenny and ivy cascade beautifully from upper blocks while creating natural green curtains.
Consider your wall’s sun exposure when selecting plants for optimal growth success. Full sun locations support ornamental grasses and drought tolerant perennials, while partial shade areas accommodate ferns and begonias. We suggest mixing plant types to create textural variety and seasonal interest throughout your vertical garden.
Match plant mature sizes to available growing space within each block opening. Compact varieties prevent overcrowding while ensuring each species receives adequate nutrients and moisture for healthy development.
Irrigation Systems for Vertical Setups
Install drip irrigation systems with individual emitters near each cinder block for consistent moisture distribution throughout your vertical garden. These systems deliver water directly to plant roots while minimizing waste and preventing overwatering issues. Simple timer controls automate watering schedules to maintain optimal soil moisture levels.
Create self watering reservoirs at the base of each block using water collection trays or built in drainage systems. These reservoirs store excess water for gradual plant uptake during dry periods. Hand watering remains effective for smaller vertical gardens or when you prefer direct control over moisture levels.
Ensure proper drainage by drilling additional holes in blocks or adding gravel layers at the bottom of each planting pocket. Good drainage prevents root rot and maintains healthy growing conditions for all plant varieties in your vertical cinder block garden.
Cinder Block Planters for Herb Gardens

Herb gardening becomes incredibly simple with cinder block planters that offer excellent drainage and easy customization. We’ll explore practical designs that maximize growing space while keeping herbs organized and accessible.
Single Block Planter Designs
Individual cinder blocks work perfectly as standalone herb planters for kitchen gardens. We simply fill each block’s hollow core with quality potting soil and plant our favorite herbs like basil, oregano, or thyme directly inside.
Positioning single blocks near walkways creates convenient access to fresh herbs during cooking. We can arrange multiple individual planters in rows or clusters to create attractive herb collections without complex construction.
Moving these portable planters allows us to follow sunlight patterns throughout the seasons. Each block accommodates one large herb plant or several small seedlings, making portion control simple for cooking needs.
Multi-Level Herb Garden Layouts
Stacking cinder blocks creates impressive tiered herb gardens that display plants at different heights. We build pyramid formations by placing three blocks on the bottom row, two blocks on the middle level, and one block on top.
Terraced layouts work exceptionally well for herbs with different water requirements since each level drains independently. We position Mediterranean herbs like rosemary and sage on upper levels where drainage occurs faster.
Creating corner arrangements maximizes space efficiency while providing easy access from multiple angles. We alternate block orientations to create interesting patterns while ensuring each herb receives adequate growing space.
Drainage Answers for Herb Planters
Proper drainage prevents root rot and ensures healthy herb growth in cinder block planters. We place a two-inch layer of gravel or coarse sand at the bottom of each block before adding potting soil.
Block orientation significantly impacts water flow, so we position hollow cores facing downward for optimal drainage. This arrangement allows excess water to escape through the bottom openings naturally.
Adding industry fabric over the drainage layer prevents soil from washing away while maintaining water flow. We ensure drainage holes remain unobstructed by checking them regularly and clearing any debris that might accumulate.
Garden Edging and Borders With Cinder Blocks

Cinder blocks transform ordinary garden spaces into professionally defined areas with their versatile edging capabilities. We’ll explore three key approaches to create stunning garden borders that combine functionality with visual appeal.
Defining Garden Pathways
Pathway borders created with cinder blocks establish durable edges that keep mulch and gravel contained while preventing grass encroachment. We position blocks flat or on their sides to add texture variation and height differences along walkways. Decorative finishes and paint transform standard blocks into inviting pathway elements that guide visitors through our garden spaces.
Strategic placement of these blocks creates natural stopping points and visual interest throughout the garden. We can incorporate lighting elements within the hollow cores to illuminate pathways during evening hours. Different stacking patterns allow us to customize the border height based on the pathway’s purpose and surrounding industry features.
Creating Flower Bed Boundaries
Flower bed boundaries benefit significantly from cinder block construction due to improved drainage and maintenance accessibility. We stack blocks to create raised edges that define planting areas while providing excellent soil drainage for healthier plant growth. The hollow cores serve as mini planters for succulents or small flowering plants, adding decorative elements to functional boundaries.
Modular design flexibility lets us customize flower bed shapes and sizes to fit any garden space perfectly. We can adjust the height by adding or removing block layers based on plant requirements and visual preferences. This approach creates organized growing areas that separate different plant types and watering zones effectively.
Installing Permanent Garden Borders
Permanent borders require mortared cinder blocks to form solid, long lasting walls around designated garden areas. We use these structures as retaining walls for sloped gardens and terraced landscapes that need erosion control. Strategic gaps and hollow spaces within the walls create planting pockets for vines and trailing plants that transform borders into vertical garden features.
These permanent installations provide privacy screening while adding architectural interest to our outdoor spaces. We can incorporate different block orientations and patterns to create unique textures and visual depth. The structural integrity of mortared borders supports heavier soil loads and withstands weather conditions for decades of reliable service.
Fire Pit Areas Using Cinder Blocks

Cinder blocks offer an affordable and accessible solution for creating stunning garden fire pits that enhance outdoor entertainment spaces. We’ll explore how these versatile building materials can transform your backyard into a cozy gathering spot while maintaining safety and aesthetic appeal.
Safety Considerations for Garden Fire Pits
Proper placement forms the foundation of fire pit safety. We recommend positioning your cinder block fire pit on non-combustible surfaces such as gravel, sand, or stone pads to prevent ground fires. Maintain at least 10 feet of clearance from structures, vegetation, and overhanging branches to ensure adequate safety margins.
Fire-rated or heavy-duty cinder blocks provide essential durability. Standard hollow blocks may crack or degrade when exposed to high temperatures over time, creating potential hazards. We advise investing in blocks specifically designed for high-heat applications to ensure long-term structural integrity.
Ventilation gaps between blocks promote efficient burning. These openings allow proper airflow while preventing dangerous heat buildup that could compromise block stability. Create a clear area around your fire pit by removing leaves, debris, and flammable materials before each use.
Supervision remains critical during all fire pit activities. Never leave fires unattended, and keep water or sand nearby for emergency extinguishing. Install your fire pit away from prevailing winds that could spread embers to unwanted areas.
Building Circular Fire Pit Designs
Careful block arrangement creates attractive curved fire pit walls. We start by laying the first ring of cinder blocks on a prepared base using sand or gravel for leveling and stability. This foundation layer ensures your fire pit remains level and secure throughout its lifespan.
Central guide points help achieve consistent circular shapes. Use a stake and string method to mark your desired radius, then gently angle each block inward to form the curve. This technique ensures uniform spacing and professional-looking results without complex calculations.
Masonry adhesive secures layers for permanent installations. We recommend applying adhesive between courses when building multi-layer walls for added strength and stability. This approach creates modern styling while ensuring your fire pit withstands weather and regular use.
Visual interest increases through varied block orientation. Alternate block colors or change positioning patterns between layers to create unique designs. Stack blocks in different configurations such as running bond or soldier courses to add architectural appeal to your garden fire pit area.
Surrounding Industry Integration
Complementary materials blend fire pits seamlessly into garden designs. We suggest matching cinder block colors to existing hardscape elements like walkways, retaining walls, or outdoor seating areas. This coordination creates visual continuity throughout your outdoor space.
Strategic plant placement softens harsh block edges. Surround your fire pit with mulch, decorative gravel, or low-maintenance plants that can tolerate heat and occasional sparks. These elements create natural transitions between the fire pit and surrounding garden areas.
Perimeter finishing enhances both function and appearance. Install paving stones, bricks, or decorative concrete around your fire pit to create defined seating areas and prevent grass growth. This approach provides stable footing for guests while adding professional polish to your outdoor entertainment space.
Proper lighting and furniture placement maximize safety and ambiance. We recommend installing low-voltage industry lighting along pathways leading to your fire pit area. Position outdoor furniture at safe distances while maintaining conversational groupings that encourage social interaction around your cinder block fire feature.
Outdoor Kitchen Gardens With Cinder Block Islands

We can transform our garden spaces into functional outdoor kitchens using durable cinder block construction techniques. These versatile building blocks create practical cooking and preparation areas that seamlessly blend with our existing garden design.
Prep Station Construction
Building our outdoor kitchen island starts with stacking cinder blocks to create a solid foundation base. We arrange the blocks in our desired configuration and ensure each layer is level before adding the next course. Concrete slab or wooden surface tops provide the ideal work area for food preparation and serving needs.
Standard cinder block dimensions allow us to customize island heights between 30 to 36 inches for comfortable working positions. We can create L-shaped or rectangular designs depending on our available space and cooking requirements. Mortar between block layers ensures structural stability for heavy countertop materials and daily kitchen use.
Storage Answers Within Blocks
Hollow cinder block spaces become instant storage compartments for our outdoor cooking essentials. We insert weather-resistant containers or woven baskets directly into the block openings to organize utensils and spices. Stainless steel or plastic bins protect items from moisture while maintaining easy access during meal preparation.
Custom-sized storage answers maximize the 8-inch block cavity space for optimal organization efficiency. We can dedicate exact blocks for frequently used items like grilling tools and seasonings. Removable dividers help separate different cooking accessories and prevent items from shifting during use.
Connecting Water and Electrical Systems
Safety planning becomes essential when we integrate utility connections into our cinder block kitchen islands. We route electrical conduits through designated block cavities before final installation to avoid structural modifications later. Licensed professionals should handle all electrical and plumbing connections to ensure code compliance and prevent hazardous situations.
Water line installations require proper weatherproofing and shut-off valve accessibility for maintenance needs. We position utility connections away from high-heat areas and cooking surfaces to prevent damage. Ground fault circuit interrupter (GFCI) outlets provide necessary electrical safety protection in outdoor wet environments.
Retaining Walls for Sloped Gardens

Sloped gardens present unique challenges that require smart answers to maximize their potential. Cinder blocks offer an ideal way to create sturdy retaining walls that transform uneven terrain into functional growing spaces.
Soil Erosion Prevention
Building terraced levels with cinder blocks effectively prevents soil from washing away during heavy rainfall. Each constructed level acts as a barrier that catches and holds soil in place, protecting your valuable garden investment from weather damage.
Stacking blocks strategically creates multiple catch points throughout your slope. Water naturally slows down as it encounters each terraced level, allowing it to soak into the soil rather than rushing downhill and carrying away precious topsoil.
Installing proper drainage behind each retaining wall prevents water buildup that could undermine the structure. We recommend placing a layer of gravel or crushed stone behind the blocks to allow water to filter through while maintaining soil stability.
Terraced Garden Level Creation
Terracing with cinder blocks helps create multiple planting levels that maximize your available growing space. Each tier provides a flat surface where you can plant different types of flora based on their exact water and sunlight requirements.
Constructing stepped levels allows for efficient water management throughout your garden. Plants requiring more moisture can be positioned on lower terraces where water naturally collects, while drought tolerant varieties thrive on upper levels with better drainage.
Planning your terraced layout enables you to create distinct growing zones for vegetables, herbs, flowers, and ornamental plants. This organization makes garden maintenance easier and creates visual interest with varying heights and textures.
Proper Foundation and Drainage
Establishing a solid foundation prevents cinder block retaining walls from shifting over time. We start by excavating a trench approximately 6 inches deep and filling it with compacted gravel to create a stable base for the first course of blocks.
Incorporating drainage systems ensures water doesn’t accumulate behind your retaining walls. A layer of gravel placed between the soil and blocks allows proper water flow while preventing hydrostatic pressure that could cause structural failure.
Backfilling with appropriate materials maintains long term stability of your terraced garden walls. We use a combination of coarse gravel near the blocks and well draining soil mix for planting areas to create the ideal growing environment while protecting the structural integrity of your retaining system.
Decorative Garden Features Using Cinder Blocks

Beyond their practical applications in raised beds and retaining walls, cinder blocks offer incredible potential for creating stunning decorative elements that transform ordinary gardens into personalized outdoor spaces.
Painted and Stained Block Designs
Paint transforms plain cinder blocks into vibrant garden focal points that complement your industry design perfectly. We recommend using exterior acrylic paint or masonry paint for durability against weather conditions. Popular color choices include earth tones like sage green and terracotta that blend naturally with plants, or bold colors like turquoise and coral that create eye-catching contrasts.
Stained finishes provide a more subtle enhancement while preserving the natural texture of the concrete. We’ve found that concrete stains penetrate deeper than paint, offering longer-lasting color that won’t chip or peel over time. Popular staining techniques include color washing for a weathered look or solid staining for uniform coverage.
Pattern painting adds artistic flair to functional garden structures. Geometric designs, stripes, or even hand-painted motifs can turn simple planters into conversation pieces. We suggest using stencils for consistent patterns across multiple blocks, creating a cohesive design throughout your garden space.
Mosaic and Tile Applications
Mosaic tile applications elevate cinder blocks from basic building materials to stunning garden art pieces. We recommend using exterior-grade ceramic tiles, natural stone pieces, or recycled glass for weather resistance. Popular mosaic patterns include geometric designs, flowing organic shapes, or themed motifs that reflect your garden’s style.
Installation requires proper adhesive and grout specifically designed for outdoor use. We’ve discovered that flexible tile adhesive works best on cinder block surfaces, accommodating natural expansion and contraction. Weatherproof grout prevents moisture damage and maintains the mosaic’s integrity through seasonal changes.
Creative tile combinations produce unique visual effects in garden features. Mixing different tile sizes, textures, and colors creates depth and interest in planters, benches, and wall surfaces. We often combine smooth ceramic tiles with textured natural stone for contrast, or use metallic accent tiles to catch sunlight.
Lighting Integration Options
Solar lighting embedded in hollow cores creates magical evening ambiance without electrical complications. We recommend placing solar stake lights directly into the block openings, where they charge during the day and automatically illuminate pathways or seating areas at night. This approach works particularly well for garden borders and planter arrangements.
LED strip lighting installation offers customizable illumination for larger garden features. We’ve successfully integrated weatherproof LED strips along the inside edges of planters or behind decorative wall features, creating subtle backlighting effects. Battery-powered options eliminate the need for electrical wiring while providing reliable operation.
Pathway accent lighting using cinder blocks enhances both safety and aesthetics. We often embed small solar spotlights or low-voltage LED fixtures within the hollow spaces of blocks used for garden edging. This technique illuminates walking surfaces while highlighting the decorative elements of your garden design.
Seasonal lighting adaptations allow for year-round enjoyment of your cinder block features. We suggest using removable lighting elements that can be adjusted for holidays or special occasions, such as string lights threaded through block openings or color-changing LED fixtures for festive displays.
Compost Bin Systems With Cinder Blocks

Building effective composting systems becomes simple and affordable when we use cinder blocks as our primary construction material. These versatile blocks create durable, well ventilated bins that transform kitchen scraps and yard waste into nutrient rich soil amendment for our gardens.
Three-Bin Composting Setup
Creating a three bin composting system with cinder blocks allows us to maintain continuous compost production throughout the year. We can dedicate the first bin to fresh organic materials like vegetable peels and grass clippings. The second bin holds materials in active decomposition where we turn and monitor the pile regularly. Our third bin contains finished compost ready for garden application.
Each bin requires approximately 12 to 16 cinder blocks depending on desired height and width dimensions. We stack blocks without mortar to maintain flexibility for future adjustments or seasonal modifications. This modular approach lets us easily expand or reconfigure our composting area as our garden needs change.
Positioning the bins side by side creates an efficient workflow where materials progress from fresh to finished compost. We can transfer decomposing materials between bins using a pitchfork or shovel through the open fronts of each section.
Ventilation and Access Design
Proper airflow ensures healthy decomposition and prevents unpleasant odors in our cinder block compost bins. We arrange blocks with strategic gaps between them to promote natural air circulation throughout the pile. These openings also provide access points for beneficial microorganisms and insects that accelerate the composting process.
Building removable front panels using loose fitting cinder blocks gives us easy access for turning compost and adding new materials. We can slide individual blocks out to create larger openings when we need to use garden tools or wheelbarrows.
Creating multiple access points at different heights helps us monitor moisture levels and temperature throughout the compost pile. The hollow cores of cinder blocks can house ventilation pipes or wooden stakes that create additional air channels deep within the composting materials.
Temperature Control Methods
Managing temperature in our cinder block compost bins requires strategic placement and protective measures. We position bins in partially shaded areas to prevent excessive heat that can slow decomposition or create overly dry conditions. Morning sun exposure helps maintain optimal temperatures while afternoon shade prevents overheating.
Adding a simple roof structure using plywood or corrugated metal sheets protects our compost from heavy rain and extreme weather conditions. This covering can rest on top of the cinder block walls and be easily removed when we need full access to the bins.
During colder months we can insulate the exterior walls by stacking additional cinder blocks or surrounding the bins with hay bales. The thermal mass of cinder blocks helps regulate temperature fluctuations and maintains consistent decomposition rates throughout seasonal changes.
Installing drainage systems at the base of each bin prevents waterlogged conditions that can create anaerobic decomposition. We place the bins on a slight incline or add a layer of coarse gravel beneath the cinder block foundation to ensure proper water management.
Conclusion
We’ve explored countless ways cinder blocks can revolutionize your garden space while keeping costs minimal. From raised beds to vertical walls to composting systems these versatile building materials offer answers for every gardening challenge you might face.
The beauty of cinder block gardening lies in its accessibility and adaptability. Whether you’re dealing with poor soil drainage creating herb gardens on slopes or building outdoor cooking spaces these concrete blocks provide the foundation for sustainable long-term projects.
Your garden transformation doesn’t require expensive materials or professional installation. With basic tools and creativity you can create functional beautiful spaces that’ll serve your growing needs for years to come. Start with one simple project and watch as your cinder block garden evolves into something truly spectacular.
Frequently Asked Questions
What are the main benefits of using cinder blocks in gardening?
Cinder blocks offer excellent drainage due to their hollow design, exceptional durability lasting for years, and cost-effectiveness compared to traditional materials. They provide versatility for various projects like raised beds, planters, and retaining walls. Their ability to warm soil quickly extends growing seasons, and they’re easy to customize in height and configuration for different garden needs.
Which plants grow best in cinder block raised beds?
Root vegetables like carrots and radishes thrive in the well-draining environment. Herbs such as basil, oregano, and thyme excel in these conditions. Leafy greens including lettuce and spinach perform well, along with perennial flowers and small fruit plants like strawberries. These plants benefit from the excellent drainage and nutrient-rich soil that cinder blocks provide.
How do you build a vertical garden wall with cinder blocks?
Stack cinder blocks in pyramid or tiered formations, using industry adhesive for stability. Line the blocks with landscape fabric or plastic to prevent soil loss. Fill hollow spaces with quality potting mix and select appropriate plants like succulents or trailing varieties. Consider sun exposure and install drip irrigation for consistent moisture while ensuring proper drainage.
Can cinder blocks be used for herb gardens?
Yes, cinder blocks are excellent for herb gardens. Individual blocks work as standalone planters for easy access and portability. Multi-level designs accommodate herbs with varying water needs. The hollow design provides superior drainage, preventing root rot. You can create organized, accessible herb gardens that maximize growing space while keeping different varieties separated.
How do cinder blocks help with garden edging and borders?
Cinder blocks create durable pathway edges that contain mulch and prevent grass encroachment. They form functional flower bed boundaries that improve drainage and maintenance access. For permanent solutions, mortared blocks provide structural integrity and can serve as retaining walls, adding privacy and architectural interest while defining garden spaces effectively.
Are cinder blocks suitable for outdoor kitchen gardens?
Absolutely. Cinder blocks create solid foundations for cooking islands with customizable heights for comfortable working. Their hollow spaces provide built-in storage for cooking essentials. You can integrate water and electrical systems (with professional installation), creating functional outdoor kitchens that combine gardening and cooking spaces in one convenient area.
How do cinder blocks help with sloped gardens?
Cinder blocks create sturdy retaining walls that prevent soil erosion on slopes. They enable terraced levels that manage water flow and create distinct planting zones. Proper foundation and drainage techniques ensure stability. This transforms uneven terrain into functional growing spaces while controlling runoff and creating multiple planting opportunities on challenging landscapes.
Can cinder blocks be decorated for aesthetic appeal?
Yes, cinder blocks can be transformed with various decorative techniques. Paint and stain enhance their appearance, while mosaic and tile applications turn them into art pieces. LED or solar lighting integration creates ambiance and improves pathway safety. These decorative options allow you to personalize your garden while maintaining the functional benefits of cinder blocks.
How effective are cinder block compost bins?
Cinder block compost bins are highly effective due to excellent ventilation through their hollow design. A three-bin system allows continuous compost production with proper decomposition stages. They provide easy access for turning compost and temperature control. The durable construction withstands weather while the design prevents waterlogged conditions, making them ideal for sustainable gardening practices.
What’s the cost comparison between cinder blocks and traditional garden materials?
Cinder blocks are significantly more cost-effective than traditional materials like wood or stone. They eliminate the need for frequent replacements due to their durability. While initial setup costs are lower, the long-term savings are substantial since they don’t rot, warp, or require regular maintenance like wooden alternatives, making them an excellent budget-friendly investment.