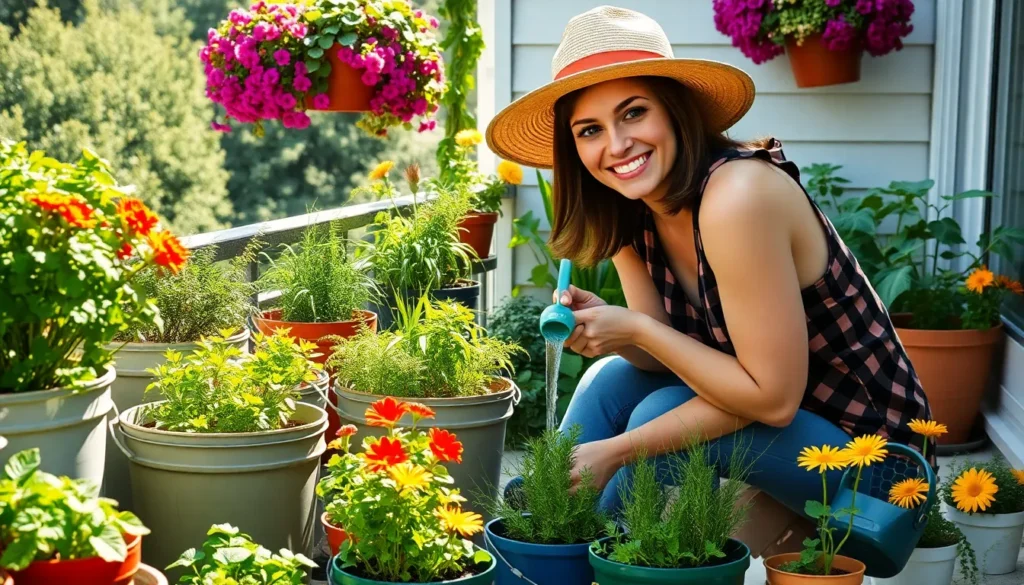
We’ve all dreamed of having a lush garden but felt limited by space or traditional gardening challenges. Bucket gardening transforms any small area into a thriving green oasis – whether you’re working with a tiny balcony apartment or simply want portable growing answers that move with the seasons.
Container gardening in buckets isn’t just practical; it’s surprisingly versatile and budget-friendly. You’ll discover how common 5-gallon buckets become the perfect vessels for growing everything from vibrant flowers to fresh herbs and even substantial vegetable crops. The beauty lies in complete control over soil quality drainage and plant placement.
Ready to revolutionize your growing game? We’re diving into creative bucket garden ideas that’ll maximize your harvest while minimizing your effort. From vertical tower systems to decorative arrangements these ingenious answers prove you don’t need acres to cultivate abundance.
Herb Garden Buckets for Fresh Cooking Ingredients
Growing culinary herbs in buckets transforms your outdoor space into a convenient cooking ingredient station. We’ve discovered that dedicated herb buckets positioned near kitchen windows or doors provide immediate access to fresh flavors year round.
Basil and Oregano Combinations
Basil thrives in bucket gardens when paired with oregano, creating the perfect Italian seasoning duo in one container. We recommend using a 5-gallon bucket with drainage holes spaced 2 inches apart along the bottom. Plant one basil seedling in the center and surround it with 2-3 oregano plants around the perimeter.
Mediterranean varieties like Genovese basil and Greek oregano produce the strongest flavors for cooking applications. These herbs require similar watering schedules, needing moisture every 2-3 days during growing season. Position your basil oregano bucket in locations receiving 6-8 hours of direct sunlight daily.
Regular harvesting encourages continuous growth throughout the season. We pinch basil flowers immediately when they appear to maintain leaf production. Oregano benefits from cutting stems back by one third every 4-6 weeks to promote bushy growth patterns.
Mint and Parsley Pairings
Mint varieties grow aggressively in bucket environments, making them ideal candidates for container herb gardening. We plant spearmint or peppermint alongside flat leaf parsley to create refreshing beverage and garnish combinations. Use separate sections within the same bucket by installing a plastic divider down the center.
Parsley serves as a natural companion that won’t compete with mint’s spreading root system. Both herbs prefer consistently moist soil conditions and partial shade during afternoon hours. We water these combinations daily during summer months, checking soil moisture 2 inches below the surface.
Fresh mint leaves enhance everything from mojitos to Middle Eastern dishes, while parsley adds brightness to soups and salads. Harvest mint stems before flowering occurs to maintain the best flavor intensity. Cut parsley from the outside stems first, allowing the center crown to continue producing new growth.
Rosemary and Thyme Arrangements
Rosemary and thyme create drought tolerant herb combinations perfect for busy gardeners seeking low maintenance options. We select woody Mediterranean herbs that share similar water and sunlight requirements in bucket gardens. Plant one rosemary bush as the centerpiece with 3-4 thyme plants arranged around the edges.
These perennial herbs develop extensive root systems that benefit from deep bucket containers. We drill extra drainage holes and add gravel layers at the bottom to prevent water logging. Sandy potting mix combined with compost provides the well draining conditions these herbs demand.
Winter protection becomes essential in colder climates where temperatures drop below 20°F. We move rosemary thyme buckets into unheated garages or cover them with frost cloth during freezing periods. Both herbs maintain their potency when dried, providing year round seasoning options from summer harvests.
Vegetable Bucket Gardens for Small Space Growing

Expanding from herbs into vegetables opens up exciting possibilities for fresh produce right at your doorstep. We’ve found that bucket vegetable gardens offer urban and small backyard gardeners an effective solution for growing nutritious crops with complete control over spacing and soil conditions.
Tomato and Pepper Containers
Tomatoes and peppers demand substantial root space, requiring containers of about 10 to 15 gallons for optimal growth and fruit production. Darker colored buckets work exceptionally well for these heat-loving crops since they retain warmth that peppers and eggplants prefer. Proper drainage becomes critical to prevent root rot, so we recommend drilling several holes in the bucket bottom before planting.
Vertical support structures maximize space efficiency while promoting better air circulation around tomato plants. Cherry tomatoes and compact pepper varieties like ‘Patio Princess’ or ‘Sweet Banana’ adapt particularly well to bucket growing. Consistent watering schedules prevent blossom end rot, and we’ve discovered that adding calcium-rich amendments helps maintain fruit quality throughout the season.
Lettuce and Spinach Systems
Lettuce and spinach thrive in smaller containers due to their shallow root systems, making them perfect candidates for 3 to 5-gallon buckets. These cool-season greens prefer consistent moisture and can tolerate partial shade, unlike their sun-loving counterparts. Dense planting maximizes yields, allowing us to harvest multiple crops from a single container throughout the growing season.
Window boxes or shallow trays work equally well for these leafy vegetables when space becomes extremely limited. Succession planting every two weeks ensures continuous harvests, and cut-and-come-again varieties like ‘Salad Bowl’ lettuce provide ongoing production. Regular watering becomes essential since these crops bolt quickly in dry conditions.
Root Vegetable Options
Root vegetables require careful consideration of container depth rather than width, with most needing 6 to 8 inches for short varieties and deeper containers for longer roots. Carrots, radishes, and beets adapt well to bucket growing when we select appropriate dwarf or short-root varieties. ‘Paris Market’ carrots and ‘Cherry Belle’ radishes perform exceptionally well in limited-depth containers.
Wider buckets help better soil aeration and accommodate more plants per container, increasing overall productivity. Seed potatoes thrive in 5-gallon buckets or half whiskey barrels, providing compact tuber production perfect for patios or decks. We’ve found that combining different root vegetables in the same container works well when their harvest times align, maximizing both space and soil usage efficiency.
Flower Bucket Displays for Colorful Outdoor Spaces

Moving beyond edible gardens, we can transform our bucket gardening space into a vibrant flower paradise that provides year-round beauty and supports local wildlife.
Seasonal Bloom Rotations
Spring displays begin with bulbs planted during fall months for maximum impact. We plant tulips and daffodils in 5-gallon buckets during October, allowing winter’s cold to trigger their spectacular blooms. These early flowers create stunning focal points when arranged in staggered patterns around patios or garden borders.
Summer rotations feature heat-loving annuals that thrive in bucket conditions. Marigolds, zinnias, and sunflowers deliver bright colors throughout the hottest months while requiring minimal maintenance. We replace spring bulbs with these vibrant performers once temperatures consistently reach 70°F.
Fall transitions bring warm-toned flowers that extend our growing season. Asters, chrysanthemums, and pansies provide rich colors that complement autumn’s natural palette. These hardy selections often survive light frosts, giving us extended enjoyment.
Winter interest comes from evergreen branches and cold-hardy blooms like cyclamen. We arrange these seasonal elements in our buckets to maintain visual appeal even during dormant months.
Pollinator-Friendly Plant Selections
Bee-attracting flowers transform our bucket displays into pollinator havens. Lavender, coneflowers, and black-eyed susans create irresistible landing pads for beneficial insects while adding fragrance and texture to our arrangements. We space these plants 12 inches apart in 5-gallon containers to allow proper air circulation.
Butterfly magnets include native wildflowers that provide nectar throughout growing seasons. Purple coneflowers and bee balm establish themselves quickly in bucket environments, returning stronger each year. These perennial selections reduce our replanting efforts while supporting local ecosystems.
Herb companions like mint and basil serve dual purposes as culinary ingredients and pollinator food sources. We position these aromatic plants strategically within our flower displays, creating functional beauty that attracts beneficial insects.
Height Variation Techniques
Layered arrangements create ever-changing visual interest through strategic plant placement. We position tall sunflowers and cosmos toward display backs, medium-height zinnias in center areas, and compact petunias along front edges. This tiered approach maximizes viewing angles from multiple directions.
Staggered planting involves placing different sized buckets at varying elevations. We use plant stands, overturned pots, or wooden blocks to create natural-looking height differences. Taller containers hold statement plants while shorter buckets house ground-covering varieties.
Vertical elements extend our displays upward through climbing supports and trailing varieties. We install tomato cages or decorative obelisks in larger buckets, allowing morning glories or sweet peas to climb skyward. Trailing nasturtiums and petunias cascade downward from elevated containers, creating flowing connections between different height levels.
Drainage Solutions for Healthy Bucket Gardens

Proper drainage transforms bucket gardens from struggling containers into thriving growing systems. We’ll explore proven methods to prevent waterlogging and root rot while maintaining optimal moisture levels for robust plant growth.
Drill Hole Placement Methods
Bottom drainage holes form the foundation of effective bucket garden water management. We recommend drilling holes at the base of each container, spacing them every 2-3 inches around the circumference for optimal water flow.
Side placement creates drainage wells that act as natural reservoirs for plant roots. Position holes slightly elevated from the very bottom – about 1 inch up from the base – to maintain a small water reserve while allowing excess moisture to escape.
Multiple hole configurations enhance both drainage and soil aeration throughout the growing season. Start with 4-6 primary holes, then add additional openings if water pools during heavy rainfall or frequent watering sessions.
Hole sizing should match your exact plants and climate conditions. Use 1/4 inch holes for most vegetables and flowers, while expanding to 3/8 inch openings for larger containers or areas with intense precipitation patterns.
Gravel Layer Techniques
Traditional gravel layers involve placing small stones at container bottoms before adding soil. While common, this method can actually impede drainage by creating perched water tables that trap moisture against plant roots.
Drainage boards provide superior water management compared to conventional gravel systems. These lightweight, uncrushable materials increase soil depth while preventing water buildup, and they’re covered with geo-textile fabrics to maintain soil separation.
Plastic drainage mats offer modern answers that prevent soil from clogging drain holes. These screens maintain consistent water flow without adding important weight to your bucket gardens, making them ideal for balcony or elevated installations.
Advanced layering systems combine thin drainage materials with protective fabrics for optimal results. Layer drainage boards first, cover with geo-textile fabric, then add your growing medium for professional-grade container performance.
Elevated Bucket Positioning
Raised positioning ensures drainage holes function effectively by preventing water accumulation beneath containers. We recommend elevating buckets 2-4 inches using pot feet, wooden blocks, or dedicated plant stands.
Natural drainage mimicry occurs when buckets sit elevated above ground level. This positioning replicates how rainfall naturally flows away from plant root zones, preventing the stagnant water conditions that damage container gardens.
Airflow improvement happens automatically when containers are lifted off surfaces. Elevated buckets enjoy better air circulation around their bases, reducing humidity levels that can encourage fungal problems and pest infestations.
Multi-level arrangements create visual interest while optimizing drainage for entire bucket garden displays. Stagger container heights using different elevation methods to ensure each bucket drains independently without affecting neighboring plants.
Vertical Bucket Garden Arrangements for Maximum Space

Vertical bucket gardening transforms limited outdoor areas into productive growing systems that maximize yield while minimizing ground space requirements. These space-saving arrangements work perfectly for balconies, patios, and small yards where traditional gardens aren’t feasible.
Tiered Stacking Systems
Tiered bucket arrangements create impressive multi-level gardens using wooden pallets or sturdy crates as foundation supports. We recommend starting with 5-gallon buckets positioned on wooden pallets, then adding successive levels with smaller containers on top. Each tier should be offset slightly to ensure adequate sunlight reaches all plants below.
Stability becomes crucial when building these multi-level systems. Level each base carefully using a spirit level, and secure buckets to their supports using zip ties or metal clamps. We suggest limiting stacks to three tiers maximum to maintain structural integrity while providing easy access for maintenance.
Plant selection varies by tier height to optimize growing conditions. Position sun-loving vegetables like tomatoes and peppers on upper levels, while shade-tolerant herbs and leafy greens thrive in lower positions. This arrangement naturally creates microclimates that benefit different plant types simultaneously.
Wall-Mounted Bucket Displays
Wall-mounted bucket systems use vertical surfaces to create living walls that save valuable floor space. Heavy-duty wall brackets or hook systems support individual buckets securely against exterior walls, fences, or garage sides. We recommend using galvanized steel hooks rated for at least 50 pounds to safely support filled containers.
Installation requires careful spacing to prevent overcrowding while maximizing growing area. Position buckets 18 to 24 inches apart horizontally and vertically to allow proper air circulation and maintenance access. This spacing also prevents upper containers from shading lower ones excessively.
Drainage management becomes especially important in wall-mounted configurations. We drill drainage holes not only in bucket bottoms but also along the lower sides to prevent water from dripping onto containers below. Installing small drip trays or redirect channels helps manage excess water flow effectively.
Hanging Bucket Configurations
Hanging bucket gardens create stunning aerial displays that maximize growing space while adding visual drama to outdoor areas. Sturdy overhead structures like pergolas, tree branches, or purpose-built frames support suspended containers at varying heights. We use heavy-duty chains or rope systems rated for ever-changing loads to ensure safety.
Weight distribution requires careful planning when designing hanging arrangements. Each 5-gallon bucket filled with soil and plants weighs approximately 40 to 50 pounds, so support structures must handle multiple containers plus wind loads. We recommend spacing hanging buckets at least 3 feet apart to prevent swaying and collision.
Cascading plant varieties work exceptionally well in hanging bucket systems. Trailing plants like cherry tomatoes, strawberries, and cascading petunias create beautiful flowing displays that maximize the visual impact of suspended containers. These arrangements also make harvesting easier since fruits and flowers hang at eye level.
Budget-Friendly Bucket Garden Materials and Tools

Starting your bucket garden doesn’t require expensive equipment or specialized containers. We’ve found that resourceful gardeners can create thriving gardens using readily available materials and basic tools.
Repurposed Container Options
Five gallon buckets serve as the foundation for most successful bucket gardens. Local feed stores and online marketplaces offer these containers at affordable prices, making them accessible for any budget. Food grade buckets become essential when growing edible plants, ensuring safety for your harvest.
Plastic buckets provide excellent durability and longevity for outdoor gardening projects. Previously used containers work perfectly as long as they didn’t store chemicals or harmful substances. Light colored options help reflect heat and prevent root overheating during summer months.
Alternative containers expand your options beyond traditional buckets. Large yogurt containers, storage tubs, and repurposed planters can accommodate smaller plants effectively. Color considerations matter significantly since darker containers absorb more heat while lighter ones maintain cooler soil temperatures.
Essential Soil and Fertilizer Choices
Well draining potting mix forms the backbone of healthy bucket gardens. Standard garden soil becomes too dense for container growing, leading to drainage problems and root issues. Premium potting mixes contain perlite and vermiculite that promote proper water flow.
Compost additions enhance soil fertility and improve water retention capabilities. Mixing one part compost with three parts potting soil creates an ideal growing medium. Peat moss serves as another excellent amendment for moisture retention and soil structure improvement.
Fertilizer requirements vary based on plant selection and growing season. Slow release granular fertilizers provide consistent nutrition over several months. Liquid fertilizers offer quick nutrient boosts during peak growing periods and can be applied bi weekly for optimal results.
Basic Gardening Tool Requirements
Essential tools streamline planting and maintenance tasks significantly. A sturdy trowel handles soil mixing, planting, and transplanting operations efficiently. Quality pruners maintain plant health through proper trimming and harvesting techniques.
Drilling equipment creates necessary drainage holes in container bottoms. A standard drill with quarter inch bits works perfectly for most bucket materials. Multiple holes spaced evenly across the bottom ensure adequate water drainage.
Watering supplies control moisture levels without overwatering sensitive plants. Watering cans with narrow spouts deliver precise amounts directly to soil surfaces. Garden hoses with adjustable nozzles provide flexibility for larger bucket garden setups.
Seasonal Bucket Garden Maintenance Tips

Success with our bucket gardens requires adapting care routines throughout the year. Each season brings unique challenges and opportunities that demand exact maintenance approaches.
Spring Planting Schedules
Choose the right plant varieties for your climate and bucket size as you begin spring preparations. Spring planting schedules should prioritize selecting compact or dwarf varieties like lettuce, herbs, strawberries, dwarf tomatoes, and peppers that thrive in limited soil volume.
Prepare nutrient-rich soil by mixing in compost and organic matter before planting begins. We recommend incorporating organic fertilizers like compost tea or fish emulsion into our routine, applying these nutrients every 2 to 3 weeks to encourage healthy growth throughout the growing season.
Prune any dead or weak growth from overwintered plants before introducing new plantings. This practice promotes vigorous new growth and prevents disease from spreading to healthy plant material.
Start succession planting schedules for crops like lettuce and radishes to ensure continuous harvests. Stagger plantings every 2 to 3 weeks for maximum productivity in our bucket gardens.
Summer Watering Routines
Water deeply until drainage appears at the bottom of each bucket, as proper watering becomes the most crucial maintenance task during hot months. Bucket gardens dry out faster than ground beds, requiring more frequent attention to moisture levels.
Mulch the soil surface immediately after watering to retain moisture and reduce evaporation rates. This simple step dramatically reduces our watering frequency while maintaining consistent soil moisture.
Consider adding buckets to a drip irrigation system to maintain consistent watering, especially during vacation periods or extended hot spells. Automated systems ensure plants receive adequate moisture even when we’re away.
Wrap buckets in reflective fabric or light-colored materials during extreme heat to keep roots cool. This protection strategy prevents temperature stress and maintains optimal growing conditions for our plants.
Monitor soil moisture daily by inserting a finger 2 inches deep into the soil. We should adjust watering frequency based on weather conditions and individual plant needs.
Winter Protection Strategies
Move buckets to sheltered locations or indoors when freezing temperatures threaten tender plants. Protected areas like covered porches or unheated garages provide essential winter refuge for our container gardens.
Empty and store buckets properly if plants aren’t winter hardy varieties. Clean containers thoroughly and store them in dry locations to prevent cracking from freeze-thaw cycles.
Mulch heavily around root zones using straw, leaves, or wood chips to insulate plants from cold damage. We can also wrap entire buckets with insulating materials like burlap or frost blankets to protect root systems.
Group buckets together in protected areas to create microclimates that moderate temperature fluctuations. This clustering technique helps our plants survive harsh winter conditions more effectively.
Select cold-hardy varieties for year-round bucket gardening in regions with mild winters. Plants like kale, Brussels sprouts, and winter herbs can continue producing throughout the colder months with proper protection.
Creative Bucket Garden Decoration Ideas

Decorating our bucket gardens transforms functional containers into stunning visual elements that complement our plant selections. We can enhance the aesthetic appeal of our gardening spaces while maintaining the practical benefits of container growing.
Paint and Stencil Designs
Bright colors and unique patterns turn ordinary buckets into eye-catching garden features. We recommend using weather-resistant acrylic paints to ensure our designs withstand outdoor conditions throughout multiple growing seasons.
Stenciling adds professional-looking details without requiring artistic expertise. Garden-themed stencils featuring leaves, flowers, or botanical motifs create cohesive designs that complement our plant selections. We can layer different stencil patterns to achieve depth and visual interest.
Color coordination with our plants enhances the overall garden aesthetic. Bold blues and purples work beautifully with yellow flowers like marigolds, while earth tones complement herb gardens and vegetable displays. We suggest painting buckets in colors that contrast with our plant choices to make both elements stand out.
Geometric patterns offer modern appeal for contemporary outdoor spaces. Stripes, chevrons, and polka dots create ever-changing visual effects that draw attention to our bucket arrangements. We can use painter’s tape to achieve clean lines and consistent patterns across multiple containers.
Natural Fiber Wrapping Techniques
Jute and burlap wrapping creates rustic charm that suits farmhouse and cottage garden styles. We secure these natural materials with weather-resistant adhesive or staples, ensuring they stay in place during watering and weather changes.
Twine and rope applications add textural interest while maintaining durability. We can wrap containers in spiral patterns or create geometric designs using different rope thicknesses. These materials age beautifully outdoors, developing character over time.
Layering different natural fibers produces sophisticated looks with minimal effort. We might combine coarse burlap as a base layer with finer jute detailing on top. This technique adds depth and prevents our decorations from appearing flat or one-dimensional.
Seasonal material swaps keep our bucket gardens fresh throughout the year. Lighter colored natural fibers work well for spring and summer displays, while darker materials complement fall and winter arrangements. We can easily update our decorations without replacing entire containers.
Themed Garden Arrangements
Salsa bucket gardens combine tomato plants with cilantro to create functional ingredient stations. We position these containers near outdoor cooking areas for convenient harvesting during meal preparation. Cherry tomato varieties work particularly well in these arrangements due to their compact growth habits.
Herb garden collections group complementary cooking herbs in coordinated containers. Basil, mint, and rosemary arrangements provide diverse flavors for culinary adventures. We plant these herbs in separate buckets to prevent aggressive spreaders like mint from overwhelming other varieties.
Succulent garden displays use smaller buckets to showcase diverse species with varying textures and colors. These arrangements require minimal water and thrive in sunny locations. We can create stunning desert-themed displays by combining different succulent varieties with decorative stones or sand.
Color-themed arrangements unite plants with similar bloom colors or foliage tones. Monochromatic displays featuring various shades of purple, pink, or yellow create sophisticated garden statements. We can enhance these themes by coordinating our bucket decorations with the dominant plant colors.
Conclusion
Bucket gardening opens up endless possibilities for creating thriving gardens regardless of space limitations or budget constraints. We’ve shown you how to transform simple containers into productive herb stations bountiful vegetable plots and stunning flower displays that bring life to any outdoor area.
The versatility of bucket gardens means you can start small and expand as your confidence grows. Whether you’re growing fresh basil by your kitchen door or creating a vertical garden wall these portable answers adapt to your changing needs and seasonal preferences.
With proper drainage techniques seasonal maintenance and creative decoration ideas your bucket garden will become a rewarding year-round project. Start with one bucket today and watch as your gardening success grows container by container.
Frequently Asked Questions
What is bucket gardening and who is it suitable for?
Bucket gardening is a space-efficient growing method using containers like 5-gallon buckets to cultivate plants in small spaces. It’s perfect for urban dwellers, apartment residents with balconies, or anyone with limited outdoor space. This method allows complete control over soil quality, drainage, and plant placement while enabling gardeners to grow herbs, vegetables, and flowers without needing traditional garden plots.
What size buckets should I use for different types of plants?
For herbs and leafy greens like lettuce and spinach, 3-5 gallon buckets work well. Tomatoes and peppers require larger 10-15 gallon containers for proper root development. Root vegetables can thrive in various sizes depending on the variety – short carrots and radishes need less depth than longer varieties. Always ensure containers have proper drainage holes regardless of size.
How do I ensure proper drainage in my bucket garden?
Drill multiple holes in the bottom of buckets and add a gravel layer or drainage boards to prevent waterlogging. Elevate buckets on blocks or stands to improve airflow and drainage. Consider using plastic drainage mats between soil layers. Proper drainage prevents root rot and ensures healthy plant growth throughout the growing season.
What are the best herb combinations for bucket gardening?
Basil and oregano pair well together in one bucket, sharing similar water and sunlight needs. Mint should be grown with parsley in separate sections of the same container to prevent mint from overtaking. Rosemary and thyme make excellent low-maintenance companions, being drought-tolerant and requiring minimal care, perfect for busy gardeners seeking fresh culinary herbs.
Can I grow vegetables successfully in buckets?
Yes, bucket vegetable gardens are highly effective for urban gardening. Use larger containers for tomatoes and peppers with vertical support structures. Lettuce and spinach thrive in smaller buckets with consistent moisture and partial shade. Root vegetables like short carrots and radishes work well in limited-depth containers. Practice succession planting for continuous harvests throughout the season.
How do I create attractive flower displays in buckets?
Plan seasonal bloom rotations starting with spring bulbs, followed by summer annuals, fall flowers, and winter evergreen arrangements. Use height variation techniques with layered arrangements and staggered planting at different elevations. Include pollinator-friendly plants like bee-attracting flowers and native wildflowers to support local wildlife while creating beautiful, functional displays.
What’s the best way to arrange buckets vertically?
Create tiered stacking systems using wooden pallets for multi-level gardens, ensuring stability and selecting plants based on tier height. Try wall-mounted displays to save floor space while maintaining proper drainage. Hanging bucket configurations work well for cascading plants, creating stunning aerial displays that maximize growing space in limited areas.
Do I need expensive materials to start bucket gardening?
No, bucket gardening is budget-friendly. Use repurposed food-grade 5-gallon buckets, large yogurt tubs, or storage bins as containers. Focus on well-draining potting mixes and compost for soil health. Essential tools include basic trowels, pruners, and watering supplies. Many containers can be found inexpensively or repurposed from household items, making this an accessible gardening method.
How do I maintain my bucket garden throughout different seasons?
Spring requires nutrient-rich soil preparation and compact variety selection. Summer needs deep watering, mulching, and possibly drip irrigation systems. Winter protection involves moving buckets to sheltered locations, insulating containers, and grouping them for microclimate creation. Choose cold-hardy varieties for year-round gardening in milder climates and adjust care routines seasonally.
How can I make my bucket garden more decorative?
Use weather-resistant acrylic paints and stencils to transform plain buckets into attractive features. Coordinate colors with plant selections for visual appeal. Try natural fiber wrapping with jute or burlap for rustic charm. Create themed arrangements like salsa gardens or succulent displays. Experiment with seasonal materials and color-themed arrangements to keep displays fresh and engaging year-round.


